online poker

Omnomicon

say it with me now, “om nom nom”

Subscribe to Omnomicon

Archive for the ‘the comfort foodie’ Category

Jun-11-2010

coffee

Posted by aleta under bildungsroman, the comfort foodie

I started my first professional job three days after turning 22, a little naive, a little rough around the edges, not even technically having even graduated college, so the professional workplace was, well, like going to high school again: everyone else seemed to know exactly what to do except for me, and I always felt like I was missing something, but nobody could really explain it to me.

Every morning, coworkers arrived just before 8:30, all with that one accessory, the must-have, the cannot-get-to-work-without (kinda) . . . a cup of coffee. I didn’t get it, this was like, American Eagle cable sweaters all over again, except instead of every girl having “her color,” everybody had their order, to a tee, and always had a store or even specific location of preference.

Sarah had a medium Dunkies. Amanda had something that smelled froofy from one of those drive-through parking lot shacks. Inexplicably, someone would show up with Starbucks they picked up on their way to work in suburban, nearly rural New Hampshire. Michael and Ken hated the place downstairs and would actually walk across to the Cumbie’s for gas station coffee.

I didn’t get it. I didn’t understand the orders, why the gal I was carpooling with would stop on our way to work, even though it would be cutting it close, what the physical size difference was between a 20oz and a 32oz. I could never estimate a price on an order, and I had to read a menu for like 20 minutes to figure out what I wanted, had no idea why everybody loved Starbucks. All in all it was embarrassing. “Eh, I just don’t like coffee, I guess,” I would tell people. Shrug. Maybe order an iced chai. Save myself the anxiety and weird brand of social awkwardness that belongs to smokers and people who don’t drink alcohol.

So I’m really only four years past that now, but at some point along the way . . . it changed. And I only recently realized that there is this world I’ve created for myself. A routine, ritual, comfort, almost a vice, but kinda not really, a way to remind myself it’s a new day.

In this new world, I have to work a visit to Dunkin’s into the first half hour of driving ANYWHERE. And I know the closest in all four directions, including contingency Dunkin’ Donutses if the first had a burnt batch. I know the difference in price from store to store ($2.61 here, $2.72 there…). I have a favorite Dunkies, but at my second choice, the guy at the drive through window calls me “sweetie” and always says “see you tomorow!”

I can tell when the drive-through line will be faster than walking in, and with a glance tell you if my coffee needs more milk or they errantly put in skim. I’m an expert, but it’s so narrow a science that nobody could possibly care. The whole rigamarole is completely rote, and yet so little effort just makes my day before it’s even really taken off.

“Can I get a large iced hazelnut, extra milk, 5 splenda? That’ll be all!”

I’ve said that easily 360 times over the last year, if not more. I think I’m close to the perfect ordering process: size; iced/hot; flavor; milk content; sugar content. That particular order seems to meet the most success.

So if I’m ever late to meet up with you and arrive, iced coffee in hand, please don’t think I was dallying; that’s like showing up with a coat on, you wouldn’t fault me for being late because I stopped to put on a coat, now would you?

Besides, you understand.

I’m a coffee person now.


I’m back! Didja miss me? Vacation was vacation, I won’t bore you with details, but I did meet Steffany from Dinner Love, and she’s a dear.

But hey check it out, while I was glutting myself daily on hotel breakfast Danish, there were 45 Tastebuddies trying out 11 different recipes in a valiant effort to determine which would qualify as THE BEST CHOCOLATE CHIP COOKIES there are. If you have no idea what I’m talking about, welcome to Omnomicon! Here’s where you can read about our monthly Recipe Round-Robin contest.

And here, let me show you what the best looks like, beginning to end.

The making of chocolate chip cookies.

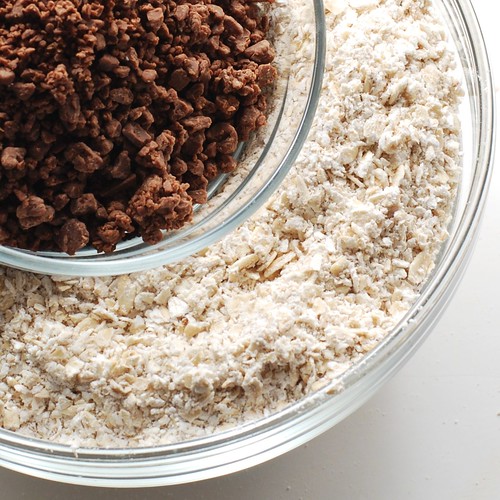
That up there is all the stuff that goes into these suckers. It’s hard to tell, but there are a couple secret ingredients in there.

The making of chocolate chip cookies.

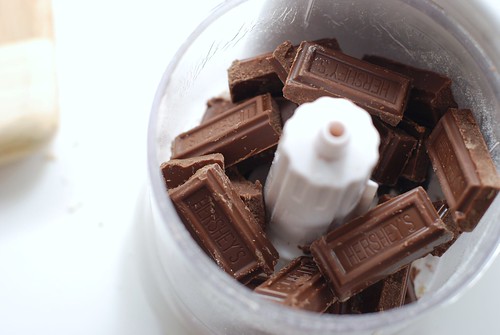
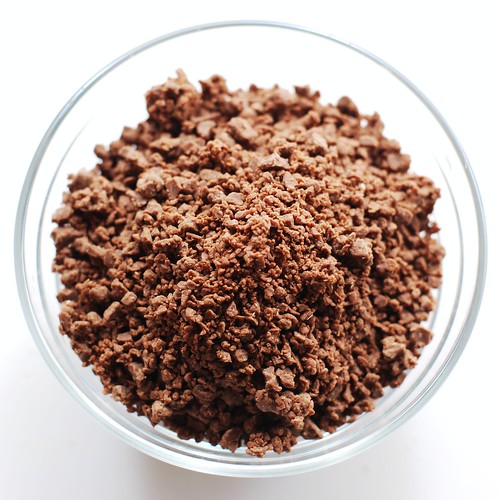
The white stuff is ground oatmeal, and the brown crumbs are grated Hershey bars. Specifically Hershey bars. Except instead of grating, I thought I’d try getting the job done with my food processor.

The making of chocolate chip cookies.

And what do you know, it totally worked.

The making of chocolate chip cookies.

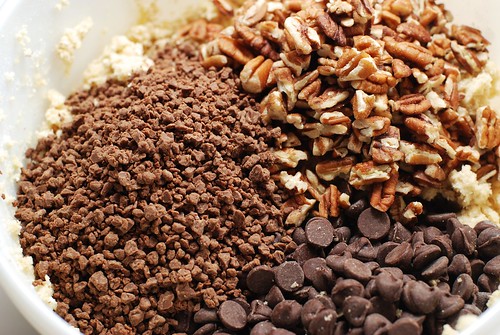
And then stir that into all the other stuff with some nuts and, naturally, chocolate chips.

The making of chocolate chip cookies.

The batter is extremely tempting, but be sure to save some for the cookies, they’re worth it.

Cookies.

So do you recognize these? They were Bubbe’s Fantastic Chocolate Chip Cookies, code named Recipe L, and many big thanks to Hallie for letting us give them a try! Here’s what she had to say about ’em:

Here is my bubbe’s fantastic recipe for Chocolate Chip Cookies. They’re definitely not low-fat, but they’re the best I’ve ever made (and I’m a pastry chef!).

So these are both pastry-chef and Tastebuddy approved. I knew you’s guys had great taste. My guess is that the groundedness of the oatmeal gives these more texture without being so suggestive of oatmeal cookies. I also have a theory on how the Hershey bar plays into things: usually a chocolate chip cookie is a sugar cookie with bitter chocolate chips here and there, but little to tie these two elements together. Maybe the grated chocolate creates a gentler transition from cookie to chip? Even if my theory is right (and I’m open to the alternative, I know what I don’t know), my word choice is not even remotely technical, so Hallie, please feel free to jump in with your expertise.

Here’s the word I got via email results:

  • Our house votes for recipe L. It had lots of chocolate and grinding the oatmeal was a great idea because it made for flatter and less dry cookies. Recipe L was nice and chocolaty! After we made our decision we did our own taste test with friends and recipe L definitely won hands down.
  • Far and away, I and my 3 co-tasters chose Bubbe’s Fantastic recipe as the best of the two. The finely ground oatmeal added a nice substance to the cookies without giving it the graininess of an oatmeal cookie. They baked up nicely–no flat cookies here–and the ground Hershey’s chocolate gave the cookies a beautiful brown color and a little extra chocolate kick. I used hazelnuts since it said you could add your choice of nuts–not a huge fan of nuts in cookies, but they tasted great in this recipe.
  • The texture was very nice; the oatmeal provided more substance to the cookie and even though some of us had hesitations about whether oatmeal belonged in a traditional chocolate chip cookie, it was quite good.
  • So good. If you’re including technique suggestions, rolling these guys into balls really helped.
  • Who knew oatmeal could help so much?

And here’s the word on the web (leave a comment with a link if I missed your post!):

And here’s what they looked like in other people’s kitchens:

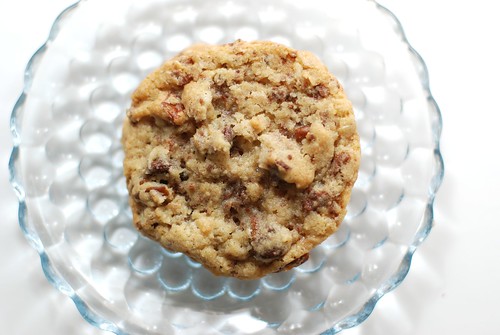
Ruth made Bubbe’s
Ruth tries Bubbe's.

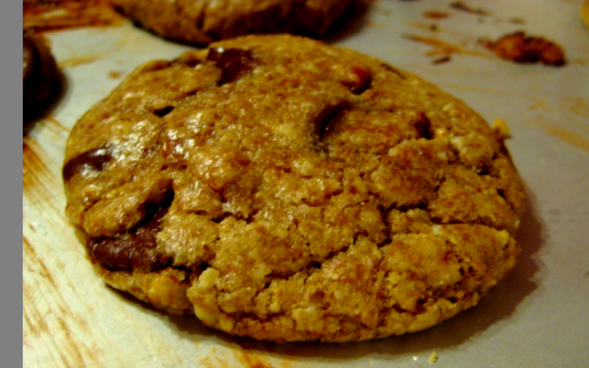
And Jeff also made Bubbe’s
Jeff gives Bubbe's cookies a shot.

Then Domestic Ambitions made the Friendly Choco-Chippers . . .
Domestic Ambitions also tried the Friendly Choco-Chippers

. . . and also Sheila’s (nice collage-work, btw).
Domestic Ambitions makes Sheila's cookies.

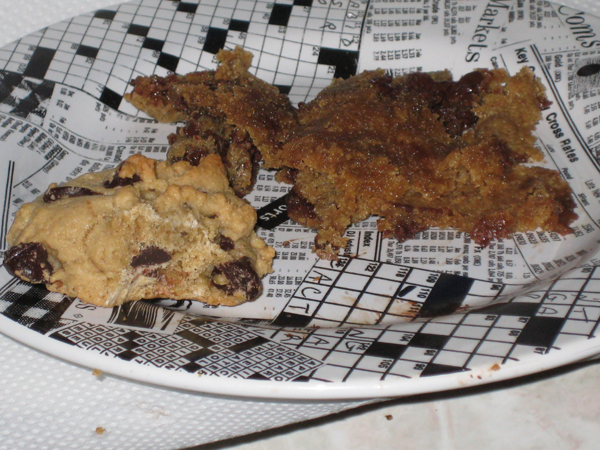
Next up are the Kitten-Free (calls for exactly 0 kittens in the ingredient list, and the cleverness was simply adorable) as compared to the Family Secret recipe, the latter which did not seem to work out for Carly, who may have been too busy with Sunday’s NYTimes crossword to care.
Carly compares the Kitten-Free to the Family Secret chocolate chips cookies...

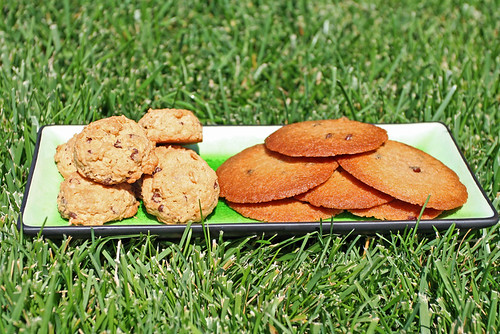
And lastly, there was the recipe that ended in “Mmm. Eat.” and Ruby’s Plan ahead cookies. I want to give Lisa mad props for this photo, it’s gorgeous.
Mmm Eat vs. Ruby's Plan-Aheaders (courtesy of Lisa)

And there you have it! Yet another Recipe Round-Robin, now with 200% more reader participation. Hooray! So I’m announcing a savoury recipe for July . . . any suggestions? I’m thinking summer-time BBQ dishes—pasta salad, seasoned hamburgers, probably not potato salad because there’s a huge tendency toward grossness and grossed-out taste-testers—but I bet comfort food will work regardless of the time of year. We’ll save fruitcake for December.

Thanks again to everyone for participating. Really, I mean it! I’m so psyched that this works out every month because people are saying they had fun and because I like reading about it, and giving stuff away is fun too.

And last but not least, here’s Hallie’s winning recipe.

Bubbe’s Fantastic Recipe for Chocolate Chip Cookies
yields about 3 dozen cookies

1 cup butter
1 cup sugar
1 cup brown sugar
2 eggs
1 tsp. vanilla
2 cups flour
2 cups oatmeal, ground to mealy texture
1/2 tsp. salt
1 tsp. baking powder
1 tsp. baking soda
12 oz chocolate chips [2 cups]
4 oz grated hershey bar [this amounts to 18.5 rectangles from the Big Bar, but use your algebra to figure it out if you can manage . . . I food processored those suckers, and it seemed to do the trick. If grating by hand, however, one Tastebuddy recommends freezing the bar first so it doesn’t melt in your hand.]
~1 cup chopped nuts of choice (I usually use pecans or walnuts) [editor used pecans, and they were fabulous]

Cream the butter and sugars together.
Add the eggs and vanilla and beat until fluffy.
Mix the dry ingredients and add to egg mixture.
Stir in the chips, nuts, and hershey bar.
Drop by rounded tablespoons onto a lined cookie sheet and bake at 375 for 6-8 minutes. [editor’s note: mine took about 10 minutes, and one Tastebuddy had reported 11-12 minutes. Final recommendation is check in at 6 minutes, and then every two minutes after that until you can see a little bit of browning happening on top].

nom nom nom!

nutrition summary (1 of 36 cookies yield): 220 calories, 12g fat, 1.5g fiber; ~5 weight watchers points

Okay, Recipe Round-Robin Tastebuds . . . did you get Recipe A? Did you just love it? Well, so did everyone else, and I’m so excited to announce the winner of Omnomicon’s very first Recipe Round-Robin: it’s none other than my old pal Lo of Burp! Where Food Happens fame!! Come on down, Lo, you have won your very own copy of The America’s Test Kitchen Family Baking Book.


See? Like that!

I want to thank the several other folks who entered the contest for so generously sharing their recipes. Y’all rock! Everyone had delicious descriptions of each of the recipes involved, so rest assured yours garnered some mad props in some end of the globe.

So what made this recipe so awesome? Here are some of the nice things our Tastebuds had to say:

  • Muffin A was hailed as “the best blueberry muffin EVER”.
  • A was fluffy, moist and very very tasty.
  • This was a difficult, very delicious decision. But Recipe A is the winner in my book (er, stomach?).

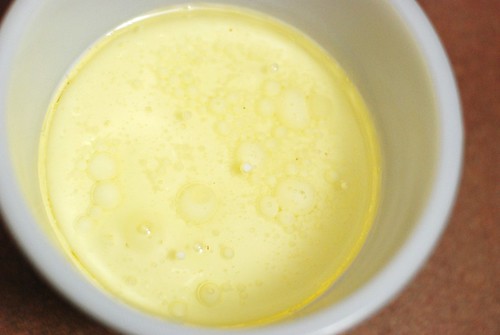
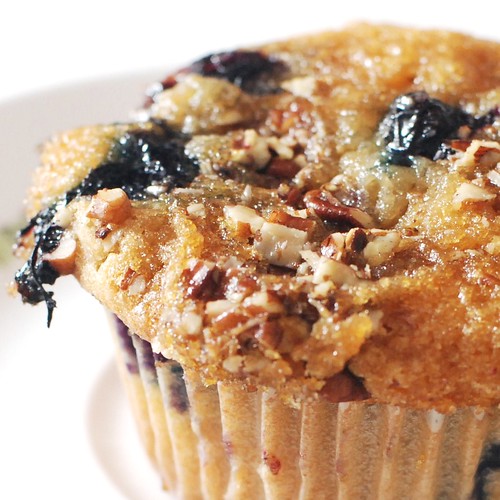
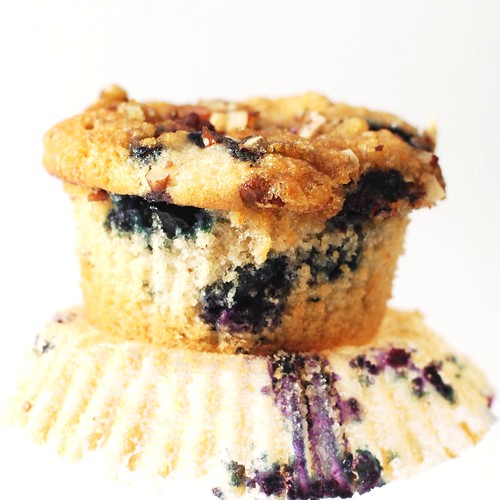
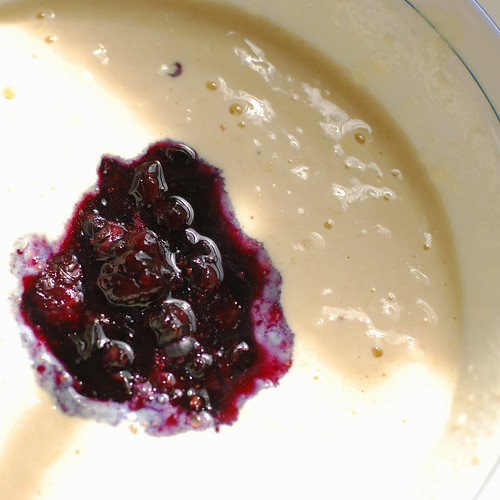
And here’s what my test run of Lo’s Blueberry Pecan Muffins with Brown Sugar Topping looked like. We start with buttermilk and oil. It looks pretty cool.

Oil and buttermilk.

If you don’t have a cup of buttermilk on hand, you can always substitute a cup of milk with a tablespoon of lemon juice, or, as I recently found out, 1 cup of yogurt. Now, clearly Lo got it right with the buttermilk, but just in case you forgot to pick up the buttermilk at the grocery store, these are things you are more likely to have already on hand.

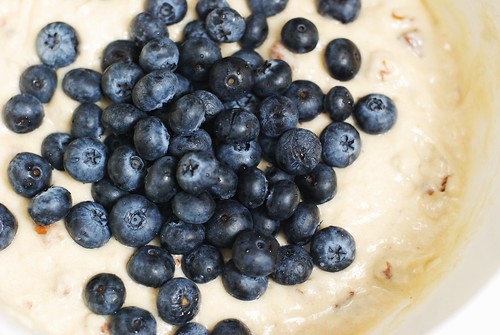
There were blueberries, of course.

Blueberries, of course.

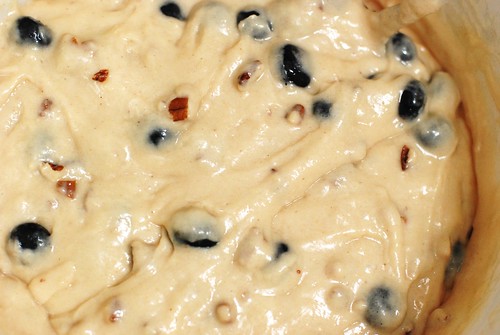
. . . and a subtle amount of pecans in the batter that is *juuuuuusssttt* enough without overdoing it.

Pecans are a secret.

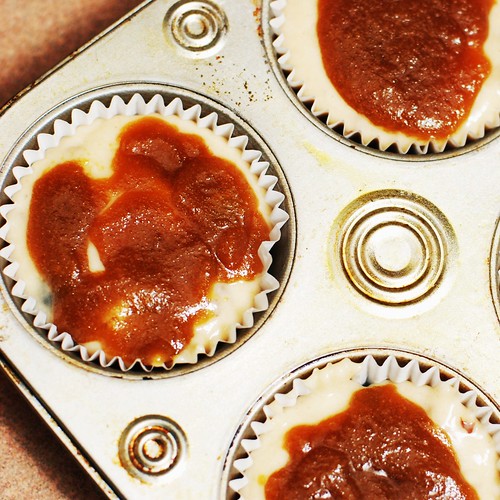
I have to admit that I kind of messed this up just a teensy bit, though not enough to destroy the tastiness of all this (*phew!*). See, I was out of dark brown sugar, and apparently I haven’t quite mastered how to make dark brown sugar out of sugar and molasses, soo . . . my topping was a little too wet (as in, it had too much butter and not enough sugar). And because of that, I ended up with little holes into the top of my muffins. But if you use hard packed brown sugar and did it right, yours should look more like mounds of brown sugar and less like um, well . . . brown gloop on top. Like I said, this is me and NOT the recipe. So make sure yours looks like brown sugar still.

My mistake.

And you know, the brown sugar and pecan topping really makes this extra-special.

The topping makes it.

But in the end, it’s a blueberry muffin, and aren’t they always just totally delicious?

Best blueberry muffin.

Lo’s Award-Winning Blueberry Pecan Muffins with Brown Sugar Topping
courtesy of Lo

2 cups flour
1 cup granulated sugar
1 tsp baking soda
1 tsp cinnamon
1/4 tsp kosher salt
1/2 cup chopped pecans
1 cup buttermilk
1/2 cup oil
1 egg
1/2 tsp vanilla extract
1 cup fresh blueberries

1/2 cup dark brown sugar packed
3 T melted butter *(see NOTE below)
1/4 cup finely chopped pecans

Preheat oven to 375º.

Combine flour, granulated sugar, baking soda, cinnamon, salt, and 1/2 cup pecans in large bowl.

Whisk buttermilk, oil, egg, and vanilla in small bowl. Add wet ingredients to dry ingredients; stir just until combined. Gently fold in blueberries. Allow batter for 15 minutes before dividing evenly among paper-lined muffin cups.

Combine melted butter and brown sugar in a small bowl. [Aleta’s NOTE (and the only part of this not word-for-word Lo’s recipe): a lot of people have had a hard time with this crumbly topping like I did (notably, others have had no problem at all), probably from not packing sugar enough. Because brown sugar packing is an inexact process, I recommend reducing the butter 1 tbsp or eliminating altogether to prevent sunken-in tops.] Spoon 2 tsp over each muffin then sprinkle with 1 tsp of the remaining finely chopped pecans.

Bake muffins at 375º for approximately 20 minutes or until a toothpick in the center comes out clean. Cool on a rack for at least 15 minutes before serving.


nutrition summary (for 1 of about 14 muffins, with topping, real egg & all-purpose flour): 310 calories, 1g fiber, 16g fat; 7 weight watchers points


Hey, one last thing: a lot of participants said they enjoyed taste-testing and would do it again. Yay! That means my experiment was successful! That said, what do you think would be a good recipe standard for the next Recipe Round-Robin? I’m looking for the kind of thing that everyone has a recipe for. So far Twitterers have recommended things like macaroni & cheese, meatloaf and shepherd’s pie . . . keep going, what else can you think of? Leave a comment if you know just the thing, and thanks dude!

fish chowder: a milky dish made with fish!

This weekend exemplified the yang and yin of Spring around here. Saturday was a gorgeous, sunny, “drive with the window open and wear flip-flops” kinda day; on Sunday a fog rolled on the pond all day, heavy and thick even at mid-day. Both days were beautiful in their own way, and even though I know we’ll get snow one last time, I sighed with delighted relief every one of those 48 hours.

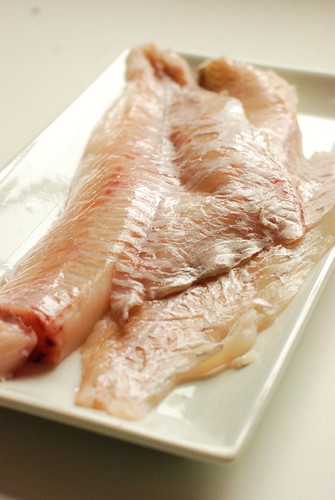
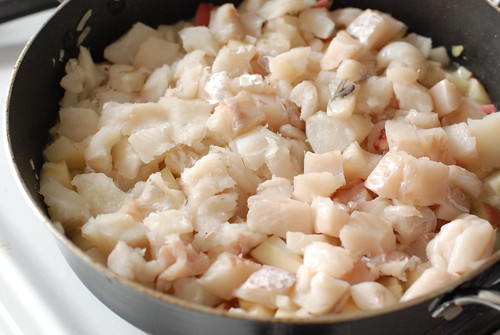
And how convenient is it that Sunday was the perfect day for fish chowder? I used Haddock because it’s cheap, standard, and what 18th-century fisherman’s wife would put in her chowder, but any white fish (or combination of fancy fishes) would work. Salmon would work marvelously, yum!

Haddock.

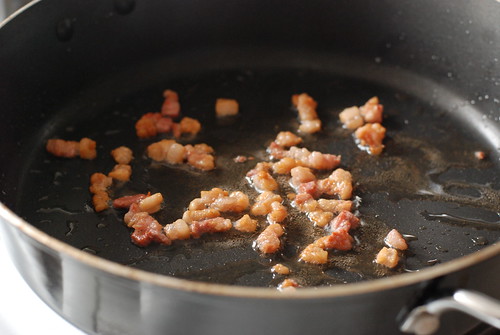
I used salt pork, but please, don’t worry about the gross unhealthiness of this because there’s not much to begin with and it’s spread among 8 servings. Really. It’s mostly for flavour. Bacon would work just as well.

Salt pork.

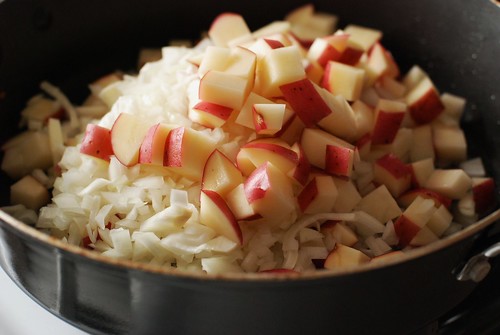
The bulk of fish chowder is vegetables, assuming you count potatoes, which I only sometimes do. Also, the only other vegetable is onion.

Fish chowder.

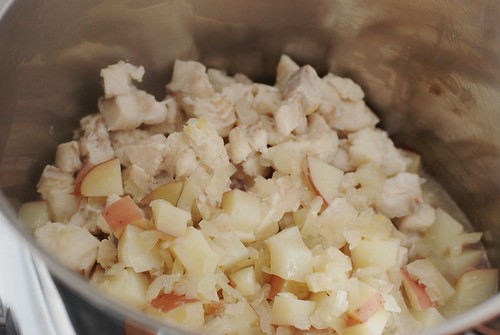
What’s going on here (and you can’t really see, sorry bout that) is that we made a fish broth with some of the fish, poured that into the pan with the veggies, then steamed the fish chunks atop the potatoes and onions, which are submerged in fish broth. It’s a neat way to steam fish and cook potato at the same time.

Steaming the fish!

Eventually we need to move the chunky stuff to a pot, though if your skillet can handle the milk on top of this stuff, you can save yourself a pot by keep your chowder in there too.

Edible, but not done.

Fish is so low cal that it’s kind of a shame to serve it in a creamy soup, which defeats the purpose, right? But instead of loading up on cream, which is admittedly delicious in a chowder, I used a combination of low fat condensed and regular milk. The result is something creamier than using milk without adding any fat (which accounts for the bulk of calories in cream). I’m assuming it’s because there are more milk solids into the same amount of liquid, but my knowledge of food chemistry is slim, so I’m basing this on logic alone.

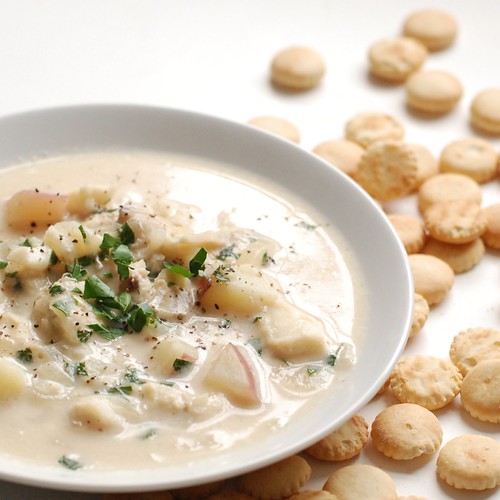
But in the end who cares? It’s a hearty and comforting way to watch the fog rolling around on the water.

Fish chowder.


New England Fish Chowder
adapted from a recipe by Margaret Woodworth D’Arcy of The National Society of The Colonial Dames of America in the State of New Hampshire . . . I’m not even kidding, I found this in the Society’s 1968 Cook Book

1.5 oz salt pork, diced
1 lb potatoes (about 2 medium), chopped into 1/2″ cubes
1 yellow onion, finely diced
1.5 lb haddock, about 2 fish or 4 fillets, cut into 1″ chunks
2 c water
1.5 c milk
12 oz evaporated milk
2 tsp salt
1 tsp pepper
2 tbsp butter
3 tbsp finely diced parsley, optional but quite effective

Place 1/2 lb fish (about 1 fillet) in a pot with 2 c cold water. Bring to boil and boil 10 minutes.

Once that gets going, fry up the salt pork over medium heat to extract all the fatness. Once the bits are crispy and brown, remove them and replace with diced potato and onion. Cook 5 minutes over medium-high, stirring frequently. By now the fish broth is done, so add it (and the fish if you like) to the potato and onion, then spread the cubed fish atop the veggies. Allow to steam (i.e. don’t stir) for 10 minutes, continuing on medium-high.

At this point, if you think your pan can’t comfortably handle an additional 3 cups of liquid, transfer the fish & veggies to a bigger pot. Add milk, condensed milk, salt & pepper. Bring to *almost* a boil (don’t let it bubble up big!) then reduce to medium-low, cover, and simmer about an hour.

Immediately before serving, stir in the butter, then ladle into bowls and garnish with parsley and additional pepper. The official word is that chowder is better the next day. I, however, suspect that old wives tale was created by a Mom Conspiracy way of getting us to look forward to leftovers.


nutrition summary (using 1% milk, fat free evaporated milk): 245 calories, 7g fat, 1g fiber; 5 weight watchers points

Now I’m going to tell you: my mother’s whoopie pie recipe is SO GOOD that I will often tell people that I don’t like whoopie pies at all, because I have yet to find another recipe that I actually like. Other people’s whoopie pies are too cakey, or too cookie-like, or (as is usually the case) the filling is pure frosting, which is WAY too sweet and totally the wrong texture altogether. My mom’s whoopie pies were famous in our circles, and she generously provided them whenever demanded, particularly when visiting my Uncle and Aunt in Maine for Thanksgiving and Christmas. I ate more whoopie pies in my childhood than cupcakes, brownies or cookies combined; they were a true and strong family tradition.

Antonia, a faithful reader, pointed to a NYTimes article about the Whoopie Pie and well hey, I’m not usually up to snuff on anything topical, and since I have an authentic family recipe on hand, I am suddenly compelled to showcase my (rather specialized) expertise!

A proper whoopie pie is not merely some cloying abomination of sugar and fat. No no, it is delicate in its way, the sweetness ever-present and yet subdued. Please do not compare them to a Devil Dog or Moon Pie. Please do not make them with cake mix and tub frosting. A whoopie pie is a very specific delicacy and there are rules.

The proper texture.

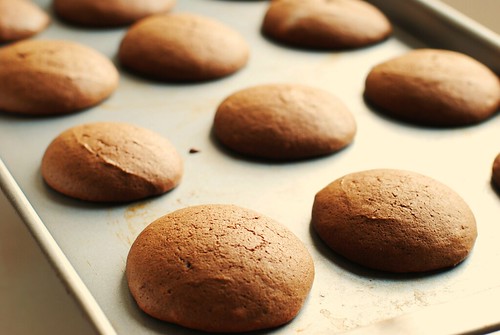
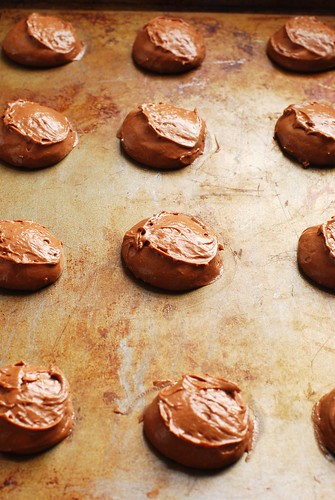
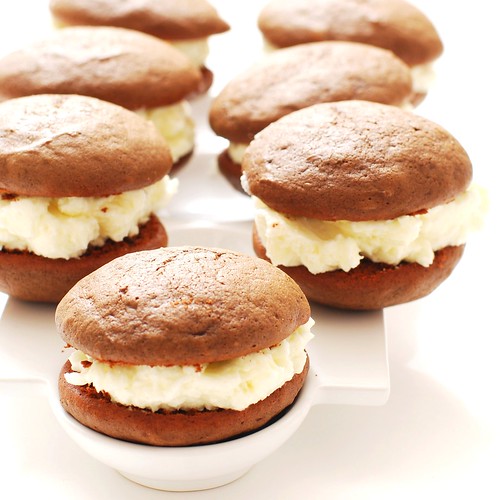
A proper whoopie pie “cookie” is a medium-brown shade, fairly dry (not all oily and moist like a Little Debbie’s snack), but still somewhat densely cakelike, maybe a vein or two where the scoop let go of the batter. They crack ever so slightly, but sometimes they don’t and maybe that has something to do with the barometric pressure. I dunno, they still taste right and seem to have the right texture, so aesthetics aside, it’s fine either way.

Okay, so maybe the filling is an abomination of fat and sugar.

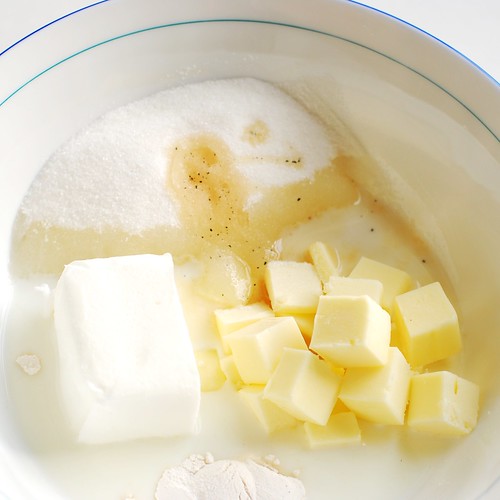
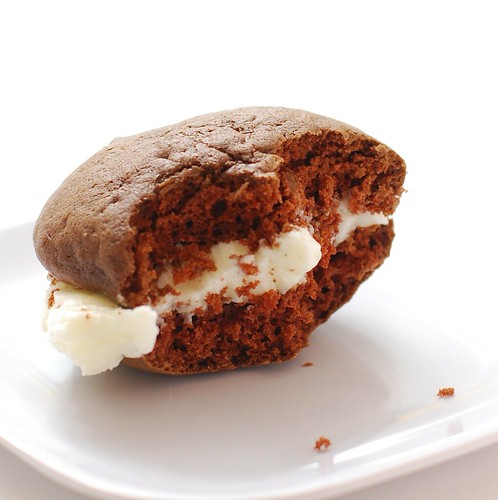
The proper whoopie pie filling is made with Crisco (which, apparently, no longer contains trans fats), butter, whole milk, sugar, a tiny smidge of flour and a regular portion of vanilla. Did you notice that it has no Fluff in it? That’s because Fluff is for fluffernutters, not whoopie pies. You will also notice that the filling is not a frosting, but a creme. While eating, one will lose all the filling out the sides and must open the pie, collect up the creme that has splooshed out back onto the bottom piece, then recreate the sandwich, only to do it all again in the next bite or two. This is the proper way to eat a whoopie pie.

This process presented many lovely photo ops. Let’s take a look!

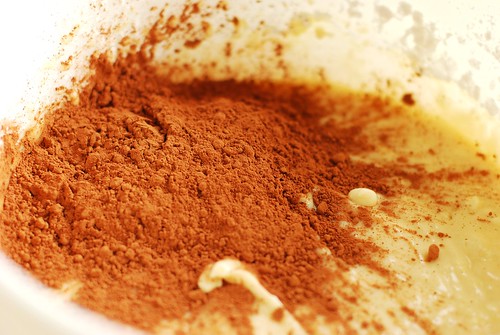
Where the chocolate comes in.

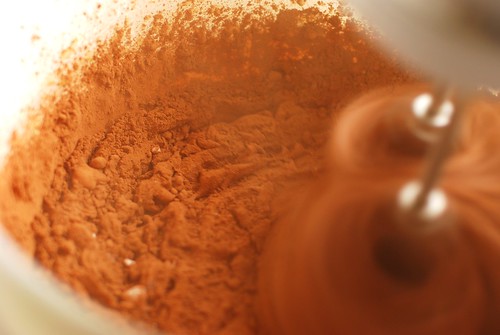
This one reminds me of a dusty construction site.

Cocoa construction site.

Ungreased cookie sheet...

The cookies can be removed from the cookie sheet almost immediately, but you really need to use a metal spatula and carefully scrap them off. I like the texture underneath, it gets a little crispy as it cools and it is so so satisfying to snack on the odd unmatched whoopie pie cookie before they’re frosted.

The underside.

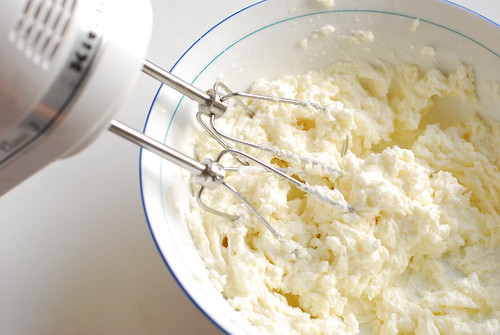
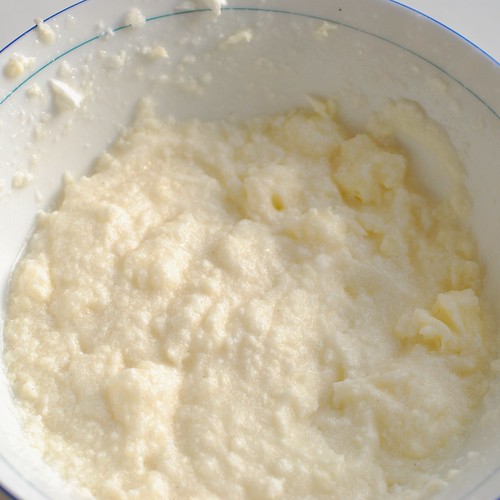
The creme takes a convenient 10 minutes to make, which you can most likely complete between the time the first batch of cookies goes into and comes out of the oven. I’ve found it nearly impossible to make the creme without an electric mixer (stand or hand, your choice), and sometimes it takes longer than others. For the first several minutes of mixing, your creme will look like this: kinda gross.

Porridge?

And then you’ll hear a cherub giggle, and an angel wing will brush against your shoulder as suddenly the creme whips up into this glorious appearance. The texture is extremely creamy, but still looks like this.

As if by magic.

After a little assembly . . .
Mom's perfect whoopie pies.

Since I started making my own food, I’ve lived on these for days at a time. Not particularly healthy nor affluent days, but certainly enjoyable ones.

Well of COURSE I ate some as I went along.


Mom’s Famous Whoopie Pies
makes about 14 after batter & cookie sampling
brought to you by very fortunate family ties.

Blend Add
1/4 c Crisco 2 c flour
1 c milk 1/4 c + 1 tbsp cocoa
1 c sugar 1.5 tsp baking soda
1 egg 1 tsp salt
1 tsp vanilla  

Drop by the small tablespoonful onto an ungreased cookie sheet—a tablespoon-sized bakery scoop works best. Bake exactly 8 minutes at 375o, see if a toothpick comes out clean, and if it doesn’t, bake another 2 minutes (10 total). Upon extraction from the oven, remove from pan immediately to wire rack to cool.


And now the creme filling (reminder: it’s not frosting, guys)

1/2 c margarine or butter (room temp is best)
1/2 c Crisco (my mother is insistent that this MUST be Crisco and CANNOT be generic shortening, nor substituted in any way . . . but if you do get it to work with a substitution, please let me know!)
1 c sugar
1 tbsp  flour
1 tsp vanilla
1/2 c warm whole milk (20 seconds in the microwave should do it)

Beat with a mixer (stand or hand, your choice) for-freakin-ever. It will start out just like, well, lumps of Crisco floating in milk, then bits will get smaller and smaller, then it’ll slosh around for a little bit, and, much like the butter making process, you’ll be wondering if this will ever become anything or if you maybe messed it up somehow. Suddenly, about five minutes later, your mix will look weird for a second, and within moments your slushy mess will turn into a glorious white creme, smooth and perfect in a way rarely seen outside the confines of uber-processed food with chemicals you can’t pronounce that are not even available to the consumer in their pure form.


Assembly

As soon as the whoopie cookies are cool, match each whoopie with its closest brother in size—even if yours didn’t all come out the same size, evenly matched whoopies will look much much nicer. Spread some filling on the flat side of one, then place the second on top. Repeat. This does not need to be done immediately before serving, as the filling tends to maintain its consistency surprisingly well, and some (like my mom) would argue that a day-old whoopie pie is even better than fresh. I like them all.

No need to refrigerate, sealed plastic or plastic wrap will keep them fresh.

. . . and that’s it. Congratulations! You just made the best whoopie pies known to man.


Not like it’s diet food or anything, but these are not quite as totally terrible as I thought they’d be!
Nutrition Summary (for 1 whoopie pie of yield 15): 330 calories, 17g fat, 1g fiber; 8 Weight Watchers Points

The one food category I seem to feed more than any other is Saturday Morning Brunch. There’s just something about waking up a little early at the very onset of two days of pure relaxation, heading to the kitchen, and waking up everyone in the house with tantalizing and familiar smells. And I’ve found that breakfast just seems to have the most universal appeal to anyone from anywhere and of any food preference. It brings together picky eaters, the hungover, old folks after church, Norwegians . . . and just minor alterations to the standard fare can accommodate virtually anyone. Even vegans enjoy animal-free bacon and dieters eat egg-white omelets, and those of us who normally shirk breakfast will always take the time to enjoy one on a sunny Saturday morning.

But there is one breakfast delicacy so simple and omnipresent, I’m aghast with myself that I’ve neglected it until now. And that’s pancakes.
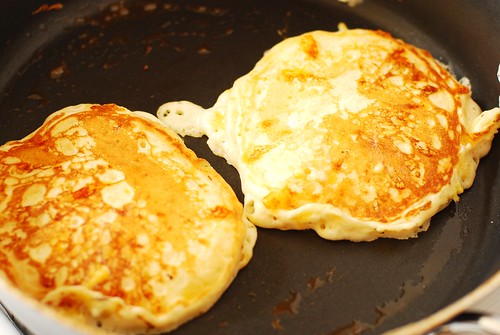
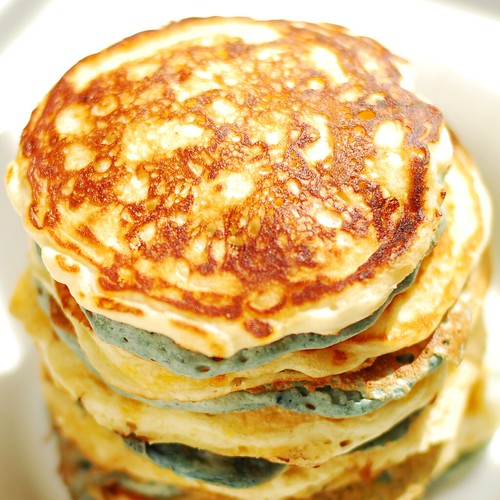
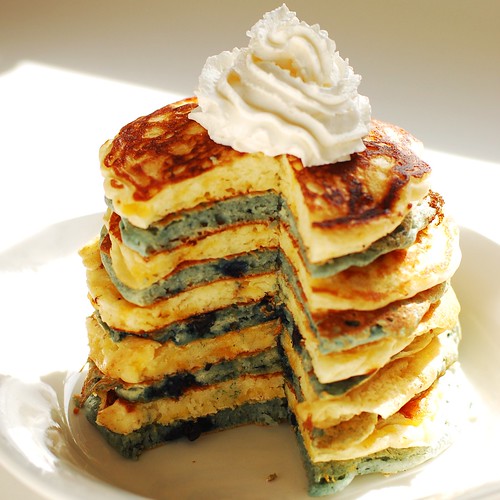
In an attempt toward rainbow cake fan service, I envisioned a colourful stack of multi-coloured pancakes sans-food dye, dyed only by the beauty of the fruits therein contained. Unfortunately, berries, with the exception of the blue variety, all seem to impart pancake batter with a dingy grey that is anything but inspiring. However, cheddar cheese makes for bright cheerful pancakes that are not savoury, but instead taste extra-buttery, making for a nice complement to the traditional blueberry. Also, though I’ve mentioned before that buttermilk pancakes are best, my favourite recipe by far is the standard regular old milk-and-all-purpose flour variety.

Anyone reading this has likely made pancakes, and I’ve included a recipe at the bottom for reference’s sake, but I think I’ll let the pictures, largely, speak for themselves. Except I need to tell you a secret, and you’re going to hate me for telling you because it’s such a guilty little secret, but . . . the best way to make your pancakes with crispy edges and fluffy insides is . . . shortening. Yes, a smidge of trans-fat-laden shortening in the pan does the trick admirably.

Blueberries.

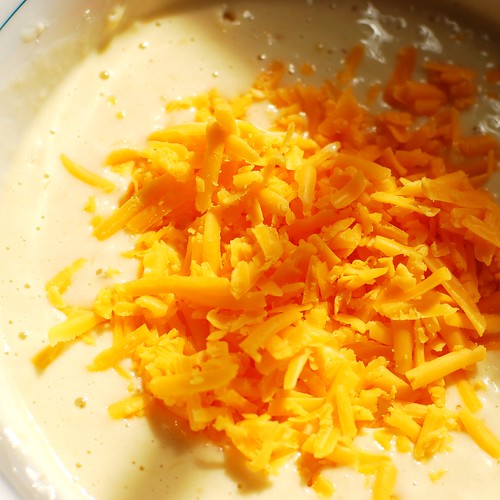
Sharp cheddar.

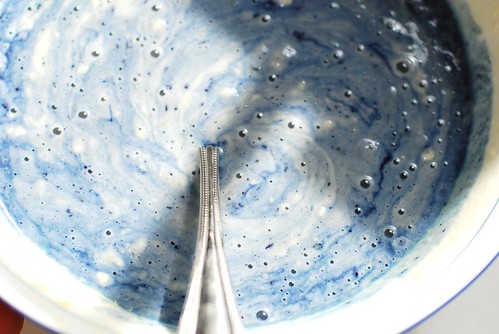
I’ll interrupt the silence here for just a moment: I’ve read a few places the best way to make blueberry pancakes is to put the blueberries on top of the batter once it’s in the pan to keep the whole batter from turning blue. I have no idea why anybody could look at this and not find it absolutely beautiful.

Blueberry batter.

Moving along . . .

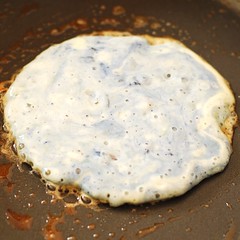
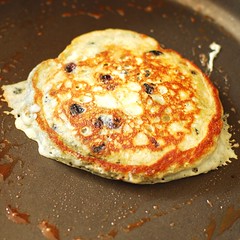
Bubbly blueberry.Blueberry flip.

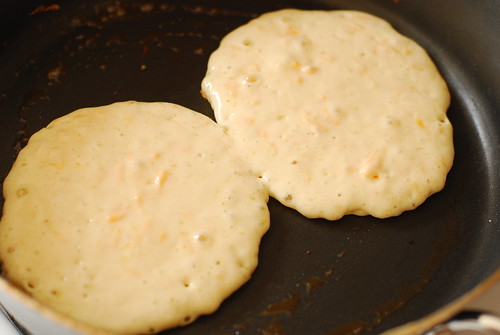
Cheddar in the pan.

Sunny sunny cheddar.

Repeat as desired.
A stack of delight.

And finally, the shot that made it all worth it. Aren’t these stripes giddily Dr. Seuss-like?

Dr. Seuss stripes.

If you don’t want pancakes right now, I just plain don’t understand you (or you just ate, which is possible).

Blueberry & Cheddar Pancakes
adapted from The JOY of Cooking

1.5 c all-purpose flour
4 tbsp sugar
1.75 tbsp baking powder
1 tsp salt
1.5 c milk (whole, lowfat, skim, it’s your call)
3 tbsp melted butter
2 eggs
1 tsp vanilla extract
1 c shredded sharp cheddar OR 3/4 c frozen blueberries, thawed, pressed, with juice.

Whisk or sift together the flour, sugar, baking powder and salt. Whisk the milk, butter, eggs and vanilla, then add to the dry ingredients. Mix just until the flour is all moistened, then stir in cheddar or blueberries; let sit for 10-15 minutes if you can spare the time . . . it seems to make the pancakes a little fluffier.

Back to that deep dark secret, shortening, which, to reiterate, makes crispy edges whilst preserving the fluffy insides. You put a smidge, about a knifetip, in the pan between each batch and you won’t regret it. However, butter or cooking spray still does the job, though not as well.

Once the pan is hot from sitting on medium-high heat (7 for fellow gas-stovers out there), drop 1/4 c of batter for each cake. Flip when the bottom is toasty and the bubbles on top aren’t popping quite as much, then remove once the new bottom is toasty.

Serve with a smile on a sunny Saturday morning.

Every winter when I feel like I’m particularly broke and miserable and I just want it to end, I head to the local fishmonger and blow a bunch of money on a lobster that is completely out of season. This entire practice is just so indicative of someone who is a complete New Englander, what with our long snowy winters and delicious lobsters.

Lobsters aren’t seasonal per se, but they are much cheaper between Memorial Day and the Fourth of July. The truth is, however, that hard shell lobsters are most easily found in the Spring. There is lots of information all over the internet as to why this is, but all you need to know is that a hard shell lobster feels firm when you squeeze slightly and makes for less chewy meat. Armed with this information, I figured that making these in early March isn’t the worst time.

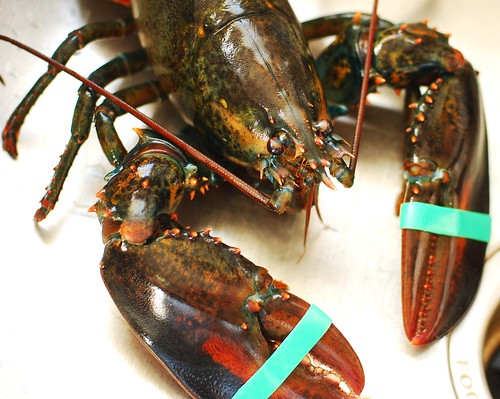
The only fresh lobsters are live lobsters, and the best ones are spritely and healthy with an ardent will to break as you steam them alive. So let’s meet the couple we’re having for dinner, bwahaha. And yes, I mean that in a creepy Vincent Price sort of way.

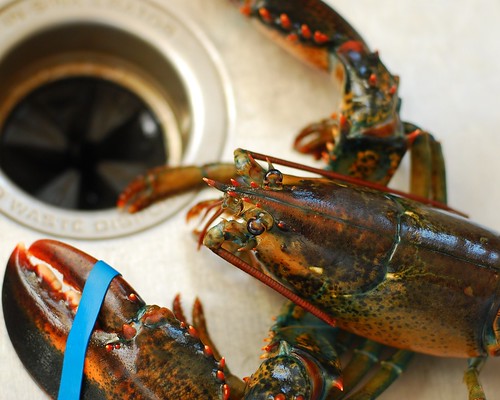
This is Roberta.

Roberta, (aka Bobster)

We nicknamed her Bobster.

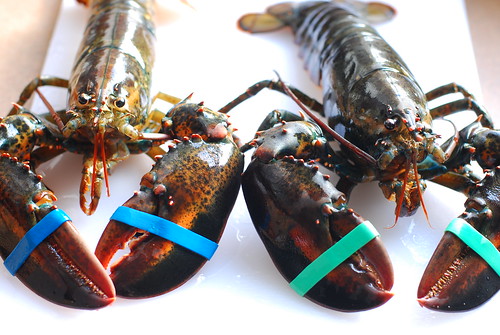
This is Shelly, for obvious reasons.

Shelly.

They became great friends when they were roommates in that tank.

Best buds.

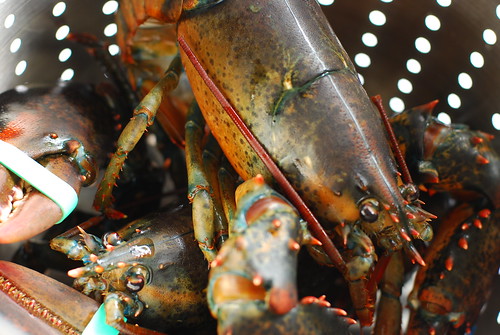
Alright ladies, get comfortable in that strainer.

Lobstahs!

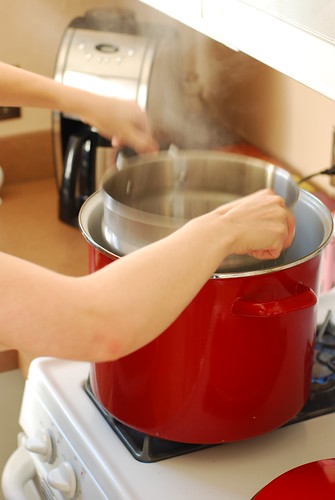
We don’t boil lobsters around here, we steam them, because boiling a huge pot of water takes for-freakin-ever, and steaming results in a less water-logged shell. Just an inch of water in a huge pot does the trick. Then steam for awhile depending on the pounds of lobster—for two 1.25 lb lobsters this amounts to about 12 minutes. You’ll need an unnaturally large pot.

Big pot.Top the pot.

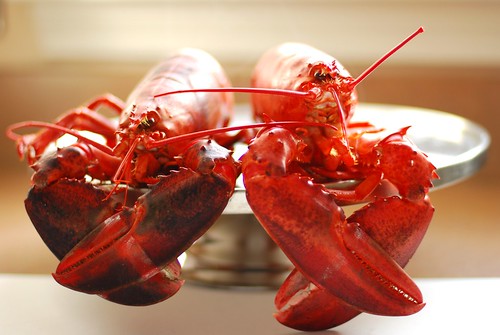
And look! One of the prettiest colours in New England.

Lobstahs!

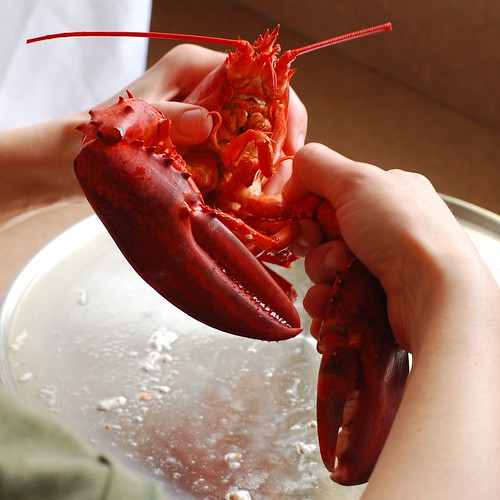
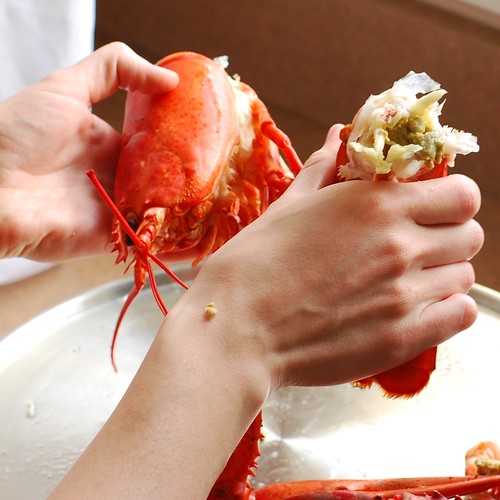
As with all delicacies, there is a catch. If you aren’t disgusted by the spiderlike appearance of these ocean bottom dwellers, you probably still understand that disassembling a lobster can be quite the undertaking without a good plan of attack, but it’s actually easier than it would seem with some handy instructions. First, twist off both claws.

Claw twist
Ta da!

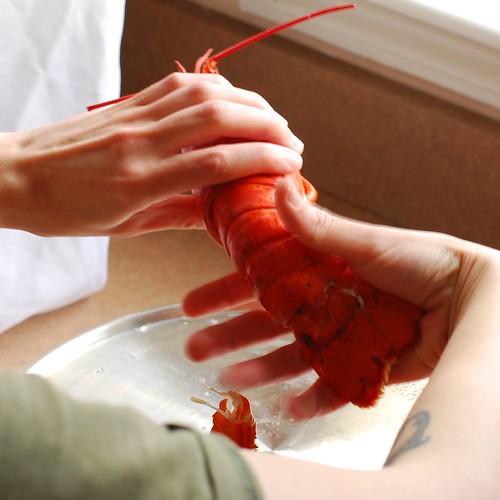
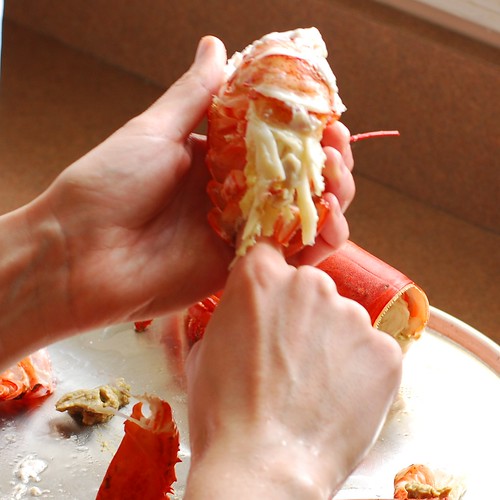
Now twist off the tail.

What a twist!
Ignore the gross part.

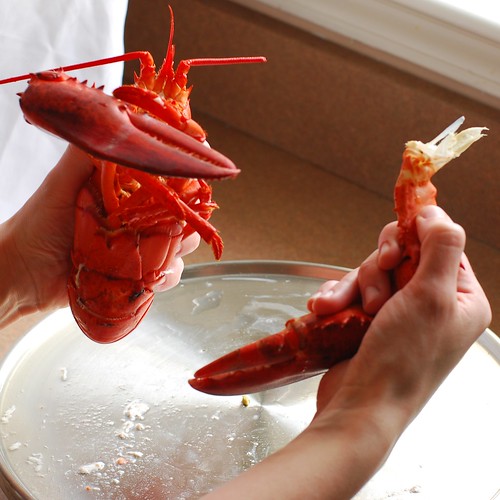
Tail meat is a cinch, you just pull off the flippers at the end of the tail and insert your finger there to push out the meat from the top. This picture doesn’t illustrate it very well, but that’s the deal.

Lobstahs!

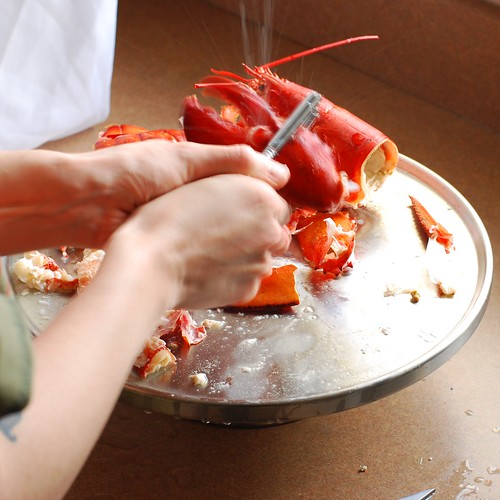
The claws are the real tough part here. They require a lobster cracker and I use a pair of kitchen scissors (ones I don’t mind putting in the dishwasher after the fact) to help myself out.

Action shot!
Lobstahs!

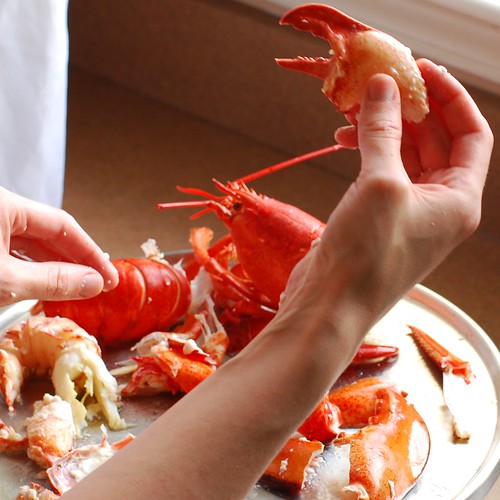
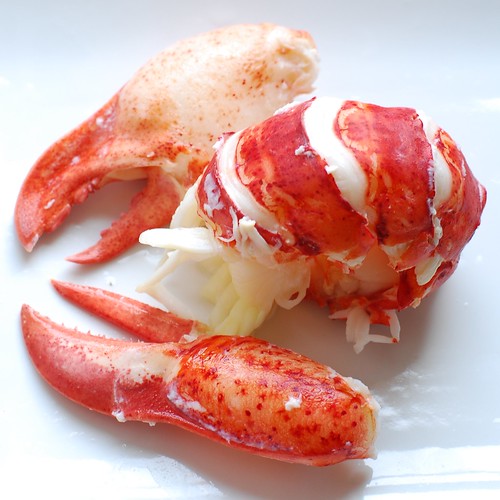
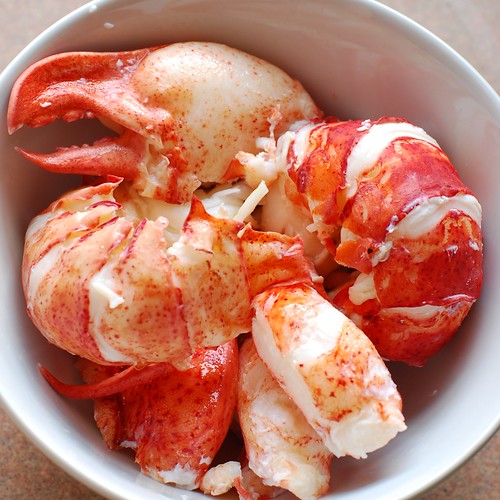
Lobster meat is much more lovely away from all that mess, and after being rinsed in room-temperature water.

Red meat.

Lobstahs!

Every time I’ve had lobster at home I’ve pulled it apart and tossed the meat into a bowl of melted butter as I went. By the time I was done the corn on the cob had cooled and soon my chin was dripping with butter as I sighed satisfied with eyes closed and a crustacean appendage entering my mouth. I understand that this scenario is only appealing to people who have experienced it, and I apologize for grossing out everyone else.

This time around I thought I’d actually *make* something with my lobster and treat it like the delicacy it is. Turns out that a particularly delicious use is Lobster Newburg, which is essentially a sherry-cream sauce that elegantly replaces the traditional serving suggestion of “float all this shit in bowl of melted butter.”

Here we go.

The beginnings of the newburg part.

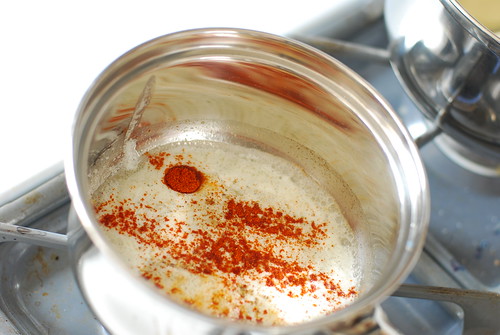
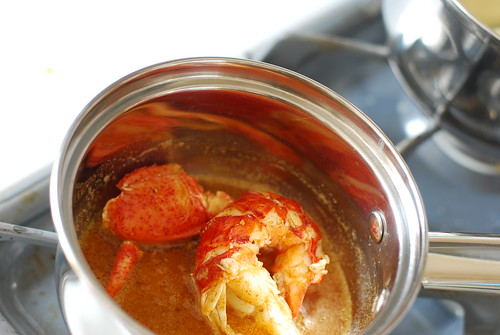
Before the cream is added, we coat our lobster bits with spices and butter.

Buttering with paprika.

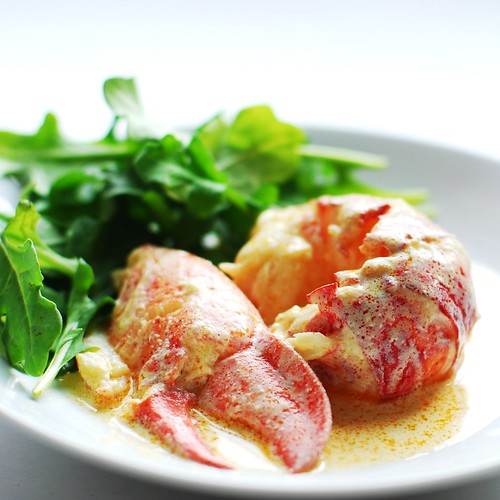
Finally, the cream part comes into play and we serve the Lobster Newburg with arugula, which has a peppery taste that complements the sauce SO WELL. In fact, I ate this a lot like a salad. But the traditional garnish is watercress and baby spinach would work as well.

Lobster newburg. Done.

Lobster Newburg

The meat from 2 x 1-1.5 lb lobsters, rinsed with lukewarm water (about 6 oz)
1 c light cream, half and half, or fat free half and half
2 egg yolks
1/4 tsp salt
1/3 c dry sherry
3 tbsp butter
1/4 tsp ground black or white pepper
1/4 tsp paprika
Arugula for garnish and eating (my highest preference, but watercress is more traditional and even baby spinach makes a nice substitute)

To steam the lobsters
Fill your largest pot with about an inch of water and bring to a boil. Using either a rack that fits in over the water line or a steaming basket, place the lobsters in the pot, tail down first, and lid immediately. Continue to boil over high heat for 12-15 minutes.

If you don’t have a rack or steam basket, you can put the lobster right in the water, but keep an eye on those claws and make sure they don’t get black, which means they’re overcooked (yes, one of my lobsters in the picture was overcooked, it was the one on the bottom).

To make the newburg part
Heat the half and half in pan over medium heat, making sure not to scald it. Meanwhile, whisk the egg yolks with salt and sherry. Add the egged-sherry to the half and half, whisk, and cook over low heat until thickened enough to coat a spoon. This should take 6-8 minutes.

In another saucepan, melt the butter over low heat and add paprika and pepper. Add lobster meat to coat, then pour the cream/sherry mixture and heat thoroughly.

Serve with arugula, watercress or baby spinach. Melt into a puddle of satisfaction.

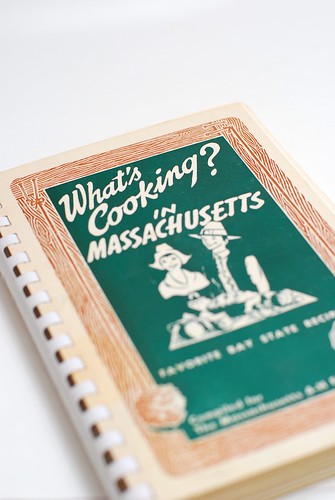
I decided that our household was long overdue for a good old fashioned surf and turf. Well I guess *kind of*. Our meal was old fashioned in that there was shrimp and there was steak, but I came upon a neat idea in this old 4-H fundraiser cookbook I found in a second hand store.

Heya good lookin.

The problem with vintage recipes is that they’re always bland and more often than not, they’re unapologetically gross as well. The shrimp bake recipe, upon inspection, is not a gross one (create a roux, add some milk, sprinkle some sparse spices in there, pair shrimp with macaroni), but it was . . . lacking. So I did a little magic in terms of additions and here’s what I came up with.

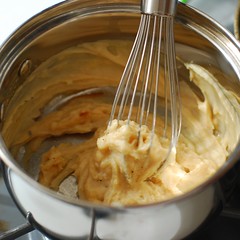
First, we make a roux. While the word is definitely a fancy-pants French one, it’s actually quite simple: melt some butter, pop in a bit o’ flour, whisk until nice and golden and yummy-smelling. For something so very simple, butter and flour smells awfully nice simmering on your stove.

Melty buttery.Roux step two! Flour.
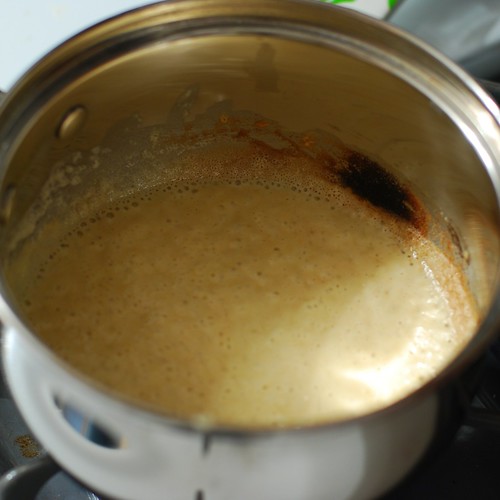
Golden flour.
Don’t mind that scald mark, it was there to begin with. Ugh. My stupid dirty pans strike again!

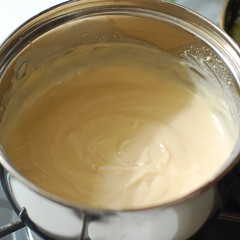
The original recipe called for milk alone, but since I had buttermilk leftover from making butter, I substituted buttermilk for half of the milk. This added a zingy tang to the flavour, that coupled with a little bit of mustard powder, quite well imitates the cheese flavour in macaroni and cheese, without actually incorporating any cheese. I don’t know that the butter and flour method is exactly healthier, it’s just an interesting coincidence, probably heightened by the fact that basically macaroni + creaminess is always associated in my mind with mac n cheese (or “mackin’ cheese,” if you’re pimp enough).

Buttermilking it up.And now some milk.

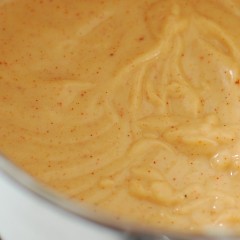
And now, one by one, we add the flavourful parts. I won’t make you scroll for the next five minutes; here’s the consolidated view. I trust you all, as adults, to understand how to add one ingredient at a time here. [Editor’s aside: Apologies to the kiddos, here’s an explanation: add these ingredients one at a time. Thereyago!]

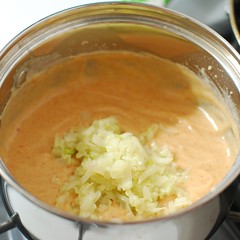
The spicy little detailsThis is what those onions were for.
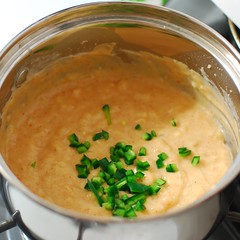
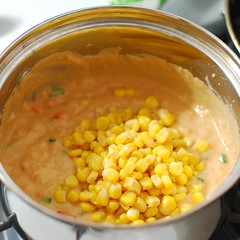
Jalapeno!Corn!
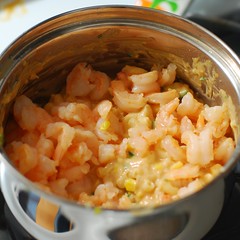
And what is a macaroni casserole without macaroni?Shrimp time!

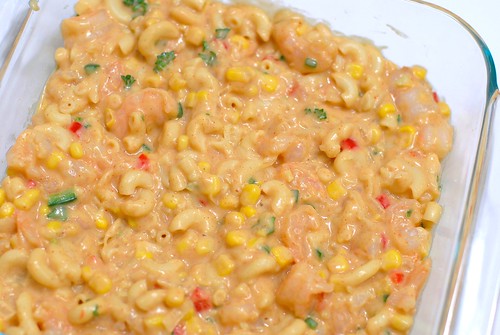
They are, in order: spices (paprika, mustard, salt), onions & garlic (sauteed lightly in butter first), jalapenos (1/2, diced finely, no seeds), corn (from a can, hey I like it that way best), macaroni (cooked), shrimp (explanation below).

Spice fearers, have no fear! There is very little jalapeno here relative to all else, and this dish is definitely not spicy, it just has this mild and comforting warmth to it. Spice lovers may wish to kick it up the proverbial notch by including the entirety of a jalapeno.

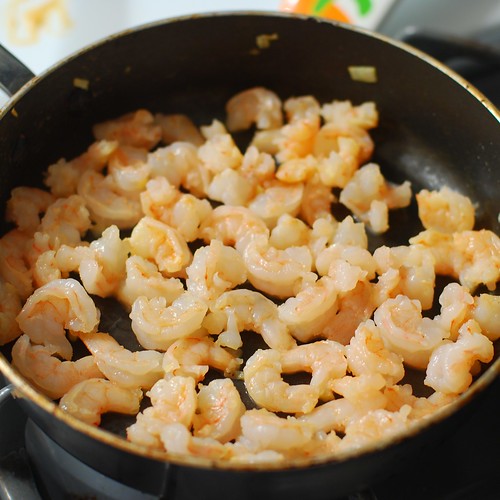
Now if you are fluent in italics, you saw the part about the onion and garlic being sauteed, no? Well obviously I did that first. And then in the same pan, while the macaroni was patiently taking in its first few minutes in the mix, I just added my raw, thawed, shelled, drained shrimp to whatever fat was left in the pan and lightly sauteed them. I’m talking like, *a* minutes here. I toyed with the idea of putting the shrimp in raw, since I knew fully cooked shrimp would get very tough after 35 minutes in the oven, but compromised on this consistency.

Lightly sauteing the shrimps.

Following my lead should result in the same delectable results I enjoyed.

Now it’s casserolin’ time! Use a glass or ceramic baking dish with about 64 square inches. In this case, I used an 8×8.

Shrimp and macaroni "Surf Bake"

At some point of the mixing of things, I included a tablespoon of jarred pimientos. It gives the dish a little bit of a Southwestern-looking flair, but didn’t add much taste, and it’s a little deceitful since this isn’t at all Southwestern, so I’ll be leaving them out in the future. The few sprigs of fresh parsley, however, did fresh things to my casserole (it’s okay, the casserole liked it).

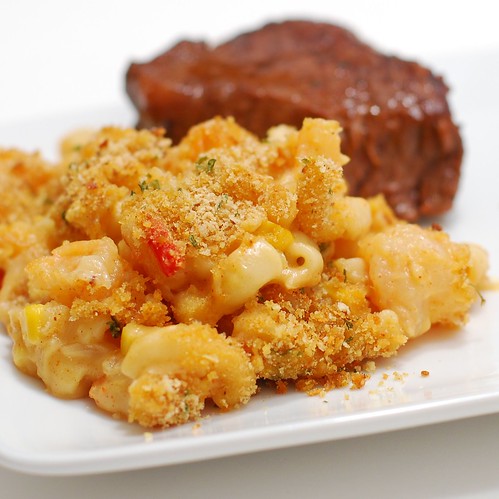
Add some breadcrumbs, a little baking time, and voila! Surf and turf. This dish is really really REALLY good, but its unphotogenicness will probably scare some of you away, and Tastespotting probably won’t accept my submission. And I’m okay with that. Because if one, even one of you makes and enjoys this incredible dish, my foodie missionary work is done, and I shall surely dream of angels.

Shrimp and macaroni "Surf Bake"

Shrimp and Macaroni “Surf Bake”
serves 4 as a side

1 c cooked macaroni, just underdone (2 oz pre-cook)
1/2 finely diced onion
4 cloves minced or pressed garlic (less to taste)
4 tbsp flour (1/2 stick total, divided: 1 tbsp for sauteeing onions, 3 tbsp for roux)
3 tbsp butter
1/2 c buttermilk (substituting milk will be a-ok)
1/2 c milk
1/2 tsp paprika
1/2 tsp dry, powdered mustard
1/2 tsp salt
2 tbsp finely chopped parsley
1/2 finely diced jalapeno (seeded, whole jalapeno for the brave)
1/2 c corn (canned, frozen, fresh, you pick! I used canned)
8 oz small shrimp, thawed, raw, shelled, drained
2 tbsp breadcrumbs

First thing’s first: cook your macaroni a minute or two shy of the al dente recommendation on the package. While that’s on, sautee the onion and garlic in 1 tbsp butter. Dice the 1/2 jalapeno, finely chop the parsley, shell the shrimp and cut each in half.

Preheat oven to 375o.

Melt 3 tbsp butter in a medium saucepan over medium/high heat. Add flour, and whisk, continuously, until the mixture is a nice warm tan. If, at any point, this begins to smell like it’s burning, immediately turn down the heat, and you should be fine.

Take the roux off the burner. Add the buttermilk and milk (again, you can just use 1 cup of milk if you forgot the buttermilk) and whisk vigorously until smooth and unlumpy. Add paprika, mustard, salt, parsley, diced jalapeno, corn and mix thoroughly (the burner’s still off right here).

In the same pan you used to saute the onions and garlic, saute the shrimps for just a minute or two, until they have a little bit of colour, but before they’re fully cooked. Add to concoction.

Spread in an 8×8 casserole dish (glass or ceramic) and sprinkle the breadcrumbs atop it all. Bake for about 35 minutes. Serve with turf.

nutrition information for 1/4 batch: 325 calories, 3g fiber, 13g fat; 7 WW points

Hai guise!

So even though it’s not a breakfast food, guess what: I’m making chili with you today. It most certainly is a diner dish, and therefore not entirely out of line with that little theme I have going. A theme, I might add, that is probably only two weeks from expiry, as I’m not entirely sure I have clever little recipe tricks for the really good stuff on the menu, other than to buy the Heart Healthy variation of the usual pancake mix, which seems to amount to a smaller serving size on the label and some cellulose gum to add fake fiber. (Well, I guess the fiber is real, but it’s not exactly whole-anything).

Alright, first you need your BEP. What’s a BEP? Why, I’m so glad you asked!

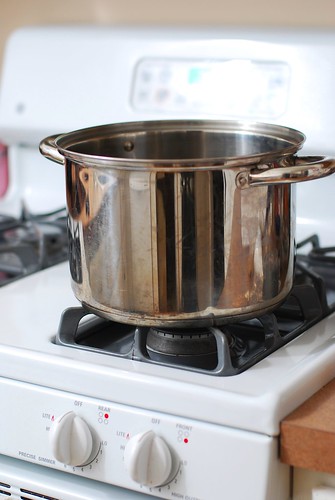
BEP: Big Effin Pot

It’s a BIG EFFIN POT! I was going to name it something a little more literal (think BFP), but I have been linked from other blogs with the caveat that the LANGUAGE on this WEBSITE is NOT AMUSING, and I’d hate to piss off anyone who has such kind and thoughtful things to say about my website. The more faint-of-heart might wish to refer to their BEP as a BOP, or BIG OLE POT. In addition to making for a far superior acronym, it’s also something you can share with your loving children. On a side note, BEPs are one of the most useful things you can have, if you don’t already. Verily, they are the LBDs of the kitchen.

In this case, the BEP is somehwat pivotal, as we have a fairly large amount of stuff that really wants to stain your walls/stovetop/white blouse/microwave, bubbling up as it simmers and you lean over to give it the occasional stir. So please, do yourself a favour and bust it out.

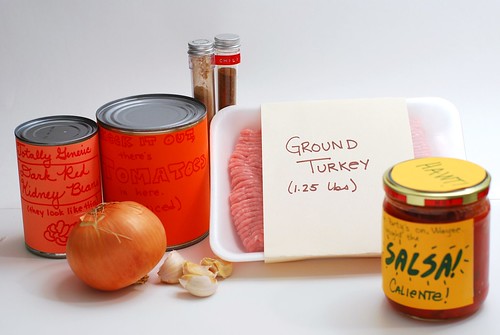
Alright, recipe time! I made generic labels for my canned goods because I always thought it was kind of stupid and funny and obvious when they did that in kids’ shows back in the day.

Totally generic ingredients.

Also, you sadly can’t read it, but that salsa jar says “The party’s on, Wayne, I brought the SALSA!” That one was my favourite. =(

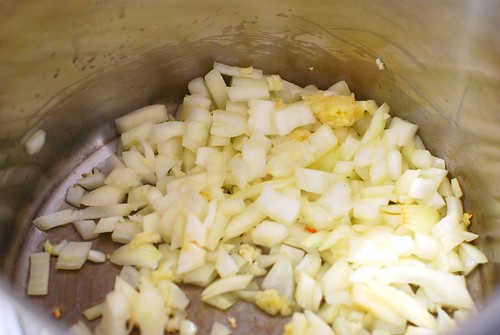
Now chop an onion. Press some garlic. Sautee in some oil. It took me a long time to learn this, so I offer this PSA for anyone who doesn’t already know: don’t press your garlic into the pan before you add the onion. You are begging for burnt, bitter-ass garlic that really does nothing good for your food. Press the garlic into your pile o’onions, and add both at the same time.

And knowing’s half the battle.

Onions. Garlic. In a pan.

I swear, I could take a thousand pictures of onions and garlic sauteeing in a pan, and I would love every single one as though it were my own, real live baby. Nothing in the world smells better.

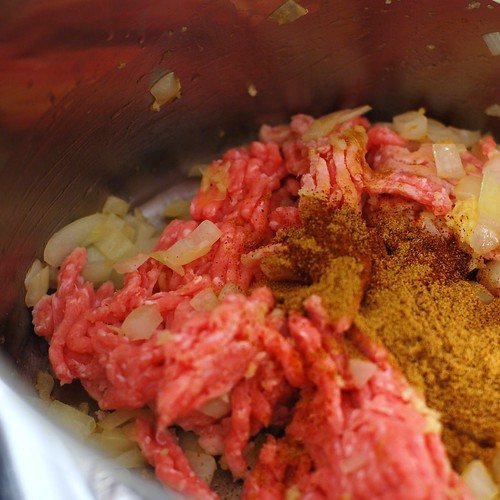
NEXT! Add some meat n stuff in there.

Is this even appetizing?

Unlike cooking onions and garlic, I have a feeling that providing a picture of raw ground meat is a lot like letting someone watch you put on pantyhose . . . it’s only sexy after it’s done, and only in the context of other *stuff*.

I remain unappetized.

See now, that there, is totally like, after you’ve put on the pantyhose, but before your svelte little dress is on. BUT

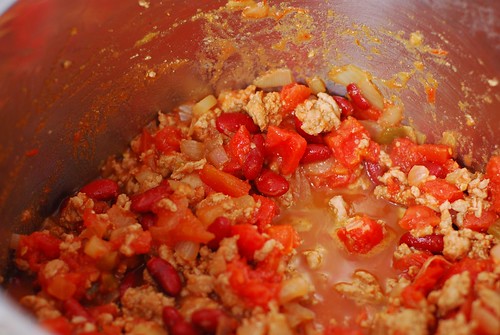
Turkey Taco Chili

There we go. We’re getting somewhere.

So this is a wonderful chili in its own right. It’s downright edible even if you have no intention of losing a single ounce, and, rather than being just low-calorie, is actually good for you! Loads of veggies, protein and fiber in there, nothing at all fake . . . and so completely undeniably filling. Seriously, a cup of this stuff is probably the most gut-busting cup of anything you can eat.

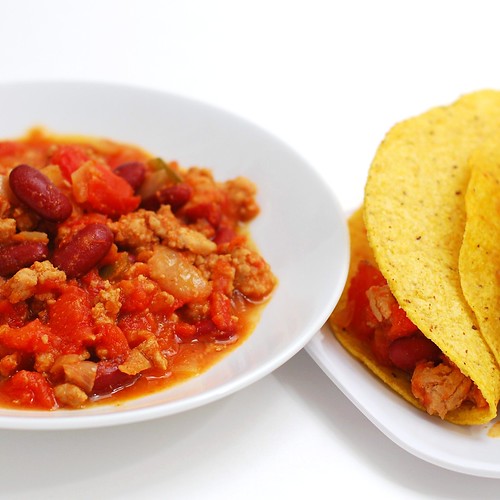
The recipe makes about 7 servings, but if you wanna bump it up to 8 for no detectable increase in calories, throw in a chopped pepper or another onion or something. These servings freeze well, but if you don’t have room in there for your entire Gladware collection, break up the monotony of leftovers by enjoying 2 Point Tacos! That’s right, this already-incredible chili makes one heckuva taco. Just add one regular taco shell to 1/4c of this stuff. Cheese and lettuce might be nice, but not necessary.

Chili. And bonus taco.

Mmmmm.

Turkey Taco Chili

1 tbsp olive oil
1 onion, chopped
4 cloves garlic, minced or pressed
1.25 lbs ground turkey (93/7 works best)
1 tbsp chili powder
1 tbsp cumin (this is the secret to making the chili taste taco-like)
2 tsp salt
28oz can of diced or stewed tomatoes
14oz can of dark red kidney beans, rinsed (or any other red bean you have on hand)
3/4 c hot salsa

Heat up the oil over medium heat, then add onions, then garlic, and saute for a couple minutes. Add the turkey, chili powder, cumin and salt and break up the turkey with a scoop, until it is no longer pink. Add tomatoes, kidney beans and salsa, and bring to a boil over high heat. Let boil a minute, then reduce heat to medium/low and simmer for 10-15 minutes.

Nutrition info: 235 calories, 5g fiber, 8g fat; 4.5 Weight Watchers Points

Two Point Tacos
a subtle variation

Scoop 1/4c of the chili into a taco shell. Eat.

Nutrition info: 120 calories, 2g fiber, 5g fat; 2 Weight Watchers Points

Woo! More diner food. Get excited.

What I mean to say is “Get excited, you’re going to be one skinny bitch or dude!”

(Hey! Some of those menu items are clickable.)

Yum! The sausage is a *mite* time-consuming, but it’s delicious and easy to freezey. Here, lemme show you.

diet diner dinner: scramble & sausage

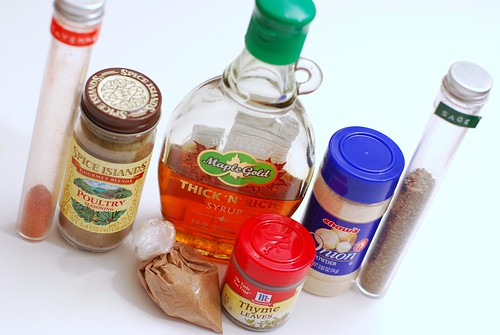
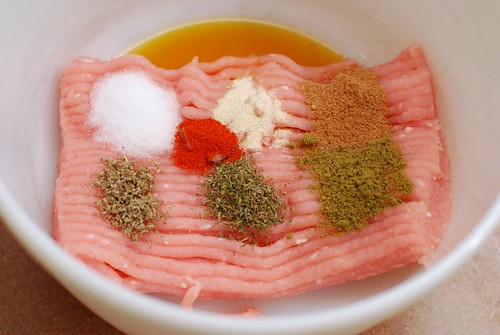
This called for a number of spices I don’t normally use, hence the unappealing array of unsightly jars. It even looks better on raw meat, somehow.
diet diner dinner: scramble & sausage

Since turkey comes in 1.25 lb packages, and since I haven’t tested the spice blend with that much turkey (I saved the extra quarter pound for a chili), I would say to use generous 1/2 tsps of the spices. Because we’re talking an extra 1/8 tsp, and my measuring spoons don’t even get that small. It’s about a pinch.
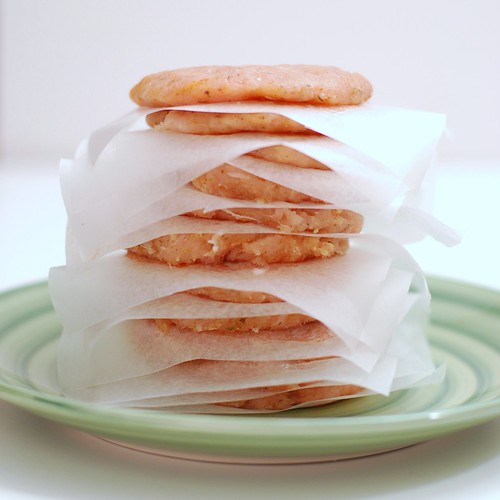
Now weigh out 1.1 oz patties. I know that’s kind of a weird size, but they were just the right size. If you don’t have a scale, divide your meat into about 12 parts. Ball up the meat, then pat it down, and stack between little squares of wax paper.

diet diner dinner: scramble & sausage

Now chill it for an hour. After the hour’s gone by, wrap whatever you aren’t going to use in saran wrap, then throw them in a freezer-safe bag in the freezer. To thaw later, microwave on high in two 10 second intervals, allowing a minute or so between nukings.

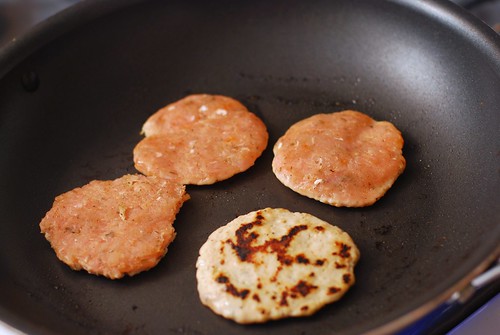
After the hour’s up, get a pan hot, then lay down a patty. Let it sit for a couple minutes, then flip. Let sit another couple minutes. Cut into one to be sure you’ve cooked all the way through (these should be rather thin, so if both sides look white, you’re probably all set).

diet diner dinner: scramble & sausage

And there you are! Money shot in a bit.

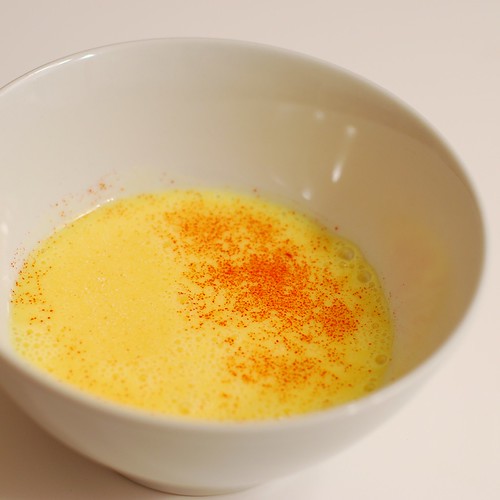
Now for the eggs. I love love LOVE egg substitute, and I use it anywhere I can get away with it. I don’t care what anyone says, for a scramble, these are fantastic. And oh so low calorie. I put a pinch of cayenne and probably a 1/4 tsp of garlic powder. Garlic powder is this amazing thing that you can put in fat free food to make it a thousand times more satisfying. You may have heard of it.

diet diner dinner: scramble & sausage

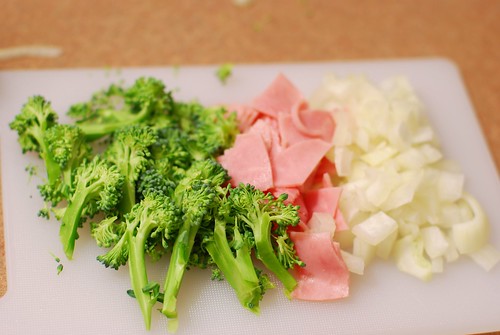
Next, some stuff to add a little fiber to your meal.

diet diner dinner: scramble & sausage

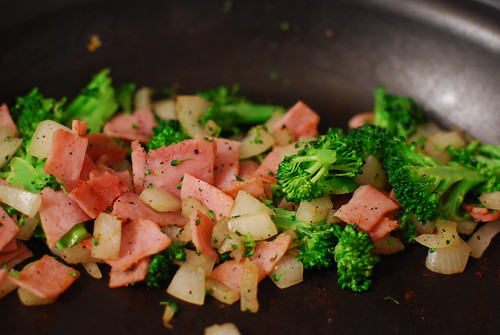
In addition to being delicious, these are lovely additions to your eggs. First you want to salt and pepper these . . . because they are particularly low-fat, the salt helps bring out a lot of otherwise neglected flavour. Sautee on medium-high for a few minutes, then set the burner to medium and lid it for another few minutes to let the broccoli get nice and tender.

diet diner dinner: scramble & sausage

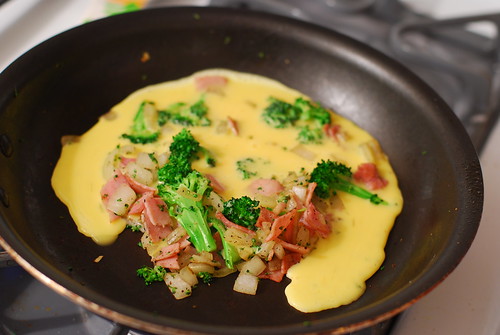
Aaaaahhh!! Egg substunami!

diet diner dinner: scramble & sausage

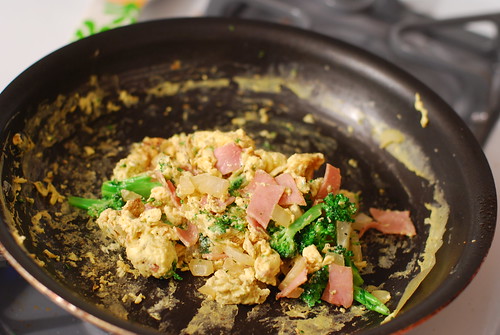
Scramble it up in your awful pan that sticks to everything even when you use cooking spray.

diet diner dinner: scramble & sausage

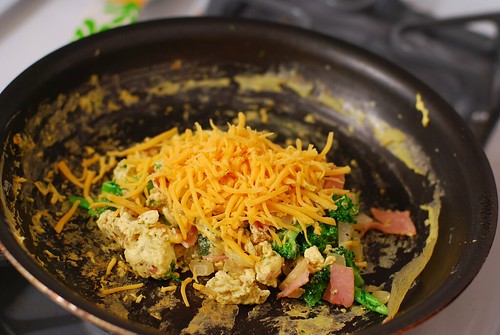
You are perhaps thinking “But Aleta, I only like broccoli when its flavour is completely masked by cheese!” Have no fear, cheese-lover . . . there is such a thing as fat free shredded cheddar, and it goes on top of these eggs.

diet diner dinner: scramble & sausage

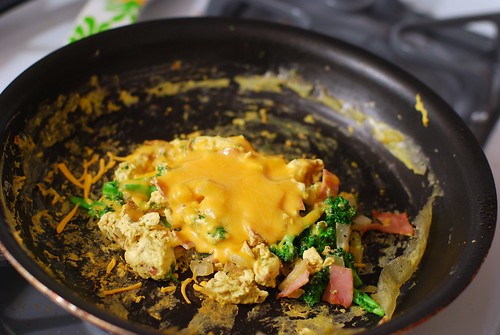
Now turn off the burner and, without moving your pan, lid it again to melt the cheese without burning the shit out of your eggs.

Mmmmmelty.

diet diner dinner: scramble & sausage

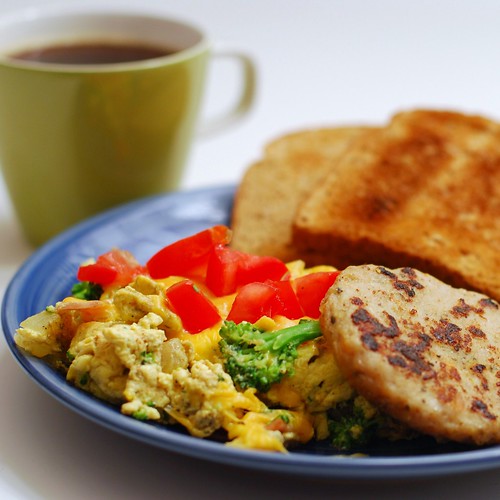
And that’s dinner.

DSC_0343

Maple Turkey Sausage
adapted from a recipe by A Taste of Home

1.25 lbs ground light turkey
1 tbsp maple syrup
One generous half-teaspoon each:
salt
onion powder
dried sage
dried thyme
poultry seasoning
nutmeg
1/4 tsp cayenne powder (plus a pinch for the adventurous)

Mix the turkey with the spices and maple syrup. Pat into tight 1.1 oz patties (about 14 total). You want these pretty thin so they don’t have to cook for very long. Layer between squares of wax paper and chill in the fridge one hour.

No no, the turkey patties, not you. Get out of there.

Heat a nonstick pan to HOT, then cook each side of the patty 2-3 minutes. Cut into one to be sure that there’s no pink in the middle.

These freeze and reheat fantastically, and I highly recommend making a month’s supply at a time. To do so, wrap each patty individually with plastic wrap, then store in a freezer bag in your freezer. They should last a good few months that way.

Easy Fo-cheesey Egg Scramble

1/2 c egg substitute

pinch of cayenne
pinch of garlic powder
1/3 c (or more) chopped broccoli
1/4 c chopped onion
1 slice packaged ham, chopped
1/4 c fat free shredded cheddar cheese
1/4 medium tomato, chopped, with the gutsy part left out, for garnish

Spray your pan with cooking spray, and heat to medium-high. Sautee the veggies until the onions start to look translucent (a few minutes), then cover the pan with a lid to help the broccoli cool.

Meanwhile, whisk the egg with the cayenne and garlic powder.

Remove the lid, turn heat to medium, and add the egg. Scramble it up. These cook pretty quickly. When the egg is no longer runny, sprinkle the cheese on top, turn off the burner, and lid the pan again to melt the cheese without burning the egg. About two minutes later, you, my friend have a cheesey egg scramble.