online poker

Omnomicon

say it with me now, “om nom nom”

Subscribe to Omnomicon

Archive for the ‘holla-days’ Category

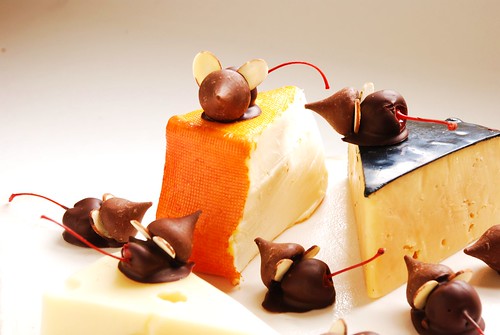
I present to you: that eleventh hour, absolutely perfect finishing touch to your Halloween spread.

Once you’ve gone through caramel apples & popcorn balls, pumpkin bread/cookies/cupcakes/whoopie pies and cider donuts, it’s hard to be all that original without making something that looks like something else. Alas, the very concept of making a dessert that is appealing only insofar as its resemblance to a mummy’s finger or a cat’s litterbox is kind of like saying you would feed those things to your guests if only they were edible just because it’s Halloween. On the other hand is the risk of creating something that just doesn’t quite hit the mark. It’s bad enough that I have to explain my costume (look, I didn’t think Anne Boleyn was all that arcane a reference), to have to explain “See? They’re little ghosts” adds some serious insult to injury. And from a culinary perspective, it’s a little gimmicky and a little lazy and definitely trashy.

Despite the general tackiness of food-that-looks-like-something-else, when done well I can admire such a masterpiece for its cleverness. A couple years ago I came upon this idea somewhere (and if it was yours, please do tell).

The charismatic one.

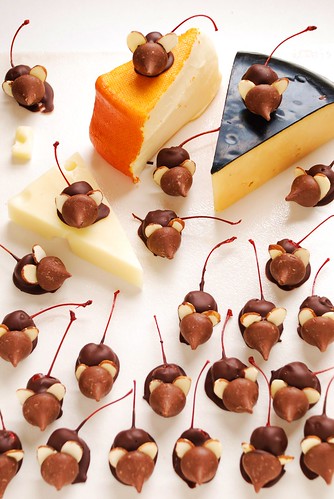
Recognizable, right? It’s like a trick AND a treat all wrapped up in one adorable little package.

The last time I made these little guys I was sorely disappointed by a mushy final consistency to the dipping chocolate, so I took the time this year to learn how to properly temper chocolate at Cooking for Engineers (dot com). Theirs is a great article to consult for a broad discussion of methods and the science involved, and entire books are no doubt available on the subject. I will be detailing only as much as applies to this effort.

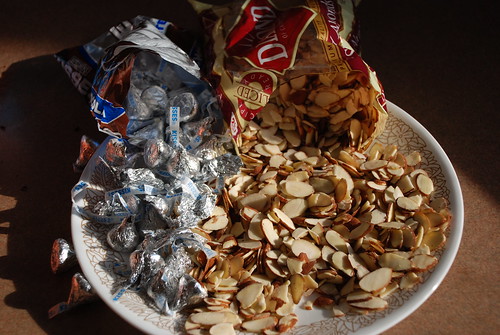
But first! Preparations are at hand. Ever shucked corn? Oh good, today you’ll be shucking Hershey Kisses.

Soon to be heads and ears.

You DO want to do this in advance of getting going with the chocolate, because it is way more of a pain in the ass to unwrap these as you go. You also want to sift through your giant pile of almond slices to pull out the pieces that are complete and have a nice look/size/shape to them. It seems obvious in retrospect, but at the time it didn’t seem as though so many of these slices would be so . . . unsuitable. Also, once the chocolate is on, it’s go time, and it’s not going to stop until you’re done.

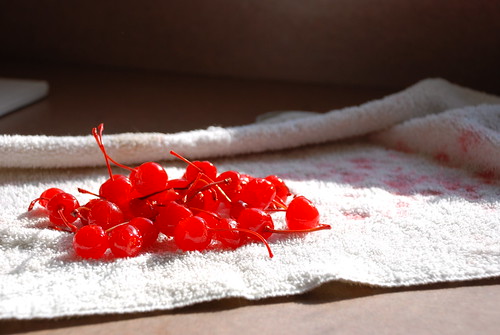
Now drain the cherries,

cherries.

then pat them dry in a towel. I made a little hobo bindle with my kitchen towel and rolled them around in there to dab ’em dry.

cherries.

Previously I was under the impression that tempering one’s chocolate was too difficult to attempt unless you were a chocolatier, figuring that even a chocolate that has seized still tastes pretty good, and as such never bothered. Turns out it’s not actually all that hard, though maybe I just had good luck today.

You will need a thermometer, but no super high heat candy thermometer necessary–a meat thermometer will do nicely. The easiest way to mess up your chocolate is to get water in it, which is why I’d avoid a rainy or otherwise humid day to take this on. So if you’re good on timing and equipment, let’s goOOOo!

Step 1: Make a double boiler.
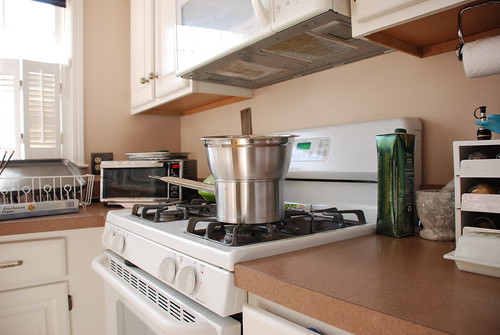
Take a metal bowl with a lip and place it on top of a pot with 1″ water, like so.

For double the boil.

Step 2: Chop your chocolate.
I did not do this, but it would have helped melt everything more easily. One third is going in the pot and the rest is staying behind for later.

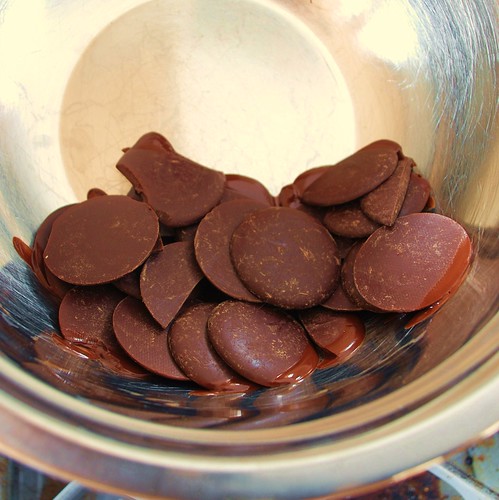
Step 3: Melt.
Put chocolate in bowl, set burner to medium high. Once the chocolate begins to melt, reduce heat to medium. Stir the whole time with a rubber spatula until the chocolate’s temperature is near 115 oF (46 oC) (for semisweet chocolate chips, if using milk chocolate or white chocolate 110 oF (43 oC))

Melt.

Step 4: Remove from heat
But leave the bowl in the pot for the next part.

Step 5: Seed.
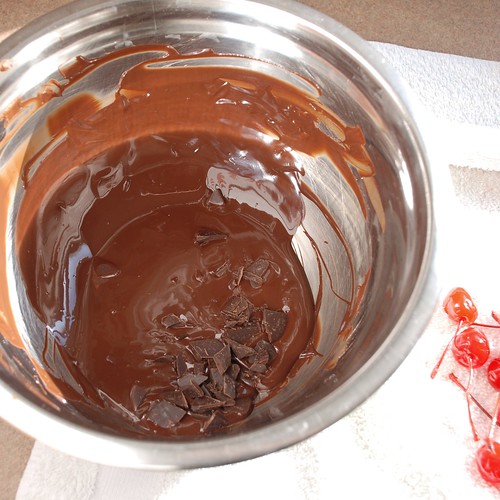
Take the remaining ounce of chocolate and stir into the molten stuff. Stir continuously until temperature is between 88 oF and 90 oF (for semisweet chocolate chips, if using milk chocolate or white chocolate 86oF and 88 oF).

Seed.

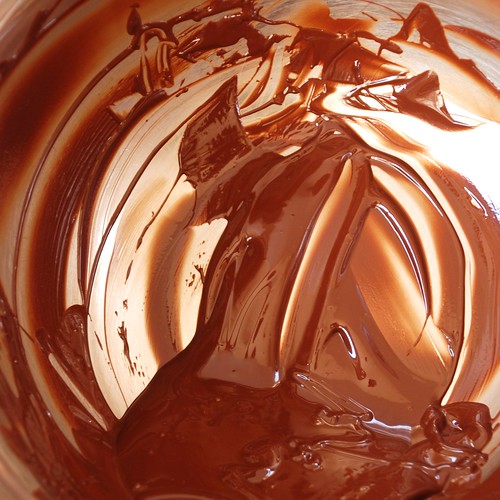
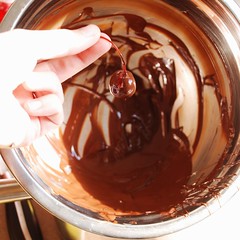
And that’s tempering chocolate, ta da! Here’s how beautifully smooooove it looks.

Perfectly shiny brunette.

Keeping the bowl at an angle helps with the dipping process (i.e. there’s more to dip into and it holds its heat better).

Step 1
Step 2Step 3!

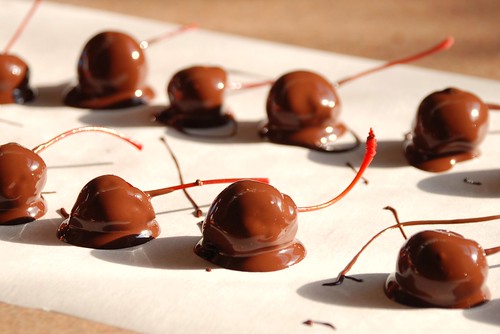
Lay out on parchment paper or wax paper.

Nothing special just yet...

Nothing special just yet...

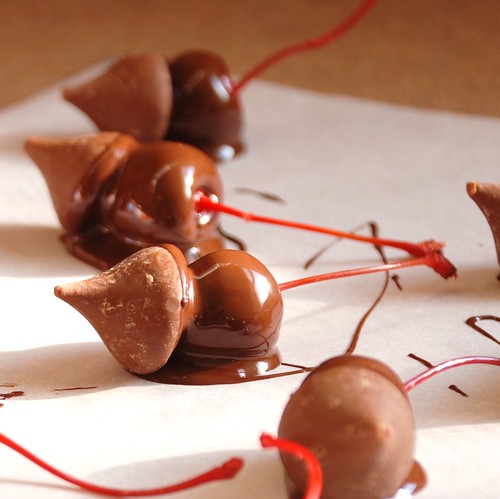
Dab on a Kiss.

(he can't hear you)

And ears.

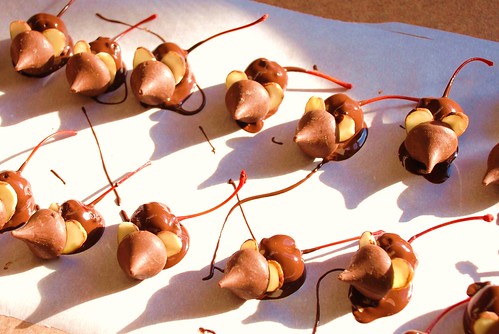
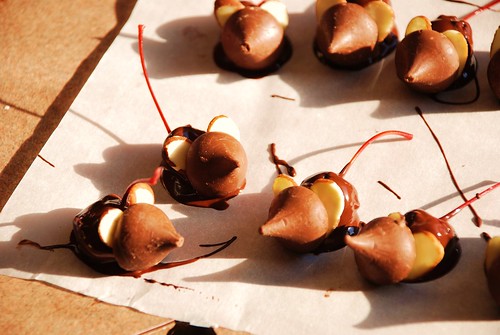
Well-tempered mice.

See how well-tempered my mice are? My, Aleta, you are positively . . . punning tonight, bahuffhuffhuff.

Well-tempered mice.

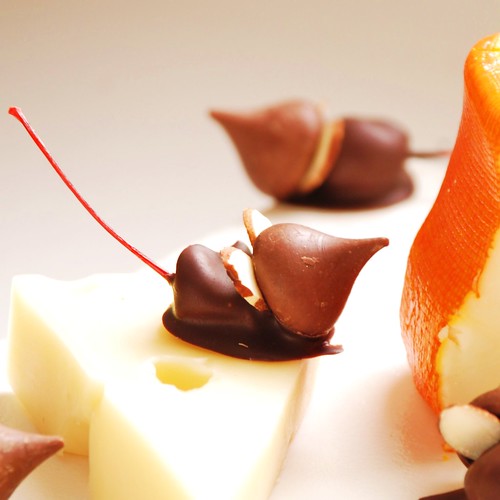
These little guys don’t look like much all stacked together on a plate, but I felt pretty clever sticking them on a cheese plate. Get it? Cuz they’re mice? Oh Martha Stewart, you have some counterculture competition coming your way.

Well-tempered mice.

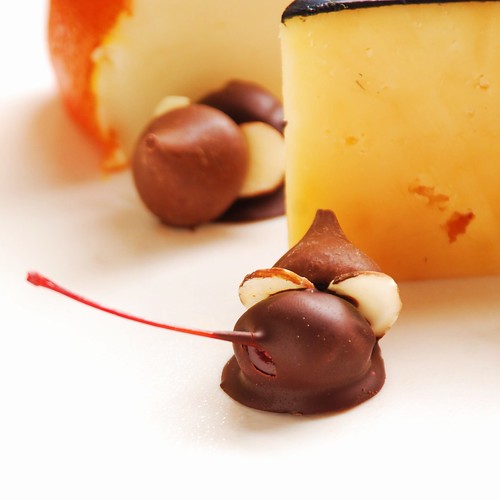
Cute enough to make up for illustrating what in true practice would actually be quite disgusting. I’m calling it a win. When made lovingly, personalities will emerge. There’s the ambitious one.

The curious one.

The so-frugal-it’s-downright-stingy one.

The stingy one.

And the one with a really undeniably cute butt.

The one with a cute butt.

Chocolate Cherry Mice

Small batch (makes 25)

1 small jar Stem-On Maraschino Cherries (10oz; ~25 count)
1/3 bag Hershey Kisses (4oz; 25 total)
4oz chocolate (avoid chips if possible; semisweet, dark, or milk as desired)
50 almond slivers (you’ll need to pick through a lot to get this many, so I recommend starting with a large bag, at least a cup)

Large batch (makes 75, safer in terms of chocolate temper)

1 LARGE (10 oz, ~50 count) jar Stem-On Maraschino Cherries
1 small (16 oz, ~25 count) jar Stem-On Maraschino Cherries
1 bag Hershey Kisses (4oz; 75 total)
12oz chocolate (avoid chips if possible; semisweet, dark, or milk as desired)
150 almond slivers (start with at least 3 cups)

Equipment:
Metal or heatproof bowl with lip
Meat thermometer
Rubber spatula. Word on the internet is no metal, no wood.
A sunny, low-humidity day best tempers chocolate, but rainy day mice will be just as yummy if not as shiny.
Drain cherries, do not rinse. Place a handful at a time in a kitchen towel, craft into a bindle and shake around to absorb as much moisture as possible. Leave in towel for now.

Unwrap all Hershey kisses and set on a platter for easy access.

Sort through almond slices until you have two nicely shaped slices for each mouse’s pair of ears.

Line 1 – 3 cookie sheets or cutting boards with parchment paper or wax paper. They need to be able to fit in your fridge!

Chop chocolate, reserving about a third chopped pieces (1.25oz for batch of 25; 4oz for batch of 75). If using chocolate chips, no need to chop.

Make a double boiler by placing a bowl with a lip over a medium pot/saucepan with about a half inch of water. Set burner to medium high, and once the chocolate begins to melt, reduce to medium. Stir continuously with rubber spatula. As soon as you can see no more individual pieces, check the temperature, and continue to cook until it just enters the appropriate target. Err on the side of removing too soon if the temperature is still rising rapidly as it nears your target.

Dark/Semisweet: 115 oF (46 oC)
Milk Chocolate: 110 oF (43 oC)
White Chocolate: 110 oF (43 oC)

Turn off stove, remove bowl from pot and place on a towel to absorb extra moisture. Add in remaining chocolate and stir constantly until temperature is at tempering range:

Dark/Semisweet: 88 oF – 90 oF (31 oC – 32 oC)
Milk Chocolate: 86 oF – 88 oF (30 oC – 31 oC)
White Chocolate: 80 oF – 82 oF (27 oC – 28 oC)

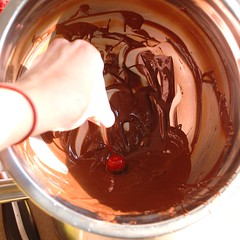
Holding stem, dip each cherry in the liquid chocolate, then set on parchment/wax paper. Set your mice about two inches apart to allow space for the Hershey Kiss and a little fiddling, and so no tails are caught in his neighbor’s warm chocolate.

Once all cherries are dipped, and starting at the beginning again, set a Hershey Kiss in front of each cherry to make a head. It helps to rest it on the cherry at an angle, as though the mouse is looking up. Aesthetically, an upturned nose is cuter.

Once all cherries are headed, and starting at the beginning again, stick one almond slice on either side of the head to make ears. Try not to touch the wet chocolate, but you can use the Hershey Kiss and the tail to help position these just so. If the chocolate is not tacky enough, wait a couple minutes and try again, but be careful not let it get too cool.

And finally, once your mice can hear you, set platters in fridge for 1-4 hours to firm up. To remove, seize the mouse by its tail. Squeak!

Serve on a cheese platter for maximum effect. Really, it’s so adorably cute.

Chocolate Cherry Mice

Part of the reason for my lapse in posting has to do with the whole rigamarole of planning something at least moderately unique and replete with a set of photographs. If this site had no photos, I’d update like, every day.

But I’ve been concocting all kinds of late-night improvisational meals and desserts and sharing only with my closest friends. Omnomicon’s mission statement is really to share dinner parties with the Internet-at-large, and so I feel like I’ve really been leaving some important guests off the list. The improvisational nature of these goodies really impede their shareability—I’m most creative around midnight, substituting everything for what I have on hand with guests gracing my living room, and I never know if it will truly come out. To photograph would be rude, and seems to jinx my success anyway.

So despite a lack of photographs, I have to share what turned out to be my most incredible late-night cheese platter to date. Use your colourful imagination to pretend that my house is impeccably kept and my serving platters not chipped. Imagine also the excellent company eccentrics such as Dano and myself might keep, and you’re probably right on.
World’s Most Incredible Improvisational Cheese Platter
intended to be served at least two hours after dessert, between the hours of 12am and 3am

Please amend according to your own stockpile of cheese & emergency guest crackers. I’ve paired the components together in the manner in which they are intended to be enjoyed, but of course experimentation is bound to occur.

1 box Water Crackers
8 oz whipped Neufchatel cheese mixed with 2 tbsp pesto concentrate (found in the fancy part of the pasta aisle in a paint-tube)

Leftover cheese from dinner, in this case, fresh mozzarella
1 tbsp leftover fig paste (just dab the mozzarella in there…this stuff can be overpowering)

Lindt Excellence Dark Chocolate Chili Chocolate bar, each square cut into four pieces
Cold tart green grapes, to cool the mouth after each piece of chocolate

Babybel cheese (the delicious little round things in red wax, just because they are hell of fun)

Ideas for variations:
Whole sugar-toasted almonds
Frozen sliced Ho-Hos (don’t laugh, they’re surprising and delicious)
Some kind of meat and earn yourself the right to call it charcuterie
Apricot jam substituted for fig paste
Make a cheese ball of the pesto cream cheese: roll in pine nuts & stick on dried cranberries


daily nom #8

If you don’t hear from me in the meantime, Happy Holidays from Omnomicon! Treat yourself to something delicious on my behalf.

<3,
Aleta

I don’t have much to say about the Daffodil Cake other than it appeared in my What’s Cooking in Massachusetts! 4H cookbook, and a quick Google is telling me that it is an Eastery-Springy-type of cake. So I guess I just missed Easter, which is fine because something in me still resists holiday seasonality. My guess is I still haven’t outgrown that jaded teenager phase, where family stuff is stupid and cheesey.
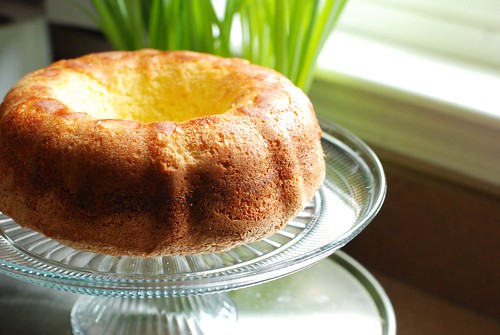
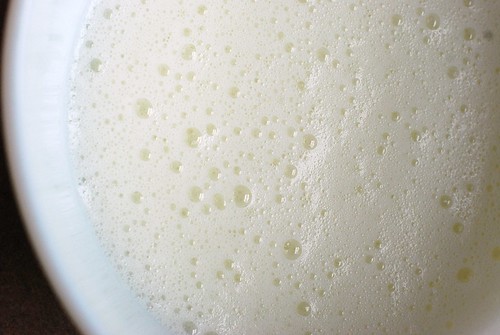
Foamy.

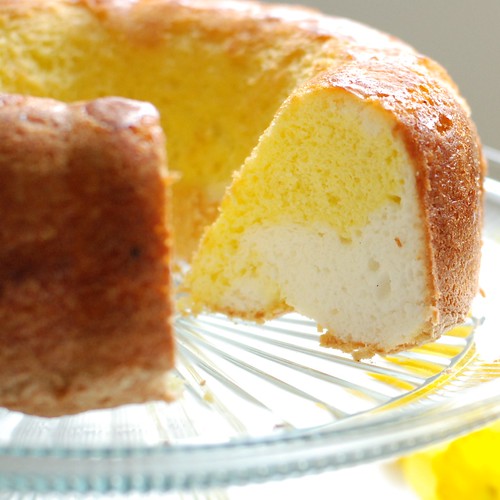
In line with the Spring theme we accidentally have going here, this cake is EXTREMELY light—for cake. It’s similar to an angel food cake, except that you are not left with an inordinate amount of unemployed egg yolks. In this cake, the egg yolks are used to make a second batter, this one all yellow, naturally, and the result is a little two-toned cake that is not as cool a surprise as say, a rainbow cake, but still pretty neat! It can be served in a manner similar to angel food cake, and in that vein would be quite delicious with some strawberries and whipped cream!

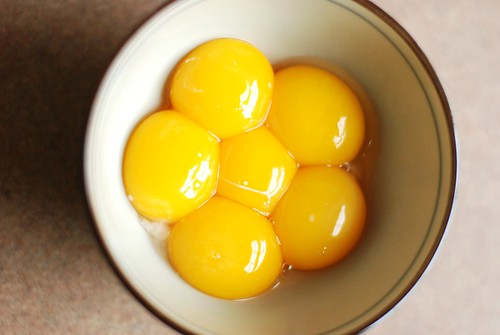
Egg yolks that are busily not going to waste.

I made this bad lawrence twice in an attempt to fix major problems from the first go at it. I cite as evidence:

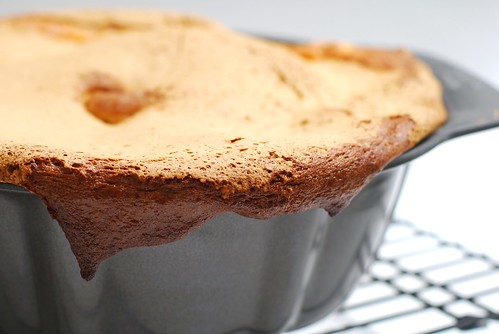
Exhibit 1.

You can see how including that particular photo might counter any culinary abilities y’all might have thought I had. The good news is that I only had to try this one more time to get much more satisfying results, and I identified my major issues here. The first:

Daffodil cake.

Let me just say up front that is not meant to be a dick joke.

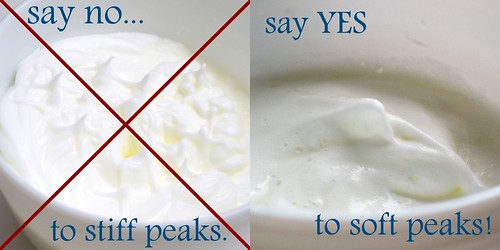
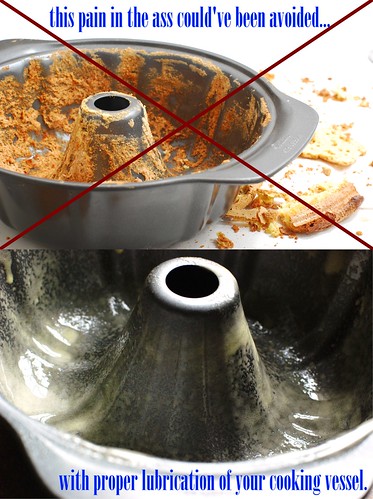
The terminology in the original recipe says “beat until stiff.” Now I’m going to venture that, in this case anyway, stiff does not imply stiff peaks, because the first time around it took me damn near 45 minutes with a handmixer to attain stiff peaks, which even then were passable at best. And then my cake exploded out of my pan and burnt to the bottom of my oven in a smelly mess (see above).

The other big hint that something was wrong was when I tried to remove the cake from the pan and then had to kind of grope it out with my fingers. It was embarrassing.

Mess.

Perhaps in 1962, they had nonstick tube pans they don’t make like they used to, but my nonstick bundt could not handle that baby, and as you can see, this time around I was plenty generous with my cooking spray. That cake might be soggy coming out of the pan, but it’s coming out of that pan on its own, goddammit!

Here’s a rare Omnomicon action shot.

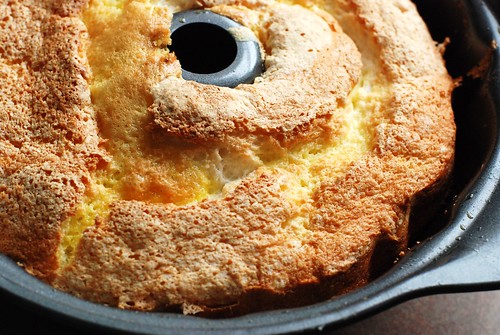
Two tone!

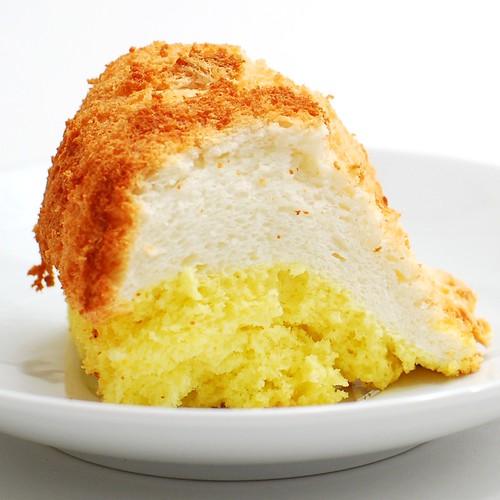
And the bottom was the most delicious part of this. If you aren’t big on presentation, I recommend eating the entire crust off the bottom, because the cake is moist and fluffy and once you flip it onto the bottom and leave it that way for a few hours, the delicious crunchy almost-meringuey texture becomes the texture of just . . . regular cake. Not as magical at all.

Nice bottom.

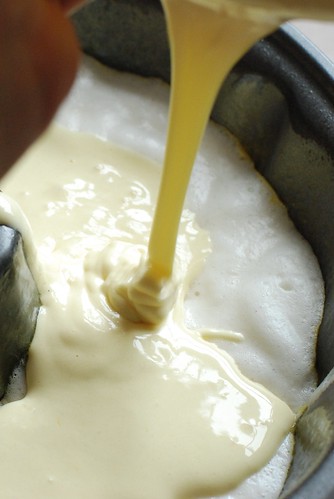
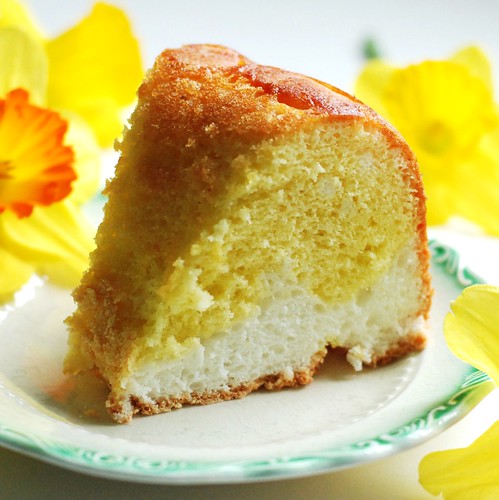
Interestingly, though you pour the yolk mixture on TOP of the whites mixture (which would logically put it on the bottom of the cake once flipped out of the pan), the yolk mix is denser and therefore sinks to the bottom of the pan. In this particular piece, it looks like a funky ying yang.

Cake Shui.

But when I overbeat the white mixture, the yolk stayed right where one would expect it to—to the top of the pan and bottom of the cake. I have to assume this is due to the increased firmness in a longer beat time for the white.

Daffodil cake.

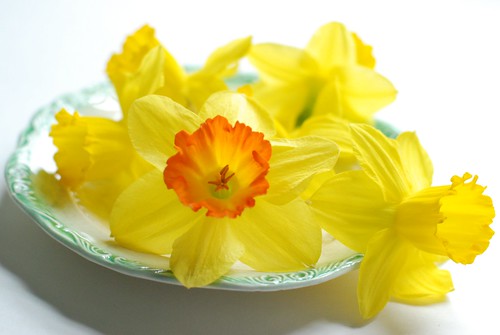
So then I took some literal shots with a daffodil, which really don’t complement the visage of the cake very well, but I bought those flowers and by golly they’re gonna be in my pictures!

Daffodil cake.

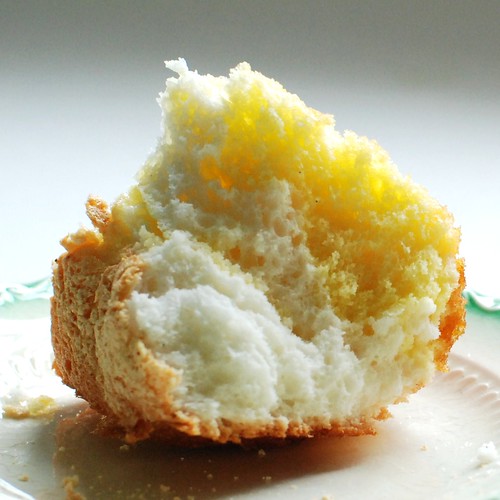
The best way to describe the plush airiness of these, however, is with this shot, wherein I tore a piece of cake in half. Verily, I rent it asunder for the visceral pleasure of it.

Daffodil cake.

And then one more picture of daffodils. Just so I can get my money’s worth.

Just daffodils. No cake.

Daffodil Cake
adapted from a 60s era 4H fundraiser book: What’s Cooking? In Massachusetts

6 egg whites
1/2 tsp cream of tartar
1/2 tsp salt
3/4 c sugar
1/2 c cake flour
1 tsp vanilla

Preheat oven to 325o.Beat egg whites until foamy. Add cream of tartar and salt, and beat until the mixture can hold a little bit of shape, but not until stiff peaks form (it should take you about 5 minutes to reach this consistency with a mixer on medium). Briefly beat in vanilla. Sift sugar and flour four times (seems like overkill to me, but just to be safe I went ahead and did it), then fold into egg white mixture. Pour into well-greased tube or bundt pan and set aside.

Now it’s time for the egg yolks!

6 egg yolks
1 tsp vanilla
1/4 tsp salt
3/4 c sugar
3/4 c cake flour
1 tsp baking powder
1/4 c boiling water

Put about 2 c water on the stove to boil. You’ll want to measure your boiling water after it’s come to a boil instead of before (what with evaporation and what have you). Beat egg yolks 3 minutes, add salt and vanilla, then gradually beat in sugar. Sift the flour and baking powder four times (again, it couldn’t hurt) and add alternately with hot water. Pour atop the white mixture in the pan.

Bake 50 minutes, let cool completely (at least an hour) before removing from pan.

Serve by itself for a cottony delicious treat, or with fruit and the whipped topping of your choice for a more full-blown sort of dessert.

Fun variation:
So some versions of the daffodil cake include a lemon icing, and this one in particular calls for either vanilla or lemon extract in the yellow batter. My awesome idea is to dye the white part with lemon extract and the yellow mixture with vanilla. It will taste the same, and 90% of people won’t notice which is which, but it’ll be really funny for that one person with the particularly sharp tastebuds.

Daffodil cake.

nutrition summary (for 1 of 8 servings): 260 calories, 4g fat, 0g fiber; 5 weight watchers points

So I know diet diner food isn’t a great sell for everybody, and frankly, I think baking takes far prettier pictures. That said, I have, for Valentine’s Day, a visual gift for all y’all. Strawberry shortcake is a beautiful thing all on its own, but for dessert for two, it can be improved upon.

Generally, in place of shortcake, I make some sweet biscuits, slice ’em open and throw some sugary strawberries and whipped topping on there. However, I’ve been reading aaalllll about different flours and decided to try out the theory that the low protein levels in cake flour makes for a more perfect crumb.

OH MY GOD, I will never go back to all-purpose flour. All-purpose flour varies from region to region and season to season, so while in theory it can make for a seasonal flair, there’s something to be said for fabulous consistency. This recipe makes a tender, delicious, and all-around omnommy shortcake biscuit.

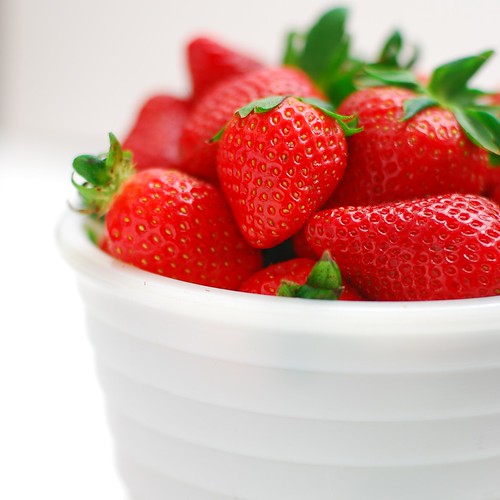
Enter strawberries.

Strawberries.

They’re out of season, but available in most stores. Do yourself a favour and throw out any that aren’t red inside. White strawberries are blech, ugh, and above all else, yucky.

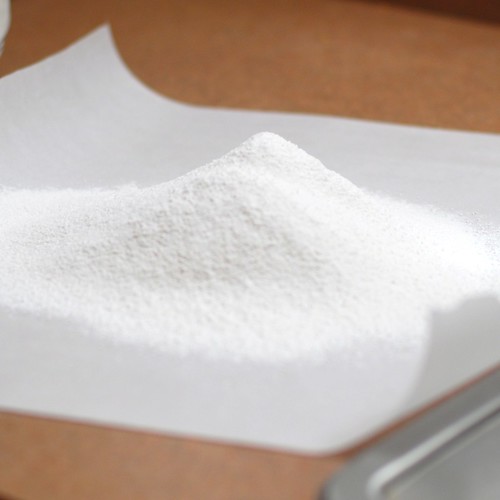
Here’s how to measure your flour perfectly. First, sift onto a flexible cutting board or, as seen here, parchment paper.

Flour!

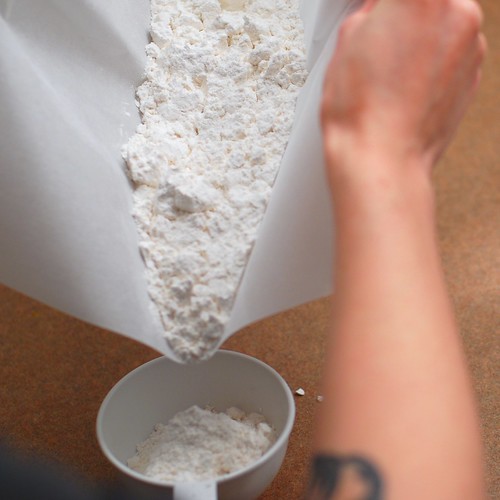
Funnel the flour into the measuring cup. Oh hey, bitch has tattoos, check that out.

Measuring . . .

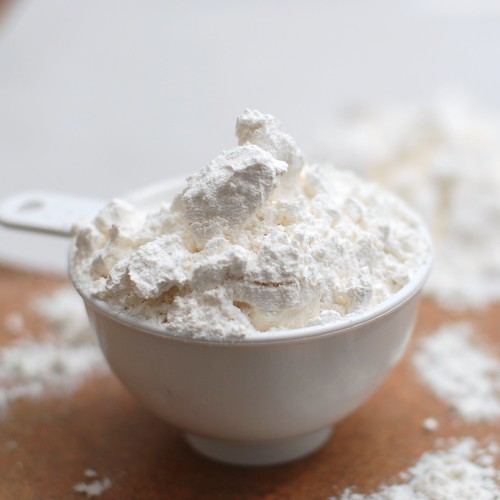
Overfill the cup with flour, and DO NOT shake to level it off–this repacks the flour and undoes all your fancy sifting.

Abundance.

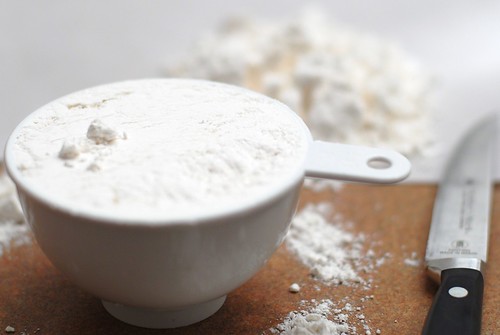
Instead, kinda slice off the top with a knife into the sink, or back into your flour bag/box if you can manage it. It’s messy, but it’s the best way.

Cut!

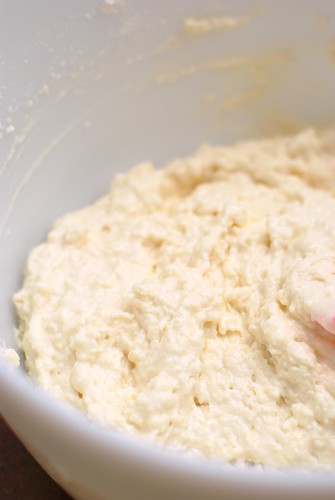
Use a pastry blender or two knives to blend the butter into the flour until it kinda disappears in there. Then add some heavy cream, light cream, or fat free half and half. This is a batter rather than a dough, so no folding out is required, and it will be goopy.

Pre-shortcake.

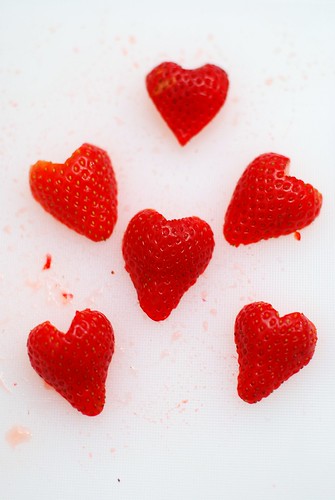
And hey, back to the strawberries! Except this time they’re seasonally-themed.

I <3 strawberries.

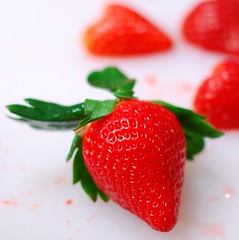
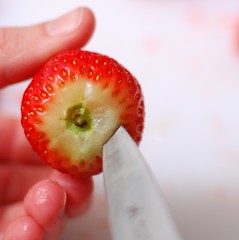
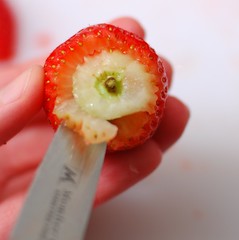
Select the pointiest berries to create the hearts. Then remove the stem and carve out the little stem-pit there. Also, this berry was a poor example, as there was a lot of white under that stem.

Pointy berry.Shink!Scrooch!

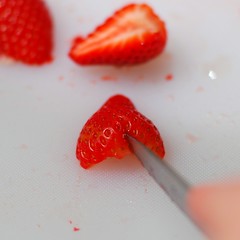
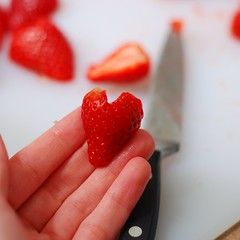
Cut the strawberries in half length-wise, then carve a little V out of the top. To further carve out the heart-shape, slice from the already-sliced side and round out the edges. This takes a little bit of practice, and I really didn’t know how to show it in photos (sorry!). Really, though, the strawberries are going to be pushed into the batter anyway, so the edges really don’t have to be all that perfect. They just take better pre-baked photos that way. And that’s how to make strawberry hearts.

V . . . not consummate, sadly.<3.

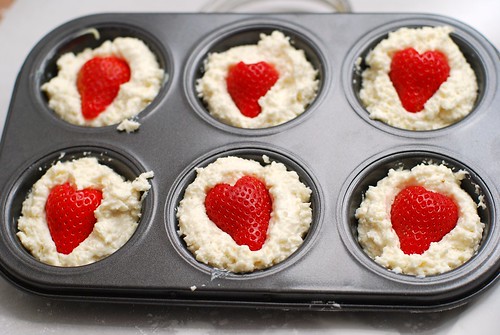
Scoop two heaving tablespoons of batter into each spot of your muffin pan, then press one of the strawberry hearts into each.

Oh look, it's all my love.

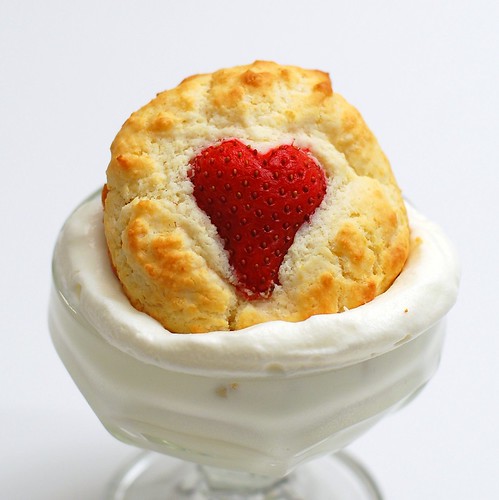
Then bake to perfection. And hey, don’t serve yours this way . . . you need to serve it with sugared strawberries. Really. Trust me. This just took the best picture.

Much love.

Strawberry Heart Shortcake Cupcakes
makes 8 cakes

1 lb fresh strawberries.
2c sifted cake flour (if using all-purpose flour, which is not recommended, reduce to 1.75c sifted)
1 tbsp baking powder
3 tbsp sugar (1 tbsp for the shortcake, 2 for the strawberry topping)
1/2 tsp salt
6 tbsp cold butter
3/4 c light or heavy cream, half and half, or fat-free half and half
Whipped cream, whipped topping, or cream-in-a-can

Rinse the berries, reserving 8-10 small to medium ones with pointy tips. These will be your hearts. Heat the oven to 450.

Slice remaining strawberries into quarters and toss with 2 tbsp sugar to coat. Set aside.

Sift flour on a flexible cutting board or parchment paper. Gently pour into measuring cup, then level off with a knife. I’ll repeat it again just in case you missed it the first time: do not level off by shaking or tapping the measuring cup. You’ll get dry nasty muffins, and nobody wants that.

Sift the sifted flour AGAIN, this time with baking powder, salt and sugar. Cut up the butter, which should have been in your fridge all this time, a little bit to get the blending going. Dump into the flour, then use a pastry blender or two knives to blend together. You’re done when there are no remaining chunks of butter in there. Add in the cream or half and half all at once, then mix until all ingredients are moistened.

Let that sit a bit while you create your strawberry hearts. Pull off stems, carve out the pit with a paring knife, then slice in half. Shape each half into a heart by carving a V at the notch (where the stem used to be). Since the berries will be pushed into the dough, the edges don’t need to make a perfect heart, but the V at the top is pivotal.

Bake for 12 minutes. Remove from oven, let cool a minute or two in the pan, then transfer to wire rack to cool. Serve to your dearest love with the sugared strawberries and whipped cream.

Love, Aleta.

Love,
Aleta