online poker

Omnomicon

say it with me now, “om nom nom”

Subscribe to Omnomicon

Archive for the ‘how to make…’ Category

So about a lifetime ago (and to be fair, a hamster lifetime) I posted about how to buy herbs and spices in bulk because it’s way the hell more affordable. If you’ve ever bought your spices this way, you may have encountered the situation where you just don’t know how much to buy. It’s hard to eyeball about how much basil would fill a jar, and then you introduce things like whole cloves into the equation and my eyes glaze over outright. What can I say, I’m not a geometry girl.

That in mind, I sat down last week and weighed out a reference for next time, lest my poor eyes once again endure the aforementioned abuse. The weights indicated pertain to the larger containers like these, except where indicated by (sm).

Spices!

Spice and Herb Weights
(serviceable quantities, approximately 1 average grocery store jar)

Spice/Herb Grams Ounces
Allspice (sm) 25 g 0.88 oz
Alum (sm) 53 g 1.87 oz
Basil 10 g 0.35 oz
Bay Leaves g 0 oz
Caraway Seed (sm) 49 g 1.73 oz
Cayenne Powder 51 g 1.8 oz
Chili Powder (Chipotle) 56 g 1.98 oz
Cinnamon (ground) 42 g 1.48 oz
Cinnamon Stick 8 sticks g – oz
Cloves (ground, sm) 25 g 0.88 oz
Cloves (whole, sm) 30 g 1.06 oz
Coriander Seed 26 g 0.92 oz
Cream of Tartar 74 g 2.61 oz
Crushed Red Pepper 37 g 1.31 oz
Cumin Powder 48 g 1.69 oz
Dill Seed (sm) 24 g 0.85 oz
Fennel Seed 44 g 1.55 oz
Garlic Powder 62 g 2.19 oz
Marjoram Leaves (sm) 5 g 0.18 oz
Mustard Powder 48 g 1.69 oz
Mustard Seed (sm) 39 g 1.38 oz
Nutmeg (ground) 51 g 1.8 oz
Oregano 14 g 0.49 oz
Paprika 44 g 1.55 oz
Peppercorn, Black 60 g 2.12 oz
Poppy Seed 60 g 2.12 oz
Poultry Seasoning 40 g 1.41 oz
Sage (ground, sm) 17 g 0.6 oz
Sesame Seed 51 g 1.8 oz
Star Anise 19 g 0.67 oz
Thyme (sm) 10 g 0.35 oz

Happy weighing!

Keep your receipts!

The holidays are finally over. For the last two months you’ve put as much deliciously rich foods and mediocre cookie plates as can fit in your mouth at any one time. Upon returning to work, you’ve discovered that your work slacks are a little tight, and you’re considering eschewing your creative and unique New Year’s resolution in favor of the old “lose 20 lbs” standby, because while cable knitting looks really cool, who has time to make anything big enough to be useful?

No worries, everyone else is feeling it too.

Now that family commitments have been satisfied and friends are finally back from where-do-your-parents-live-again, it’s the perfect time to get everyone together for a party to celebrate the end of the bustling season and the beginning of two miserable months before March even begins to tempt you with hints of Spring. What better way than to flavor trip?

Miraculin is really nothing new to dedicated foodies, who probably read This NYTimes Article last year, or considered purchasing some from ThinkGeek. If you are not a dedicated foodie, or do not read the New York Times, good for you! Here’s a simple breakdown of the deal:

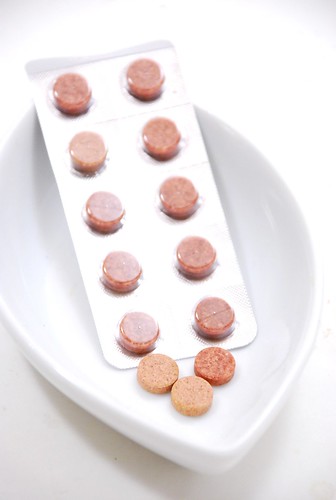
Oh hai thar, miraculin tablets!

Miraculin is a chemical derived from the Miracle Fruit of exotic West Africa. It “tricks your tastebuds into thinking sour and bitter foods are sweet.” I can’t imagine that exact sentence hasn’t been used like, a bajilion times, so I put it in quotes, even though I’m not entirely sure who I’m quoting. The experience lasts 20-40 minutes, during which time lemons taste like sweet lemonade, Tabasco has a chocolatey overtone, and sweets taste the same as ever. It is legal in the United States and most other countries, and is not a drug in the sense that your mind is not affected, just your tastebuds. I’m not sure how Mormons might feel about that, so please speak up if you happen to know. There has been talk of using it as an aid to diabetics, in a fashion similar to Stevia, but the process in the US has been held up by red tape, and I suspect that the lingering after-effect stymies the actual practicality of this idea.

Flavor tripping makes a great alternative to the standard “drink beer until we’re drunk” model of throwing a party, and gives an easy (and relatively inexpensive) focus—each serving costs about a dollar, and citrus fruit should be flooding in from Florida any day now. And it’s good clean fun!

But what makes it especially relevant to this time of year is that diet thing. Instead of feeding guests brownies and cookies,* it’s fruit, and tasty enough sneak a few vitamins into someone’s day. Even after the effects have worn off, the lemons and limes can be used for drink garnish, and don’t be surprised if you see a cohort unpeeling an orange or snacking on carrots later in the night.
*(Okay, you can still make your famous brownies, I understand)

Magic pill.

We had a flavor tripping component to our Halloween party a couple years back, and it went over very well. Everyone agreed that grapefruit are simply HEAVENLY on the stuff, and we sampled various sour beers and all but emptied my condiment shelves. I managed to convince 30 or 40 people to take the pill all at once, waited until it was in everyone’s mouth and announced “Haha, that was acid. Enjoy the light show, ladies and gentlemen!” I would not recommend making this joke around family or children, lest you instantly earn the scarlet letter of drug-addled hippy on the fast-track to self-destruction.

Here is pretty much the only relevant shot I have from that totally righteous party. Featuring myself as Lydia the Tattooed Lady, and Sarita as one hot secret service type.
Tasty lemons

On a completely unrelated side note, even a year out, and I’m still really proud of that costume, even if my entire torso was sticky for the first two weeks of November.

Moving right along, below is a list of items that we found especially interesting under the exotic hypnosis of the Miracle Fruit:

  • Lemons, naturally
  • Limes, and though I usually like sour foods anyway, this is the only time I have ever enjoyed a lime
  • Grapefruit, which tastes like a delicate blend of manna and angel’s breath, with notes of the flutter of a dove’s wings
  • Carrots, sweeter than you think!
  • Tabasco, and be careful not to eat too much because it is very delicious
  • Vinegar, which is a real trip
  • Guiness
  • Sour Beers

There were many other beers being a-sampled, but I only managed to try a couple. Make sure that everyone knows to coat their tongue as the tablet dissolves on it. I let it dissolve in the middle to tip of my tongue, which meant the lemons tasted wonderful until the juice made it down on the sides of my tongue and gave me a rude awakening.

Another warning: be careful if you’re prone to heartburn. While your mouth will be flooded with sweetness, you’re still swallowing a whole lotta citric acid (or vinegar, or spicy foods), so BEWARE.

It worked.

Do tell: have you tried the stuff, or are you of the “oh, I always wanted to try that” camp? What delights did you find in your cupboards?

shameless plug: the dishes pictured are for sale on my Etsy site: Aleta’s Kitschen.

ENLIGHTENING FEEDBACK


Kalie, who I’m assuming is Mormon, answered a pivotal question I posed:
Mormons love it! We just can’t do the whole sour beers and Guiness thing!

Part of the reason for my lapse in posting has to do with the whole rigamarole of planning something at least moderately unique and replete with a set of photographs. If this site had no photos, I’d update like, every day.

But I’ve been concocting all kinds of late-night improvisational meals and desserts and sharing only with my closest friends. Omnomicon’s mission statement is really to share dinner parties with the Internet-at-large, and so I feel like I’ve really been leaving some important guests off the list. The improvisational nature of these goodies really impede their shareability—I’m most creative around midnight, substituting everything for what I have on hand with guests gracing my living room, and I never know if it will truly come out. To photograph would be rude, and seems to jinx my success anyway.

So despite a lack of photographs, I have to share what turned out to be my most incredible late-night cheese platter to date. Use your colourful imagination to pretend that my house is impeccably kept and my serving platters not chipped. Imagine also the excellent company eccentrics such as Dano and myself might keep, and you’re probably right on.

World’s Most Incredible Improvisational Cheese Platter
intended to be served at least two hours after dessert, between the hours of 12am and 3am

Please amend according to your own stockpile of cheese & emergency guest crackers. I’ve paired the components together in the manner in which they are intended to be enjoyed, but of course experimentation is bound to occur.

1 box Water Crackers
8 oz whipped Neufchatel cheese mixed with 2 tbsp pesto concentrate (found in the fancy part of the pasta aisle in a paint-tube)

Leftover cheese from dinner, in this case, fresh mozzarella
1 tbsp leftover fig paste (just dab the mozzarella in there…this stuff can be overpowering)

Lindt Excellence Dark Chocolate Chili Chocolate bar, each square cut into four pieces
Cold tart green grapes, to cool the mouth after each piece of chocolate

Babybel cheese (the delicious little round things in red wax, just because they are hell of fun)

Ideas for variations:
Whole sugar-toasted almonds
Frozen sliced Ho-Hos (don’t laugh, they’re surprising and delicious)
Some kind of meat and earn yourself the right to call it charcuterie
Apricot jam substituted for fig paste
Make a cheese ball of the pesto cream cheese: roll in pine nuts & stick on dried cranberries


daily nom #8

If you don’t hear from me in the meantime, Happy Holidays from Omnomicon! Treat yourself to something delicious on my behalf.

<3,
Aleta

The mimosa. A delicious blend of fruit & alcohol that transforms even the most mediocre of brunches into an experience nothing short of magical. But alas, there are times where maybe perhaps a little bit of drinking might not be in the cards. Perhaps your hangover dictates brunch, but the thought of another drink, well, let’s just say you don’t want to think about another drink.

The solution is simple: Faux Mimosa. In addition to the dilemma above, it can be applied to a number of other problems as well. Perhaps you have that teetotaler friend, or worse, a decidedly non-teetotaler friend who gets whiny and annoying. Maybe you have a sister or niece *just* shy of 19 and you want to be the cool older sister (or cool aunt) without all the baggage of being arrested for serving alcohol to someone underage. How cool would you be to have her pals over, as you bemusedly observe the pitch and slurredness of their gossip rise over the course of the evening, so sure they are that this is the real deal. I would warn that you might end up providing crash space.

So imagine my delight in finding this recipe:

Faux mimosa.

Side note: while the Fish House Punch looks like it might be pretty good, you’d think they could come up with a better title. Really. Or just run with it and garnish with fish heads.

This gem comes to us via that 1977 classic Sharing Our Best, a collection gathered by the Devil Worshipping Green Mountain Deputies Association of Vermont. The Devil Worshipping part isn’t explicitly addressed, except for THAT HUGE UPSIDE-DOWN PENTACLE ON THE COVER, which couldn’t possibly be a gross oversight.

Faux mimosa.

We begin our Champagne Mocktail odyssey.

Buy local . . . soda.

I like to buy local whenever possible. Turns out Polar makes its soda, like, 10 miles that way, so it’s extra fresh and better retains its vitamin content. That’s how that works, right?

I decided to squeeze my own orange and grapefruit juice, since I really don’t drink these things anyway and didn’t want to surrender the fridge space. These are also locally-grown oranges and grapefruit. I just love going orange-picking, they have this great farm right in Westborough.

Citrus. Decidedly not local.

I’m just kidding. Citrus plants don’t grow in New England.

In an awkward proportion, to get a cup each of orange and grapefruit juice, it took 3 oranges and 1.5 grapefruit. I think this probably changes depending on season, specific varietal and origin of your oranges, though the grapefruit proportion seems as though it would be a little more reliable. As a frame of reference, 1 orange = 1/3 c juice and 1 grapefruit = 2/3 c juice.

The remains.

The easiest way to get juice out of citrus is with a citrus reamer. They’re cheap, extremely effective, and feel like way less of a pain in the ass than one of those little cup things. Also, you can strain the juice as you make it, which is convenient. Just poke it in your fruit there, mess up the insides, then let the juice drip into the sieve, and presumably the bowl underneath. Last step is to squeeze the orange/grapefruit around the reamer and rotate.

How to ream out an orange.

Get out your finest $5 Ikea pitcher.

I actually do love this thing.

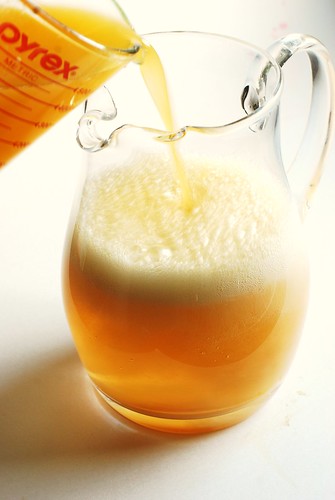
And pour your non-alcoholic champagne.

Ginger ale.

Faux mimosa.

Faux mimosa.

Looks like a nice witbier, eh?

Faux mimosa.

Pour into your completely inappropriately-shaped glass.

But mimosas are for girls. Girls with names like Kelli and Brittany. Let’s girl this up a bit, shall we?

A 3 on the girly scale.

Well, that’s nice, but Kelli and Brittany would kinda feel like you aren’t trying. Put some fruit in there, bitches love that shit.

On the girl scale, perhaps a 6

Okay, we’re getting close. Let’s just go all out.

Kelli and Brittany would totally drink this.

Drink on, ladies, drink on.

This was a bit sweet for my tastes, so I recommend excluding the extra sugar—it just felt so sticky sweet, it was much more refreshing after I diluted a bit with seltzer water. I also think there’s a little room for experimentation here down the seltzer water path, it makes for a dryer-tasting “champagne.” This inordinate sweetness is why you’ll notice I went from making Mock Champagne to Mocktail Mimosa. It just describes it better.

Faux Mimosa
from Sharing Our Best by the Green Mountain Deputies Association (1977)

Feel free to make this low-sugar or sugar-laden according to your preference. Serves 8.

1 liter ginger ale
1 c grapefruit juice (1.5 grapefruit if fresh-squeezing)
1 c orange juice (3 oranges if fresh-squeezing)
1 c water

Mix. Chill. Text Kelli and Brittany and see if they’re doing anything.

nutrition summary (1 serving with diet ginger ale): 23 calories, no fat, no fiber; about .5 weight watchers points

Aug-9-2009

how to oven-steam veggies

Posted by aleta under for veggie-heads, how to make...

Let’s get all healthy on your ass.

I’m not really good at veggie-centric recipes, mostly because I think they’re very good all by themselves simply steamed or roasted or even fresh. There are a few standbys for combining veggies—salads, soups, mixing them with oil and tossing with pasta—but I never come up with anything particularly noteworthy, and so here I am, writing a blog with an audience no doubt suffering from a collective vitamin deficiency. Sorry about that.

I’ll make it up to you by sharing a method for oven-roasting veggies that I found in my new favourite reference book Vegetables from Amaranth to Zucchini. It’s one of the few reference books that hold up against Wikipedia and Internet-at-large, and even though it cost more than a Physics textbook, I highly recommend it.

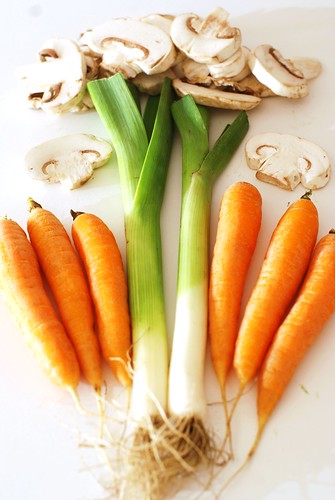
So here’s what I learned. Grab some veggies you have lying around, perhaps the hardier vegetables from your CSA share that survived the last 6 days of neglect. Perhaps also some mushrooms because it makes a nice little faux-sauce.

Let's put these babies to use.

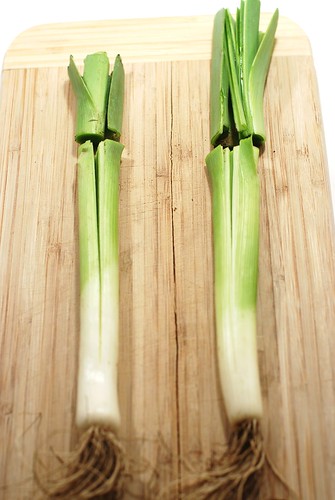
Clean a leek.

I sprung a leek!

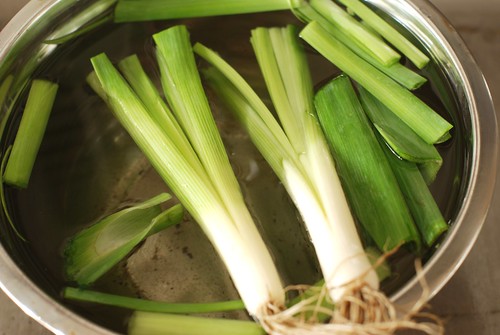
How to do this: slice lengthwise about an inch from the base, then rinse all the dirt out in a tub o’water by separating the leaves and rubbing out any dirt under there. Leeks trap dirt very easily, so rinsing is pivotal in preventing that gritty bite of dirt that momentarily makes you wonder if you broke a tooth. If you’ve ever broken a tooth before, otherwise it’s just gross.

The water douse.

The green parts are usually reserved for soups, but I usually throw them in too.

Next, mince some mushrooms. Toss with thyme, salt and a smiiiidge of sugar.

Mushroom bits.

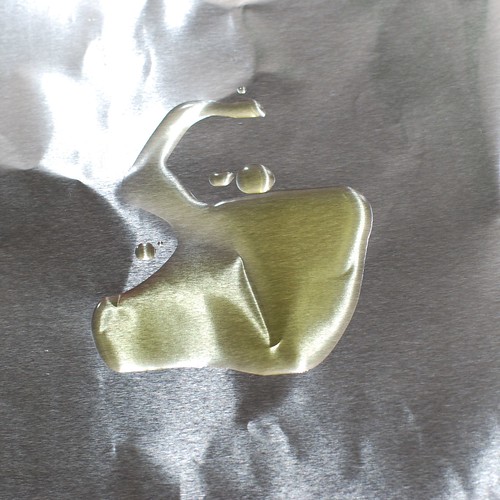
Now we build the packet. Drop a teaspoon of oil on about a foot of foil, then spread to coat.

Oil.

And layer the veggies.

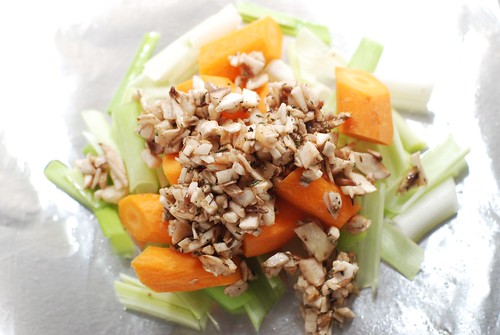
Leeks, carrots.

Plus mushrooms.

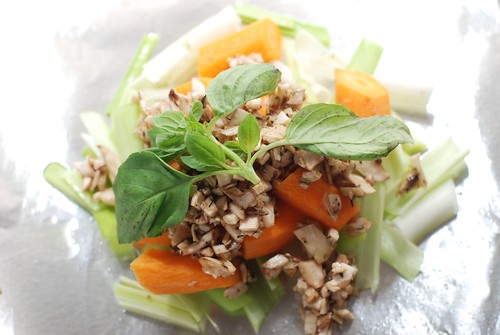
I had some sad-looking basil leaves that were about to kick off, so I put a bunch in here to lend some complexity of flavour. Of course, you can mince whatever fresh spices you have to get rid of in with the mushroom, but I was going for subtlety for once.

Spice it.

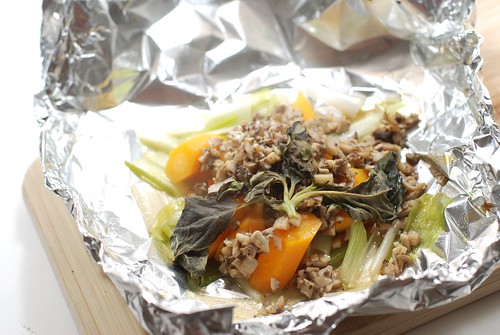
Fold over and pinch like a turnover.

Make like a turnover.

. . . and 20 minutes later, you have veggies with dinner. I did this in the oven at 400o, but it would work just fine on the grill if you have the spare real estate beside your steak tips.

20 minutes later...

Serve with rice, meat, or another packet of veggies.

Oven-Steamed Veggies

And that’s how Omnomicon is updated after way too much time off.

Oven-Steamed Veggies
as discussed in Elizabeth Schneider’s masterpiece, Vegetables from Amaranth to Zucchini.

This would work for pretty much any combination of veggies you love, but the mushrooms replace a traditional sauce and lend a level of satisfaction you might miss.

2 small leeks (or more), washed & cut into 1″ slices (about
6 small carrots, peeled & cut into 1″ slices (about 1/2 a lb)
4 oz mushrooms, minced finely
3 tsp olive oil (or other oil of you choice)
a sprig of fresh herbs you like
1/2 tsp thyme
1/2 tsp sugar
1/2 tsp kosher salt
1/8 tsp pepper

Preheat oven to 400o. Toss mushrooms with thyme, sugar, salt & pepper. Add in 1 tsp olive oil.

Cut two 12″ lengths of aluminum foil and coat half of each with 1 tsp olive oil. On each, layer half each of leeks, carrots, mushroom mixture and top with a sprig of your favourite herb on the oiled half. Fold over and pinch around to close, as though sealing a turnover. Place on a cookie sheet and bake for 20 minutes.

nutrition summary (1 serving, 1/2 of recipe): 145 calories, 7g fat, 4.5g fiber; about 3 weight watchers points

Tags:
May-4-2009

how to make hot sauce!

Posted by aleta under how to make...

Alrighty, kiddos! Today we’re making hot sauce. Yusssss! I did a bit of research, paired it with existing knowledge, and came up with this little spot of education.

Turns out that making hot sauce is a pretty inexact art, which makes it very easy to customize to your own liking. Different methods include aging, fermentation, starting with a mash, and then what I picture here, which requires thinking ahead a scant 2 hours instead of 3 years. With my lacking “planning ahead” skills, this is the only method that could possibly prove useful to me. Also, this makes a very thoughtful but inexpensive gift for most dudes.

Even “quick method” hot sauce is versatile. You can add ground spices, different mixes of peppers, unique vinegars, and create different textures all according to your preference. I went with a very simple recipe that uses jalapenos, as they are the most readily available hot pepper in my area, roasted garlic because it’s delicious, and red wine vinegar to give it some personality. My aim was a sauce with the simplicity, texture and versatility of Tabasco Sauce, but different because why else would you make your own, am I right?

Hot hot hot.

To begin with, we need to lay down some food safety rules. This is not the kind of food safety where we worry that we might undercook the egg the 1 time out of 20,000 that it contains salmonella. No no, we’re talking the kind of sure fire situation where “you’re doing it wrong” quickly becomes “fuck, my eyes!” so you want to be a little careful.

Here’s some totally excellent, completely free advice.

free advice.

Vinyl, unpowdered gloves which can be found by the hundred at your local drug store. I use these any time I cut a hot pepper ever since that time I had to dunk my nose in yogurt after a mistouch mishap. They’re cheap and disposable and well worth the investment. Without gloves, I find that fieriness has made its way under fingernails, on eyelids, in the corner of my mouth . . . pretty much anywhere I ever get a little itch. You’ll find yourself far less likely to itch with the gloves on, and when you’re done your nail beds won’t burn either. Be sure to be wearing these when you clean the knives and cutting board you use, and clean these well. End advice.

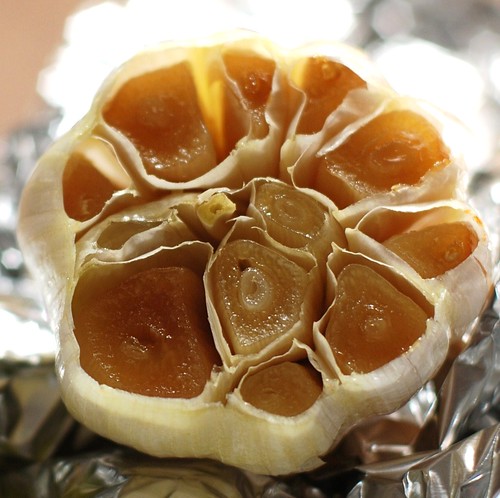
Now that we have that boring bit out of the way, we roast garlic, which takes about 45 minutes. I don’t think I have to tell you that roasted garlic is always better than garlic of any other kind.

Roasted.

It makes your house smell good and your breath smell bad. Interesting dichotomy, garlic.

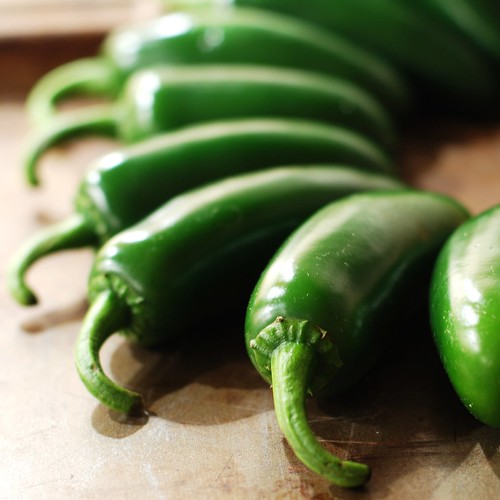
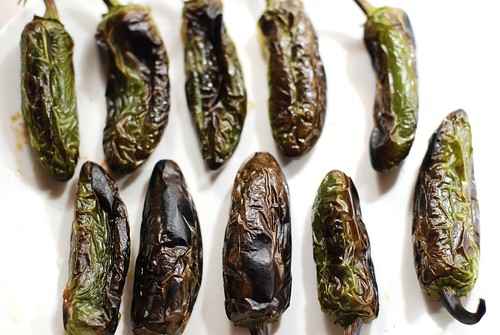
Now crank on up to broil and burn up some jalapenos! Five to ten minutes each side under the broiler should do the trick, but what you’re really looking for is the skin to blister, turn black, and pull away from the body of the pepper ever-so-slightly.

Burnt, but the good kind like you want.

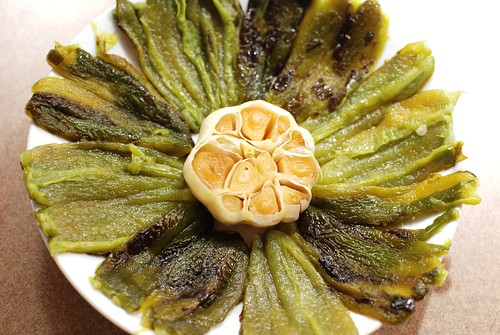
Roasting the jalapeno brings out a little more flavour in addition to deepening the efficacy of its spiciness, and is worth the effort. After doing so, don your gloves, peel the skin, remove the seeds, and artfully arrange with the garlic head in a florally-reminiscent display of Springtime enthusiasm.

Spicy little flower.

Okay, you don’t have to do that really, but it’s an option. What you do need to do is chop these veggies up and dump them in a pot with some vinegar.

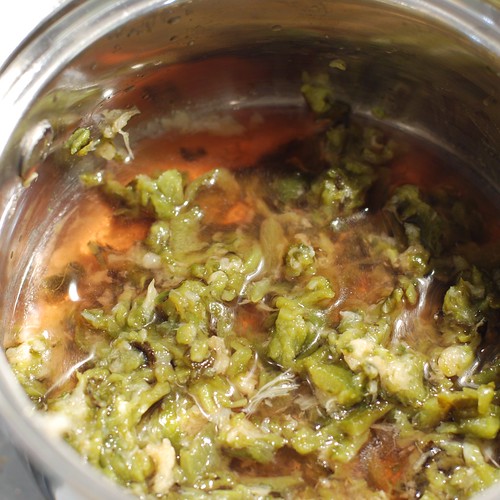
The simmer commencement.

The story doesn’t change much for the next hour, while the mix simmers slowly with the cook’s eye upon its liquidity. If it gets too chunky, add more vinegar. In all, I used 1.5 – 2 cups of vinegar. And here’s the result.

Hot stew!

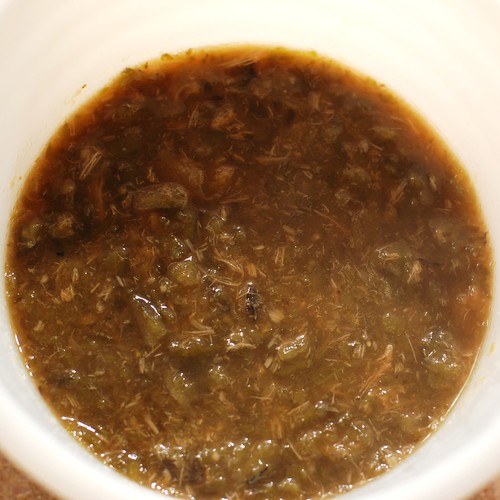
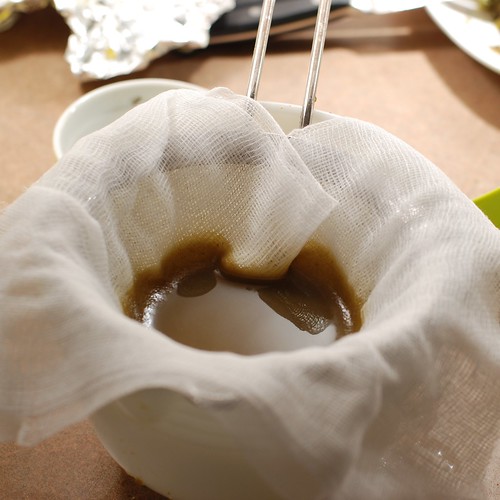
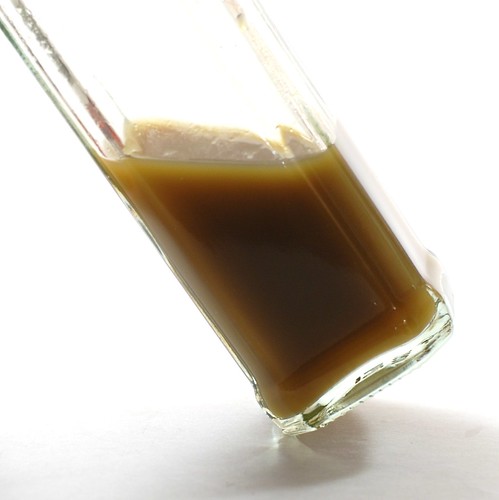
Strain as much as you like, if at all. I strained with cheesecloth in a mesh strainer 3 times for the texture pictured.

Chunk free.

And here’s our final product. The flavour is mild (about Tabasco strength), but pronounced. It comes on quickly, then recedes almost immediately, with practically no lingering. If any hot sauce enthusiasts happen to be reading, feel free to correct my terminology.

Jalapeno-garlic hot sauce.

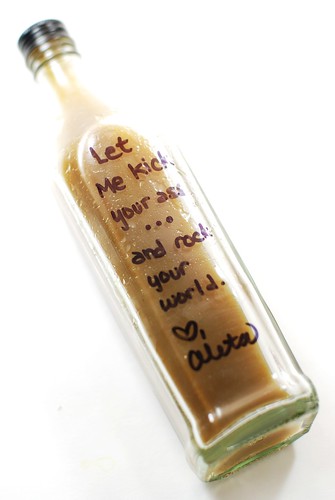
Oh, and what good is making your own hot sauce without a little sassy branding?

<3, Aleta

Variations

Think of this as more of a method than a recipe. You can effectively make any variety of amendments to the ingredients, add extra things and substitute others. This is just a jumping-off point. Here’s a sample list of ideas—think hot sauce fusion.

“Sweet But Not Innocent” > Habanero, mango, white vinegar
“Italian Stallion” > Basil, Italian peppers (mild), cherry peppers, tomato, balsamic vinegar
“The Asiatic” > Thai chili peppers, rice vinegar (mirin), dash soy sauce

So tell me, what would your signature hot sauce be? Make it interesting. Give it a cutesy name. Any neat packaging ideas? And if you follow through and make it, let me know, I promise I’m dying to hear about it.


Aleta’s Bad Breath Hot Sauce
brought to you by Omnomicon’s own singular ingenuity

1 head garlic
10 jalapeno peppers
1.5 c red wine vinegar
1/4 tsp sugar
1/8 tsp salt (two pinches? I did two pinches)

Roast the garlic by drizzling with 1 tsp oil, wrap tightly in foil, then bake at 325o for approximately 45 minutes. If you have a better way to roast garlic, then by all means, do it that way.

Char the jalapenos. Immediately after removing the garlic from the oven, flip the heat up to broil, then char each side of the jalapenos for 5-10 minutes. See pictures for reference, but the goal is black skin that is wrinkly because it has pulled away from the pepper.

Moving along, peel and de-seed the peppers, being sure to remove the light green veins to which the seeds cling. This prevents the seeds and veins’ bitterness from marring your lovely lovely batch. Pop the roasted garlic from its papery head, using a fork or toothpick, and chop, along with the cleaned peppers.

Dump peppers and garlic into a small pot with vinegar, sugar & salt. Bring to a boil, reduce heat, and lightly simmer, uncovered & on low, for about an hour. If the sauce begins to look too chunky, add more vinegar, but note that the more you do this, the more diluted the flavour will be. If it’s cooking down too quickly (like you want to add vinegar after the first 15 minutes), try lowering the heat further.

Strain a few times with a cheesecloth-lined mesh strainer into a small bottle. I used a Johnny Walker sampler for mine, and it looked just darling. For gift-giving purposes, nip bottles make excellent, cheap packaging, with the added bonus of a shot that first requires your sip. If strained, this should last a solid 3 months—I’d recommend refrigeration just to be safe.

Makes enough for one household over the course of 3 months, a few ounces or so. As a frame of reference for larger batches, my 10 jalapenos weighed about 10 oz.

So by now we all know that milk (after a little cooking and straining) becomes yogurt, and strained yogurt becomes Greek yogurt, but if you keep straining for a little longer, you get yogurt cheese. Think fat-free cream cheese, except without weird ingredients like structuring proteins, and you can make it at home. I have no problem with chemicals, but I am a fan of simplicity, and if I can eat the same thing with less stuff in it, I’d rather.

So as it turns out yogurt cheese is called different things in different places. This foodstuff came to my attention at a Middle-Eastern restaurant where it was called “labneh,” alternately spelled “labaneh,” its Lebanese name. Indians call it “dahi,” and for some reason Wikipedia seems to think it’s the same thing as Greek yogurt. Since I do operate under the assumption that Wikipedia knows better than I, so I’m guessing that Greek yogurt is technically a particularly loosely-textured yogurt cheese. Given its recent commercialization, I will refer to Greek yogurt as the stuff you get in the store and yogurt cheese as the stuff with a texture like cream cheese.

At this point, I can’t imagine I’m spoiling anything by pointing out that this post could be alternately titled “how to make labaneh,” “how to make labneh,” “how to make dahi,” or “how to make yoghurt cheese.”

For the last few weeks I’ve been experimenting on how to get this right. Since yogurt is cheaper to get in large quantities, I’d been straining it extensively, if effort put into leaving something there for awhile can accurately be described as “extensive.” Seemed easiest to do it with a strainer.

Extensive leaving-it-there-for-awhile.

And uh, I ended up with Greek yogurt. With a strange sort of texture.

Greek yogurt that was supposed to be labneh.

I tried a few variations on this: in the fridge and on the counter, each checked every 12 hours or so and I never really got any further than Greek yogurt (for the record, on the counter is quicker). Which is all well and good, except that I can buy Greek yogurt at the store, and the quality is better, and given the yield per cup of yogurt, it costs about the same too, so as far as I’m concerned there’s no convincing argument to make Greek yogurt at home, other than maybe to try it out and get some indie cred from your more-tattooed friends.

And besides, I wanted labneh, which I can’t buy at the store, and wtf is up with the yogurt that refuses to cooperate? The entire internet agreed it only takes 24 hours to make this shit!

Just then, a little piece of my childhood reached out with a warm, knowing smile.

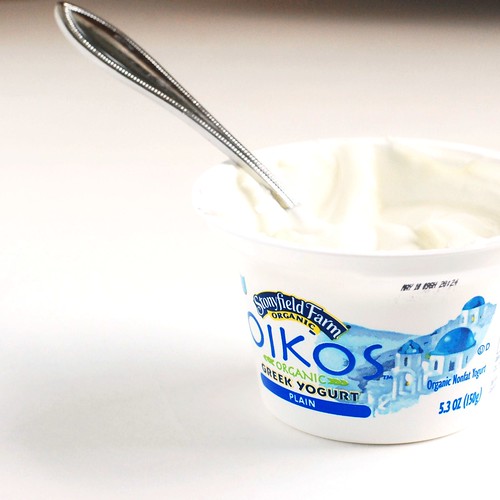
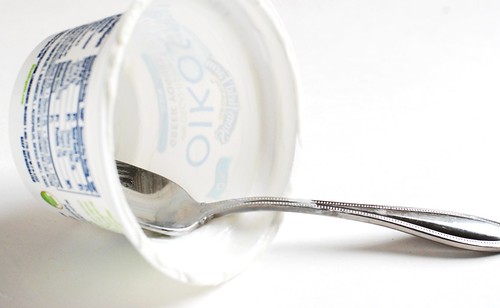
Stonyfield Farm's Oikos.

Alright, I lied, it was an email from someone I’ve never met who may have been smiling, but I wouldn’t know. What I do know, however, is that she works for Stonyfield Farm. I grew up going on field trips to Stonyfield Farm, as their headquarters are situated a few towns over from my hometown. I’m pretty sure that their organic yogurt was the first time I’d ever even seen the word “organic” on a foodstuff, because that trend took a little while to make it to New Hampshire. These people are trendsetters.

So Stonyfield wants to create some food blog buzz about their new organic, fat free, low cal, totally delicious Greek yogurt, affectionately called “Oikos” by sending along some “get it free” coupons. I was happy to accommodate for a few reasons. Excellent opportunity for a list.

  1. Food blog perks. Yay!
  2. What a convenient coincidence, I have been buying lots of yogurt lately for this labneh thing and could use the discount.
  3. I’m definitely not an organic foodie, but I am a HUGE proponent of buying local. Stonyfield Farm is a scant 50 miles from my home, which in food-source terms is my backyard.
  4. I figured out some food science.

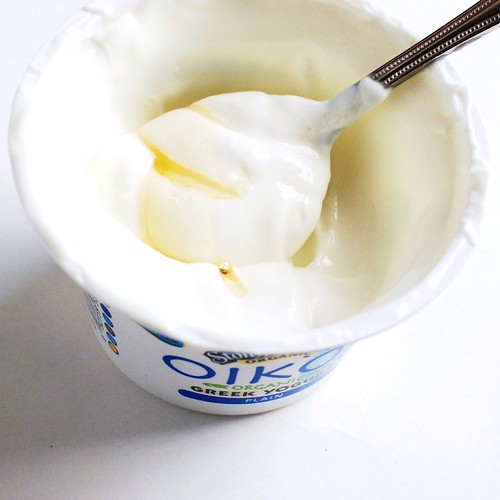
So what do you do with Greek yogurt, other than just substitute it for regular yogurt in stuff? Well, there’s the boring but tasty “stir in some vanilla and honey” thing.

Yogurt + honey.

But I wouldn’t really call that a recipe. So I strained it, figuring that starting out at the Greek yogurt stage would cut my work in half and I could do a little product placement and maybe it would even work this time.

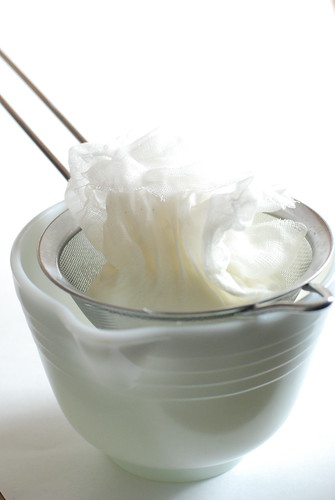
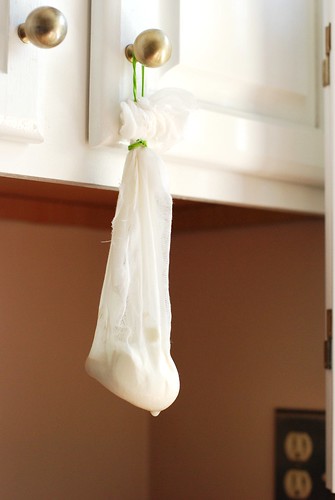
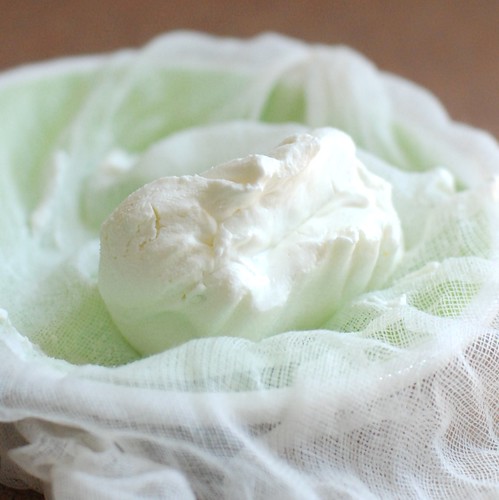
Making labneh.

This reminds me of the stork’s creepy baby-in-a-bag thing! I do this at room temperature because it seems to work more quickly and because it’s kind of a pain in the ass to work around a big bowl in my fridge. And I mean, we’re effectively just breeding bacteria here anyway, so this method doesn’t make me all that squeamish.

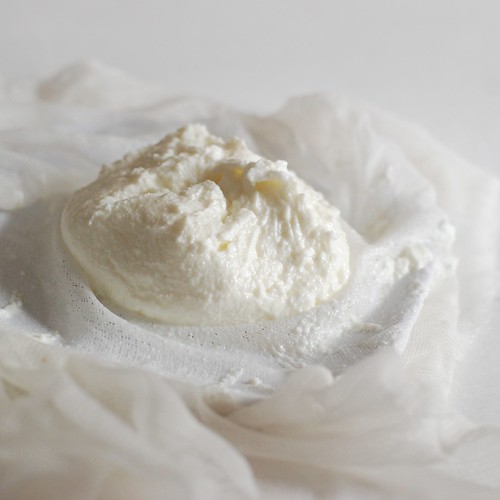
After just an overnight stint in the suggestive sling *ahem* I awoke to sheer delight. LABNEH! My quest, it was ended.

Results!

A perfect cream cheese texture . . . smooth, none of the weird pebbliness of previous attempts. I refused to believe this was just because organic is better, and compared Stonyfield’s ingredient list to that of other fat free yogurts. Turns out that Stonyfield has only milk + bacteria, whereas the other three cartons I examined included pectin or milk solids as thickeners. Now in terms of eating yogurt straight up, I don’t care if it’s thick because of milk solids or gelatin or inferior bacteria, but for my purposes here, Stonyfield worked out pretty well.

So here’s what you came for:

How to Make Yogurt Cheese

1 5.3 oz cup Greek yogurt (ingredients should be just milk + bacteria—no milk solids, pectin nor gelatin allowed!)
1 pinch salt
a piece of cheesecloth or muslin or even a very strong paper towel if you are daring
some place to suspend a leaky bag of yogurt overnight

Mix the yogurt & salt, make a bag out of the cheesecloth, then suspend it at room temperature for 8-12 hours with a bowl underneath to collect the whey as it drains off.

That’s pretty much it. Notes:

  • I use a rubber band to hang the parcel from a cabinet knob.
  • You can try this in the fridge, it will take a little bit longer.
  • And you can use regular yogurt too, but it too will take longer. Regular, non-Greek yogurt will yield about 1/3 c for every cup you use.
  • 3.5 oz of Stonyfield Farm Oikos yielded about 1/3 c yogurt cheese as well. Amount will vary depending on how long you strain and what brand of Greek yogurt you use.

Serve in one of the manners below.

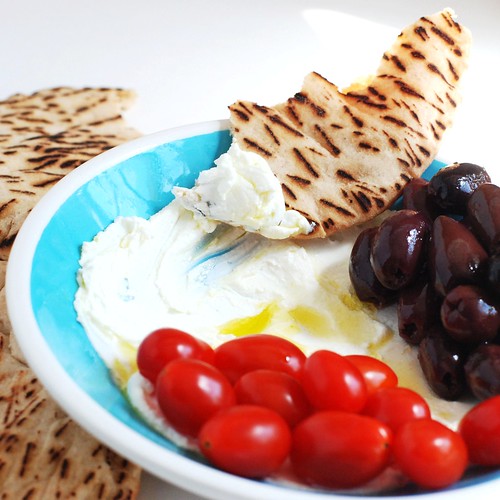
Traditional labneh.

Traditional Labneh
like how I had it at that restaurant that time

Spread some of the yogurt cheese on a plate, drizzle some olive oil atop, serve with any combination of the following: pita, olives, tomatoes, chickpeas, cucumbers, hummus, bruised mint, sprinkles of other herbs or spices. Simple but the best application I’ve found to date.

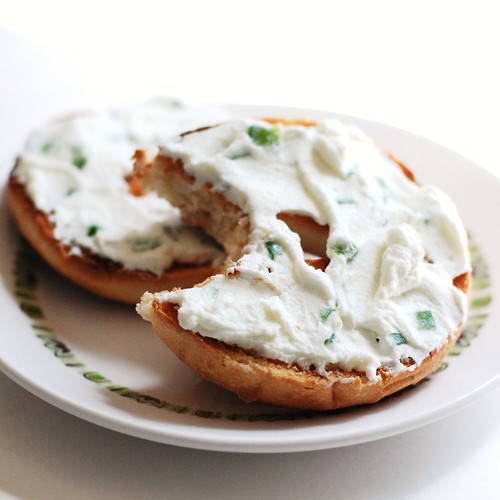
Jalapeno yogurt cheese!

Jalapeno Yogurt Cream Cheese

1/3 c yogurt cheese (this recipe also works just fine for cream cheese if you omit the olive oil)
a drop or two of olive oil (brings out flavour)
pinch garlic powder
1/4 jalapeno, seeded and finely diced

Mix. Let mingle in fridge for a good while. Overnight would be ideal. Serve. Let me know if you try this one, I think it could use some work, but the idea is solid.

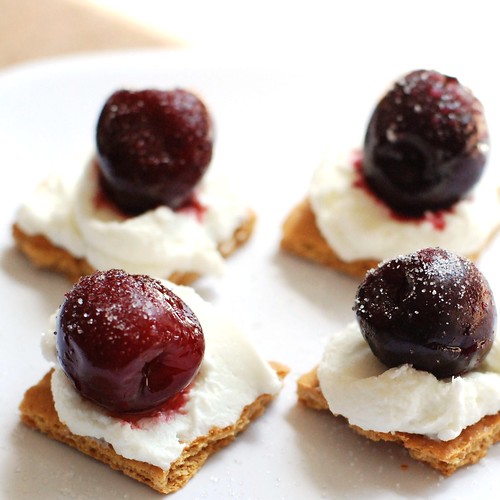
Imitation cherry cheesecake.
Cheaty-Pants Light Cherry Cheesecake Bites
makes just a few—eat alone or share with 1 other friend

1/3 c yogurt cheese
2-3 graham crackers (before you snap at perforation)
2 tsp sugar
2 drops vanilla extract
frozen cherries, thawed

Mix the yogurt cheese with the sugar and vanilla. Okay, NOW snap the graham crackers at the perforation, then slice each baby rectangle in half to make little squares. Spread a little cheesecake mixture onto each square, then top with a cherry and a little extra sprinkle of sugar. The graham crackers will get soggy very quickly, so these are not make-ahead nor party friendly. Think of it as a special private little treat to enjoy as you make them.

The end.

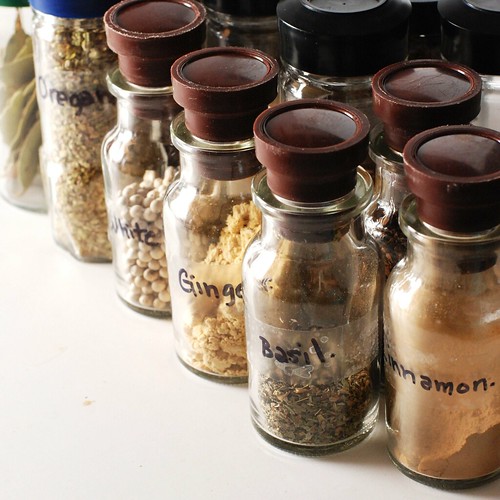
Not to brag or anything, but I probably pay less for my dried herbs & spices than you do. I can fill my spice cabinet for about $10.

I’m so excited about this post . . . I’ve been working on it for weeks and the necessary research included grocery shopping, an impromptu Twitter survey and a *spreadsheet*, and I am a bitch easily excited by things that can only be figured out on a spreadsheet. So here goes: Aleta’s Guide to Buying Dried Herbs & Spices on the Cheap. And right up front, I promise the pictures get better as you read along.

When you buy spices & dried herbs at the right places, they go from “pretty expensive and at times cost-prohibitive” to “practically free.” Buying cheap spicery brings with it several very important benefits. Here’s a convenient bullet-pointed list of those benefits.

  • The sudden affordability of grabbing something you haven’t tried; if you don’t like it, eh . . . it was 43 cents to learn that.
  • The ability to replace your seasonings as frequently as you’re supposed to—6 months for dried herbs, 1 year for ground spices. I replace all mine every three months (mostly because I only buy 3 months’ worth at a time) for about $4. And yes, the improvement in taste from fresh spices to the dusty shit in the back of your cabinet is immediately discernible.
  • Hey, suddenly organic food is cheaper than conventional, how about that.

Obtaining affordable spicery is every bit as simple as locating an organic/health food store or co-op in your area—my personal H&S-supplier is Worcester’s own ARTichoke Food Co-Operative. ARTichoke is a really great part of Worcester’s community, and just being in the store makes me contentedly smile to myself the entire time. As a frame of reference, I’m a complete bitch at all other times, so that really means something. Also, they were so very accommodating with my request to take photos, and that’s pretty cool of them. So if you live in the Metrowest area, please give ARTichoke your business, and consider becoming a member.

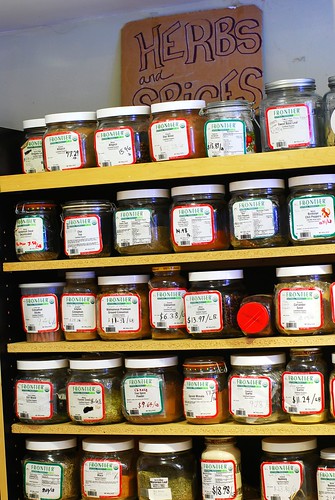
Now pretend you’re me: at your local co-op grinning like an idiot, you wander to the back to see if they have what I affectionately call “the world’s biggest spice rack.”

World's biggest spice rack.

. . . and chances are, they do. Yes, regardless of size, they’re all “World’s Biggest” as far as I’m concerned. You’ll see a nice variety of spices in bulk, many or all of them organic, still a total steal compared to the grocery store (we’ll get to hard numbers in just a minute). The only concern you should have here is how frequently the containers are rotated, and if you’re too shy to ask, figure that the more traffic the store gets, the fresher their spices will be.

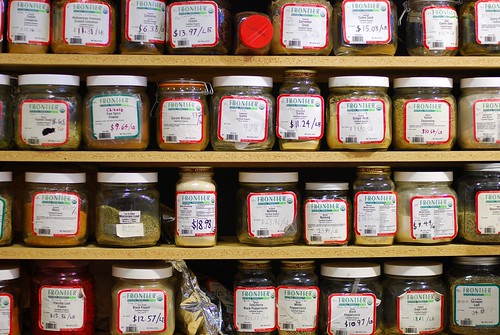
Spice rack detail.

Most of the prices are between $10 and $20 a pound. This sounds like an awful lot to pay for spices, but you are buying fractions of an ounce, so it’s a pretty good deal.

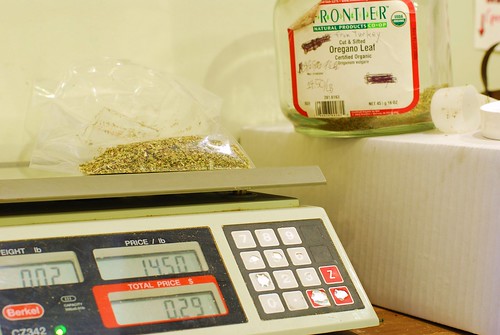
Holy oregano batman.

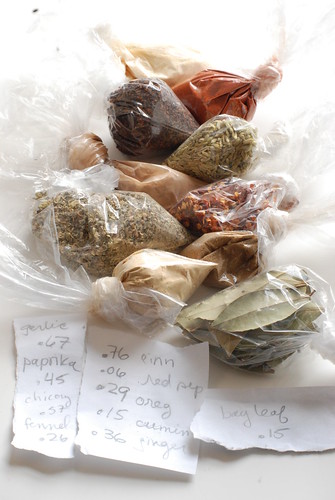
For example, that’s three months’ worth of oregano (for me) for about 29 cents. So I loaded up on the stuff I use the most for about $3.15. I never throw any away, because I never have to—I buy just the amount I think I’ll use, and then I throw in something I’ve never tried just for fun (this time it was chicory), and I rotate every 3 months.

Loadin on up.

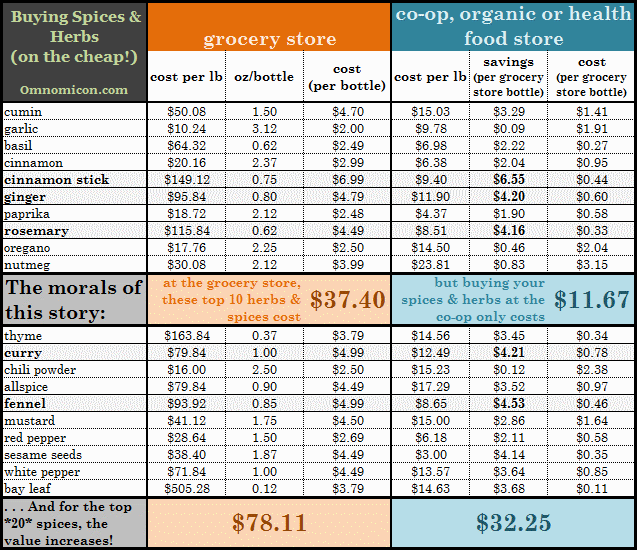
So let’s say you are just moving out of your dorm and setting up your first apartment and you want to fill your spice rack. How much does that cost, and how much can you save by buying the same amounts at the co-op? WELL I AM GLAD YOU ASKED, I HAPPEN TO HAVE A SPREADSHEET HANDY. These are prices at my local Stop & Shop compared to prices at ARTichoke Food Co-op.

How to Buy Herbs & Spices: The Chart

(Please note that you do not *need* to buy a full jar’s worth, so your price can easily be under $4 for the top ten there).

So for a more established cook like myself, where I already have a bunch of herbs & spices in stock and only really need to replace them one at a time every now and again, the cost savings isn’t quite what it would be for our hypothetical college student (I figure it’s about $70 a year for me instead of about $26 up front for a new homesteader). But my biggest advantage is being able to afford to replace my H&S extremely frequently. And also, my spices are organic, thrusting my taste in agriculture into the realm of the most gastronomically elite.

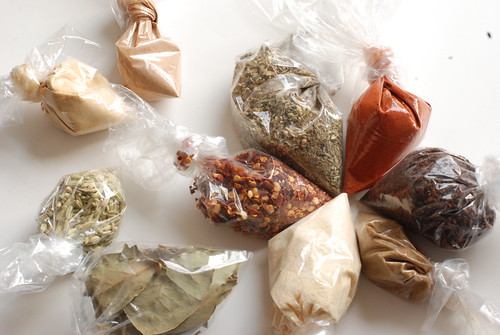
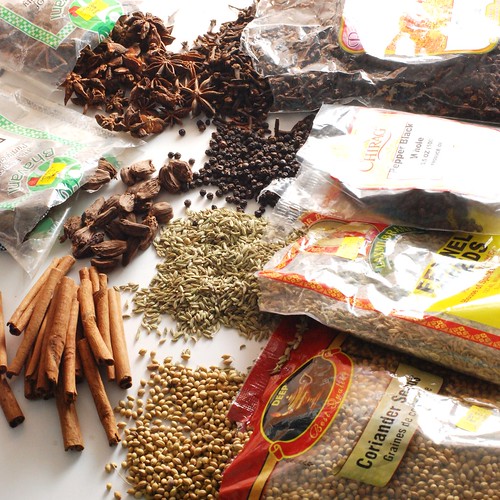
Incidentally, ethnic markets are another great place to buy H&S. My local ethnic store of choice is an Indian market, so while they have a wide array of spices, they really don’t have any dried herbs at all. But if the co-op is out of something, or I think I’m gonna need A LOT of it (like, 5 times as much as comes in the typical bottle at the grocery store), or if you don’t have a co-op or organic bulk store near you, this is another option.

Spices!

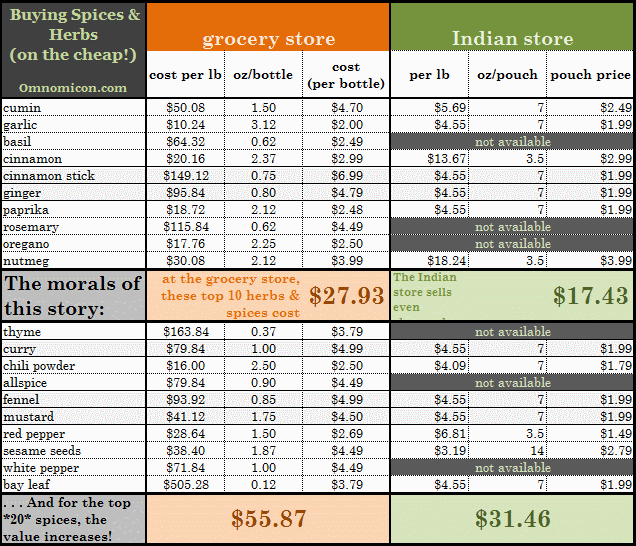
Even though, pound for pound, the Indian bulk prices are even WAY lower than the co-op prices, this approach doesn’t look like it’s saving you all that much money. The reason is you can’t buy less than a pouch of any of these, and 7oz is A LOT (notice how the average oz in the grocery store is about 1.5oz). Strange, though, how even buying 7 times as much of something is still cheaper. Here comes another spreadsheet.

How to buy Herbs & Spices (from India)

Fun fact: If you compared the amount you would have to buy at the grocery store to the amount you get at the Indian store, you will save (literally, I calculated it and everything) $135.31 for the top 10 and $483.22 for all 20. I’m not even kidding.

So that’s my big secret! I have a littler one, and it’s how to fill the glass bottles (the ones you obviously saved from the grocery store herbs and spices) with the co-op feed without using a funnel. I actually figured this out just the other night as I was taking pictures for this post, so I’m feeling awfully clever at the moment. But it’s so simple, it doesn’t even require words:

Filling the bottle

And that’s it! Throw some scotch tape on there, write the name of the spices with a Sharpie (I still can’t tell cayenne from paprika without a risky sniff test), and you are fully-equipped to throw in cavalier handfuls of seasoning into your next spaghetti sauce.

Congratulations, you are finally free of the economic oppression placed upon you by your local grocery store!

Spices!

I already asked Twitter, but if you aren’t on Twitter or feel like stating it again for perpetuity, what are your top ten most-used herbs and spices?

And, if I can manage it, look for a bonus post tomorrow on something you can do with all your fancy new (suddenly inexpensive) herbs and spices. Cheers, dear readers! Forget it, maybe another time.

Feb-23-2009

how to make butter

Posted by aleta under how to make...

butter

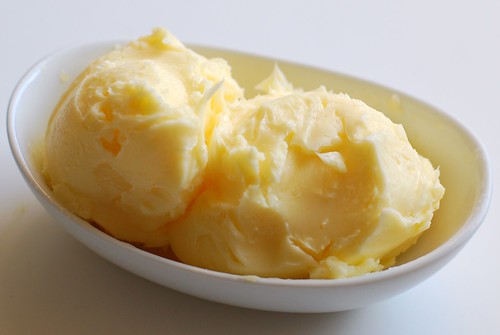
Homemade butter is easy, relatively quick to make and amazingly delicious. If it cost less than buying butter at the grocery store, it would be too good to be true, which is why this is not the case. All things considered, though, I still think it’s well worth it.

This stuff is precious, so I think the best use of it is not in baking, but rather, on top of freshly baked, still warm, bread, muffins or crumpets.

Are you ready for this? It’s intense.

buttercream on the edge

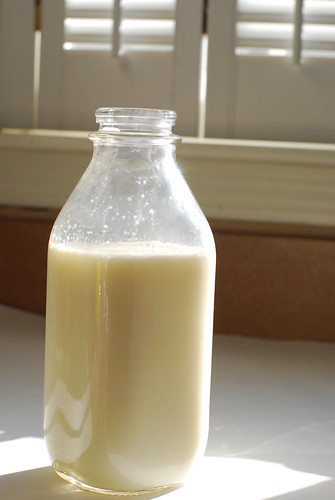
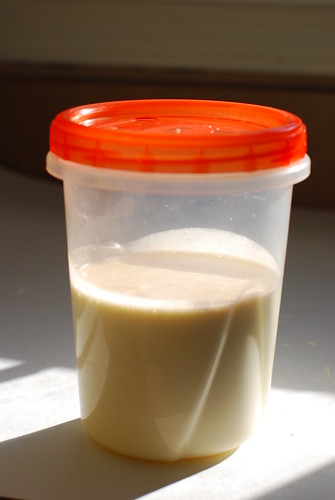
We begin with cream. I used superfresh local stuff, but the carton at the grocery store will do just as well. The important thing is to use cream at room temperature. The difference between doing this with cold cream and room temperature cream is the difference between an hour of churning and ten minutes.

Next, get a container with a tight-fitting screw-on lid that will not spurt cream all over your kitchen when you shake it vigorously. It also needs to hold at least twice the volume of the amount of cream you’re using.

butter

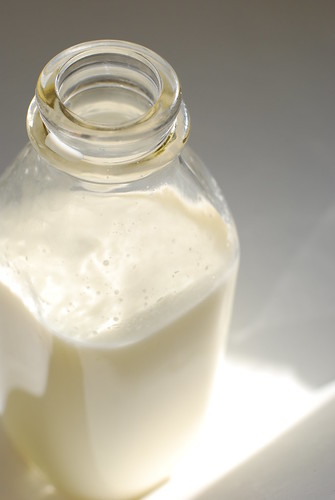
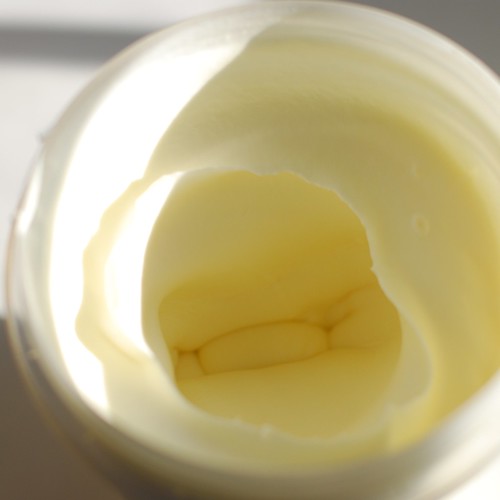
Begin shaking the container up and down in a rhythmic pattern. After 3 minutes, it’ll start feeling less like you’re shaking a jar of liquid and more like you’re shaking a jar of whipped cream, because essentially, you are.

3 minutes.

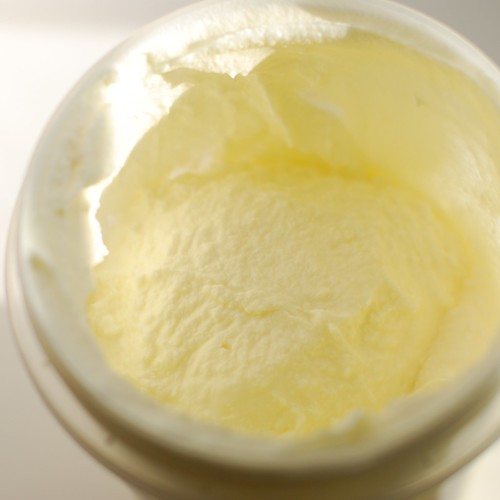
The next 3 minutes will feel like you’re shaking a brick. This is the hardest part. You will wonder “is this doing anything?” Just keep at it.

6 minutes.

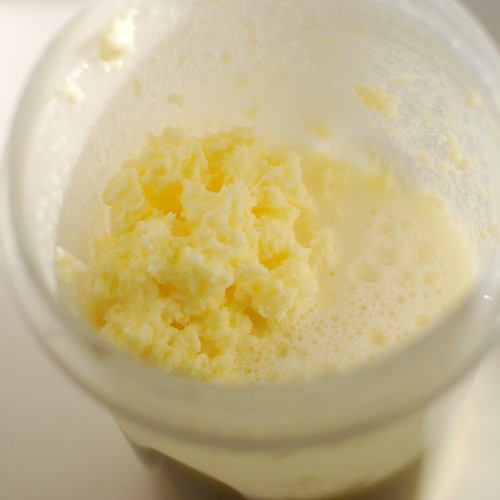
All of a sudden, within just a few shakes, the jar will begin going “shuk shuk shuk” and you’ll be able to feel the butter separating from the buttermilk. Keep doing that for about four minutes until you have lots of buttermilk in there.

10 minutes.

Next (not pictured), cover the top of the jar with cheesecloth and pour off the buttermilk, which can be used for a great many delicious items, but most notably, all the best pancake recipes call for buttermilk. It’s a truth.

After that, let the faucet water get as cold as it gets, then fill the jar to just under the top of the butter. The water needs to be very cold, or else the butter will melt as you replace the cheesecloth and pour the water out into the sink. Repeat 7-10 times until the water drains completely clear. This cleans the butter and keeps it from going rancid as quickly as it will otherwise.

Also important is to drain the butter. I have pictures of this part.

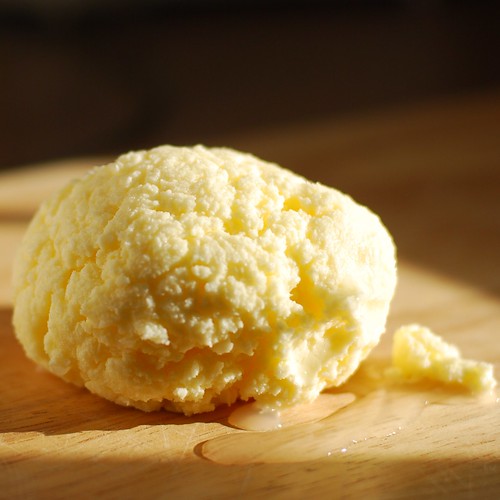
the birth of butter.

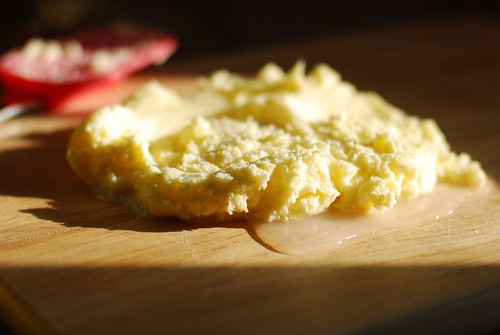
All that water puddling under the butter needs to come out. The best way is with a marble cutting board, but since I don’t have one of those, I used a wooden one. Simply squeeze the water out of the butter with a wooden spoon or spatula. The latter will double as a scraper to regroup between squeezings. To do away with the drained water, tilt the cutting board and/or use paper towels to absorb it.

butter

If you feel like the butter is getting melty at all, just stick it in the fridge for a few minutes before going back at it.

If you want to salt your butter, add about 1/4 tsp salt and stir into your finished butter. I think the reason to do this last is that it doesn’t interfere with the draining process by absorbing water and embedding it in the butter.

And that’s it! Beautiful, beautiful butter.

butter

Notes
I used one pint of cream to make just under 6.5 oz of butter and almost a cup of buttermilk. These amounts will vary from batch to batch, but is a decent estimate.

Tags: ,

Aaannnndddd, she’s back!

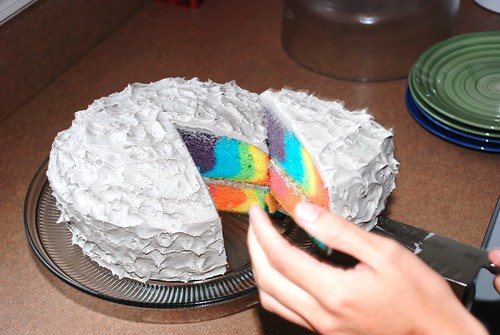
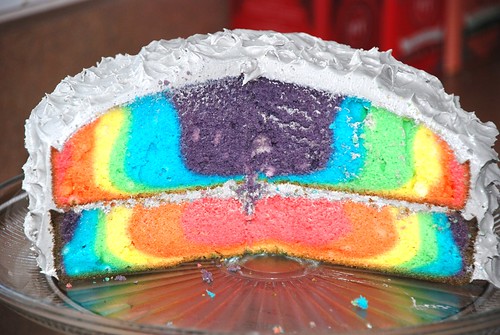
So I did mention something about health and/or diet food in my last post, and while this recipe is the latter, it is most certainly not to be confused with the former. I posted about my rainbow cake here, and it got a lot of traffic on over to my livejournal, and everyone wanted the “recipe.” The cool thing is that if you’re making something so distractingly colourful, people will think it’s delicious no matter what.

This presents me with the option to use an old Weight Watchers trick—the one-point cupcake. Except I’m making a cake and I created my own frosting. Kinda. I’ve seen it done before, but I swear I made it up first!

This cake is suitable for many occasions:

  • A child’s birthday
  • Your mom’s birthday
  • Coming out to your conservative parents
    • If you’re a lesbian, they’ll be thrilled that you won’t be forgoing your feminine kitchen duties.
    • If you’re the kind of gay dude who makes cakes for your parents, they were probably on to you anyway.
  • Coming out to your conservative parents on your mother’s birthday
  • Your friend’s jam band CD release party

. . . so I’m sure you’ll find a use for this recipe soon.

And of course, you can use any white cake recipe you’d like. This is just how I make it because I have delusions of wearing size 2 someday.

Oh yes, and do me a favour: DOUBLE THE RECIPE AS PHOTOGRAPHED HERE!! The recipe at the bottom is accurate, but this made for a really REALLY small cake, and there was not nearly enough frosting, especially considering its lightness.

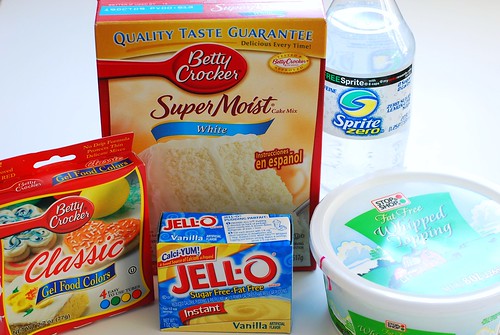
Okay, on with the ingredients.

how to: rainbow cake!

That’s all. Notice the lack of fat in here? Mmmmmm . . . chemicals. Though I don’t need to defend my method thanks to the double-dub (WW) aspect, even when I make a “real” cake I usually use box mix because let’s face it: Betty’s been doing it way longer than I have, and has pretty much perfected the art.

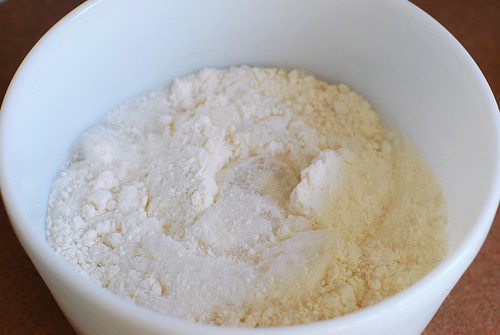
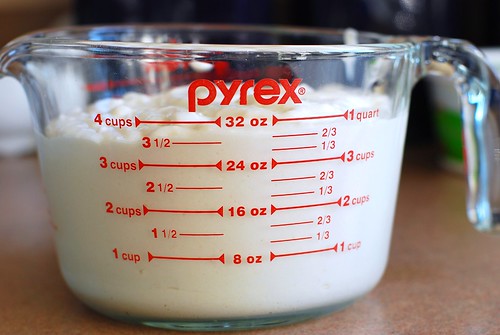
Pour a can of soda (12 oz) 2-12 oz cans of soda into the cake mix two boxes of cake mix. No eggs, no oil, no water, no sweat.

how to: rainbow cake!

The action shots weren’t too thrilling. Now we measure it.

how to: rainbow cake!

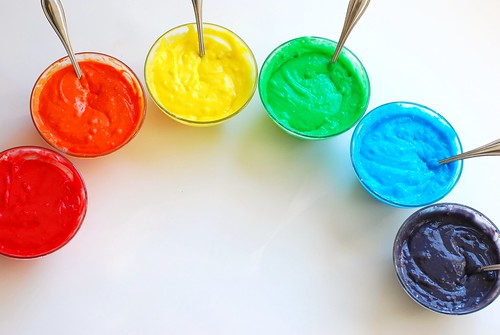
I’m going to round to 30 oz 60 oz because I have six colours and isn’t that just too convenient? It worked out to 3/4 c 1.5 c per colour, measurementwise. So I divvied that up and used my gel colours.

how to: rainbow cake!

(the gel colours, while not as good as pigment dye, are much bolder than the very liquidy food colouring you probably grew up with)

how to: rainbow cake!

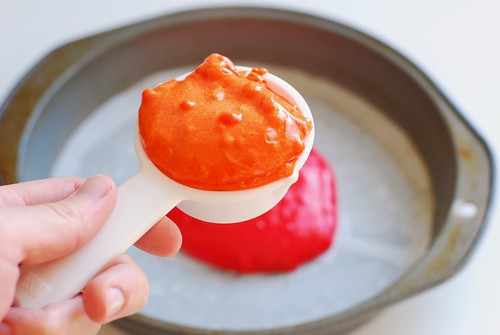
The first colour you drop into the pan, use about 2/3 of the mix for that colour. Otherwise, the top (last) colour will really dominate. I used a heaping 1/4 c 1 cup of each colour.

how to: rainbow cake!

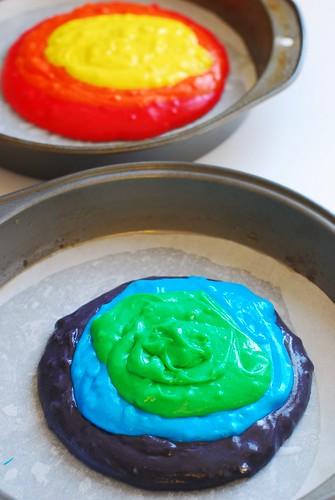
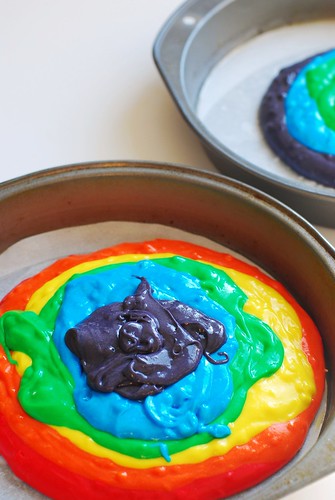
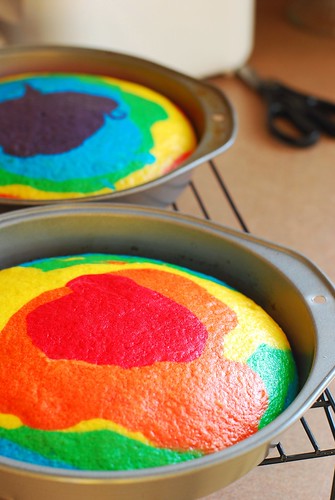
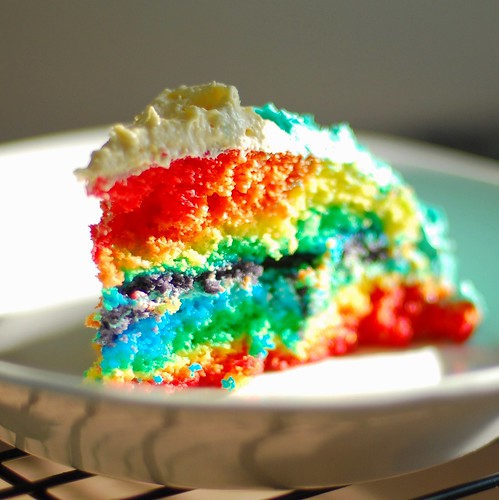
Drop the colours, one by one, into the middle of the pan, in neat concentric-ish gobs. Remember the cake is going to be sliced in the side there, so mixing it around on top isn’t going to make your slices any more psychedelic (trust me, I did the three-dimensional thinking for you already).

When you’re three colours in, start doing the reverse with the other pan. Since I’m going in rainbow order: red, orange, yellow, green, blue, purple, I got from red to yellow in the first pan, then purple, blue, green in the second. This is so that your two pans are equal if your measurements aren’t exact (and they’re not likely to be).

how to: rainbow cake!

Now finish up.

how to: rainbow cake!

Follow the box’s baking instructions and do your dishes.

how to: rainbow cake!

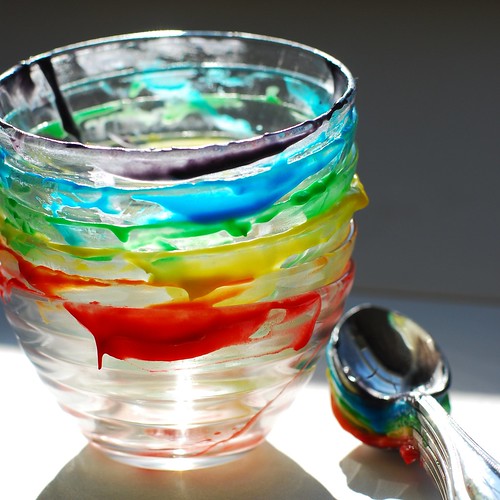
Such lovely dishes!

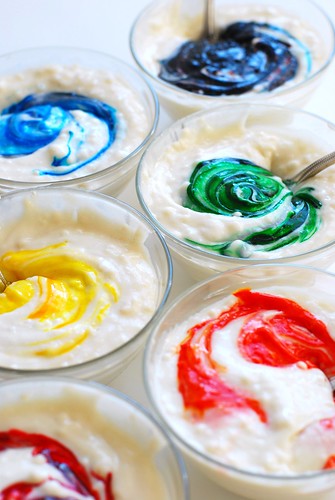
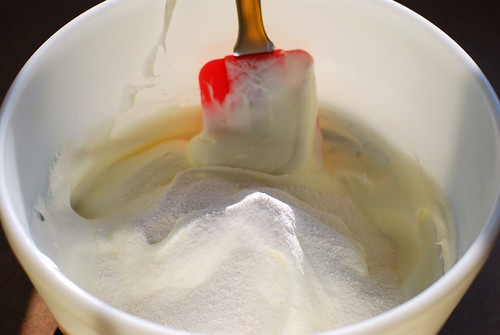
Now for the frosting: 1 box 2 boxes of fat free sugar free pudding mix, and 8 oz 16 oz (two of the 8 oz tubs pictured) of fat-free whipped topping. Or sugar-free. Or light. Or regular. They’re all pretty much the same. But that’s it.

how to: rainbow cake!

Holy shit, the cake’s done! Toothpick clean and everything! Get that shit out of the oven!!!

how to: rainbow cake!

The purple top kind of made a little turkey silhouette.

how to: rainbow cake!

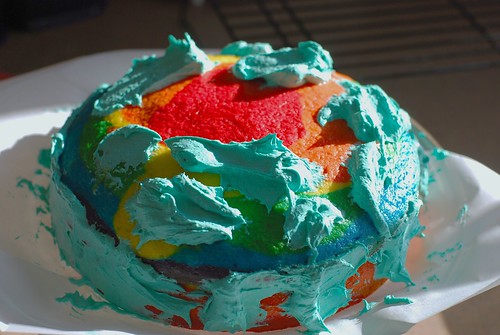
The frosting will be a little tough to spread, so treat it like a buttercream (I guess, I’ve never frosted a cake with buttercream). Putting gobs all over, then smoothing in worked well for me.

how to: rainbow cake!

And look at that thing! It’s so pretty-lookin.

how to: rainbow cake!

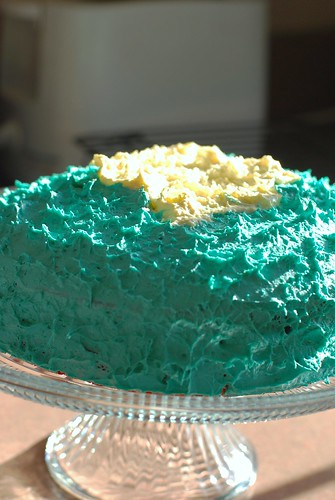
Here’s what this particular cake looked like. See how it’s tiny and too rounded and it kind of isn’t all that great? That’s because I didn’t double the recipe. It’s a mistake I’ll only make once.

how to: rainbow cake!

Here’s what that really should look like: same process, twice the batter.

DSC_0598

Mmmmm.

Sunny Day Rainbow Cake

2 boxes white cake mix
24 oz of clear diet soda (2 cans, ginger ale and sprite work well)
gel food colouring
16 oz whipped topping
2 oz instant fat-free sugar-free pudding mix (2 smallish boxes)

The Dieting
Mix the cake mix with the soda according to regular instructions on box. It will be lumpy afterward. Again, you can use any white cake recipe you want, this is just how I do it.

The Rainbowing
Measure the total volume (by my estimate, 64 oz), then divide by 6 and measure into separate bowls. There are 8 oz in a cup, so 64/6 = 10 to 11 oz, or 1 cup + 2 tbsp.

Stir colour into each bowl with its own spoon. For the first colour into the pan, measure out 2/3 to 3/4 of your mix (in this case about 1 c) as close to the middle as you can. Drop in your first three colours, then work on the other pan with the last three colours. So if you’re doing rainbow order, the first pan should have red, then orange, then yellow, and now the purple, blue and green go into the second pan. As a recap, this is so both layers are roughly the same size.

Bake the cake for however long the box tells you to bake it. Check it when the box says to, but usually it’ll need an extra 5 or 10 minutes or maybe more because of the density of the soda method. Just keep baking, checking back every 5 minutes or so until a toothpick to the center comes out clean. Let cool completely before moving to a wire rack.

The Frostinging
Meanwhile, make your frosting. Just mix the pudding mix in with the whipped topping for a few minutes. Dye if you’re into that.

Frost your fat-free cake with your fat-free whipped frosting. Eat.

Edit 1 (one week later)


No children were harmed in the making nor consumption of this cake.

People seemed to miss the point that I am a 25-year-old woman on a diet with no kids. Since kids don’t really need fat-free anything, there’s no need to use the soda recipe if you don’t like the idea, and if you don’t like dye, don’t make this for dinner for them every night for a month. Okay, folks, thanks for the allowance to disclaim.

Edit 2 (two weeks later)


A note to Weight Watchers (the people on the diet, not the company):
WW has long advertised 1/12 of a cake mix with diet soda to be a “one point cupcake.” I have no idea why they insist this is the case when according to the “as packaged” nutrition information, this much cupcake has 170 calories, 3g fat and no fiber . . . by my calculation, that’s 4 points. That said, 1/12 of this recipe, (2 box mixes + 16 oz whipped topping + 2 oz or so pudding mix) works out to 10 points a slice. Not bad considering that a comparable cake would be 14 points.

Edit 3 (two months later)


FAQ
Here are questions I get over and over again about this cake. I just don’t want to answer any more emails about it. These questions apply to any cake, so please don’t blame your epic fail on me.

Omg my cake burnt!
Next time don’t bake it for as long.

My cake stuck to the pan!
Grease your pan better next time.

My cake burnt/stuck to the pan/was underdone/crumbled. Is this because of the food colouring I used?
No, the food colouring has nothing to do with the failure of your cake. You baked it too long/didn’t grease enough/didn’t bake long enough/moved it before it was cool.

I’m making this for my kids, can I use non-diet soda for this cake?
I don’t know why you would, you certainly wouldn’t be saving much in the way of calories, and I don’t really think your kids need more sugar. Just make a regular cake and then put food colouring in it, it will look the same, promise.

If I don’t make it with soda, will the colours run?
No. In fact, like I keep saying, please just use whatever the hell cake recipe you like. Please. The rainbow part has nothing to do with Weight Watchers.

The frosting, it’s so thick!
Yes, buy a tub of Duncan Hines frosting as a backup plan.

The cake, it fell apart!
Let it cool before you move it, and more importantly, don’t jostle the thing about.

I don’t like the cake this made, blech!
You probably aren’t on a diet, so I don’t know why you bothered to make diet cake.

I don’t get it, you make two cakes and then you put them on top of each other?!
Yes, it’s called a layer cake, and pretty much any cake you buy at a grocery store is constructed in the same manner.

But I don’t *like* food colouring.
Well, you’re wasting your time reading this, aren’t you?

I totally saw this on Something Awful’s Goons with Spoons Rainbow Cake thread, way to steal the idea, asshole.
Me too, fellow goon, me too. And in fact, I posted my original rainbow cake there. If you have no idea what I’m talking about and would like to see about a hojillion rainbow cakes, and a rainbow cheesecake, please check out the thread that put this on my radar.

DSC_0603

9/26/2014
closing comments because way more spam bots are hanging around than humans, and after at least 2000 actual people comments, there probably isn’t much left to say. however, my email address remains active, so if you wanna be social, send it that way.

thanks, internet, this was fun.