online poker

Omnomicon

say it with me now, “om nom nom”

Subscribe to Omnomicon

Archive for the ‘new england (culinarily speaking)’ Category

Welcome, October! People are already handing out free candy, and won’t stop until next year. And hey, why not? Bikinis are at least nine months away (assuming it stops snowing before May gets here), nothing’s in season except squash, and it’s cold—if we can get the kitchen toasty, hopefully some of the heat will drift into the living room and combat the chill emanating from the ill-conceived window door.

What I’m saying is, “It’s time to start baking again.”

I think the Worcester County Homemakers would agree, so I consulted their 1961 tome.

homemakers do it...at home

As per usual, I have an opinion.

I heart Worcester

It’s true: I do so heart Worcester. I’m just so-so on Abraham Lincoln, whose upper torso I found a bit out of place, but a mere moment of googling uncovered a visit to Worcester on September 12, 1848, earning him permanent fixture in the minds of Worcester housewives, even a hundred years later.

Amid such white trash classics as “Clamburgers” and “Baked Stuffed [with onions, carrots, shortening, day old bread, and evaporated milk] Hot Dogs” I came upon a most enchanting proposal.

butterscotch-pecan biscuits

Butterscotch! Pecans!! Biscuits!!! Awww, and I bet they’re gonna be so goddamn cute too! Let’s do it. I drag out this clumsy atrocity for its sole function.

butterscotch-pecan biscuits

I love biscuits, but usually have to resign myself to drop biscuits because I hate kneading, likely because I suck at it. These, however, were extremely manageable, and are my new favorite thing to whip up for no reason.

circle circle

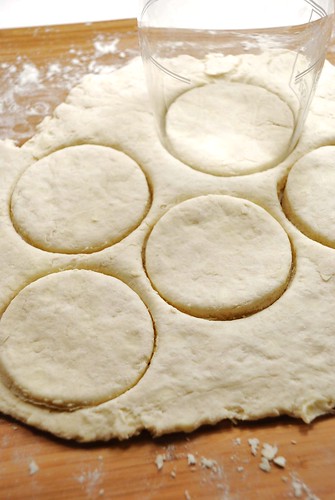
The biscuits are going just inside muffin pan cups, so scrounge about for whatever cylinder you have about that’s closest to the right size. In this case, I used this promotional wine glass that came free with the only wine tasting I’ve ever attended.

Inelegant uses for elegant items.

Get a little mis en place going strong…

polka dot dot dot

Now I did follow the recipe for this part. This time. Next time I will not be mixing the butter with the brown sugar because as I quickly discovered it doesn’t exactly make a suspension, and the levels in each cup were . . . variable. But then Math told me the good news: it works out to 2 tsp of melted butter and 2 tsp brown sugar in each cup, making the next part easy.

Just before starting on the dough, set the oven to 425o, cut 2 tsp (2/3 tbsp) into each cup and put it in the oven for a little bit. Keep an eye on that, you want the butter just melted and not sizzling. Once your biscuits are cut and ready, measure a solid 2 tsp of brown sugar into each cup and stir. I like using chopsticks for these kinds of things, and they’re also easy to clean/store.

I also discovered only 38 solid pecan halves after dropping $5, so instead of 5 in each cup, I settled for 3, which arrange much more nicely than I imagine 5 might.

almost like little abstract plants

Set biscuits atop each cup and bake for fit-teen minutes.

putting the bisc in biscuit

Now because I stopped to snap that, I really missed out on some delicious butterscotch that cooled onto the pan [that I later scraped out for a midnight snack], so unless you’re f’blogging, pop them out toute de suite. I promise they will not be as syrupy as you expect, but a little bit of parchment will go a long way just in case.

Such brass!

And then eat them. Eat them as soon as they will let you.

and now they're arrows.

Butterscotch-Pecan Biscuits
adapted from Worcester County Homemakers Cook Book (1961, Home Department Advisory Council, Worcester County Extension Service, Worcester, Mass.)

1 stick butter, sliced into 2 tsp (2/3 tbsp) bits
2 cups flour (248g)
1 tbsp baking powder
1 tsp salt
1/3 c cold chopped butter (5 1/3 tbsp)
3/4 c milk
1/2 c packed brown sugar (50g)
36 whole pecan halves (1 c)

Drop 2 tsp butter in each cup of a muffin pan and put into oven as it preheats to 425o. Keep checking as you work on the biscuits, and pull out as soon as it is *just* barely melted; do not let it bubble.

Squizzle flour, baking powder and salt in food processor real quick in lieu of the traditional sifting. If traditional, poor, cheap or have a tiny kitchen, sift into bowl. Cut/pulse in the 1/3 c butter, and once you have coarse pebbles, add milk, work into a ball, and turn onto a floured board. Knead 10-12 times, roll out and cut 12 circles-cum-biscuits (see wine glass notes above).

Your butter should be melted by now, so measure 2 tsp brown sugar into each cup and stir with a chopstick. Plop a biscuit atop each cup, bake 15 minutes.

Flip onto a cutting board covered with parchment immediately upon removal from the oven. Let cool and just try to resist.

cairn.

Everyone knows those people who rants and raves about their Italian/German/Czechoslovakian/Whatever grandmother, her incredible cooking, and the totally amazing recipes that have been handed down for generations. Sadly, I have little to counter with. While the French French are celebrated the world over for their epicurean heritage, the French Canadian are not. Case and point: French Canadians eat frog legs, though on second thought, the French French eat snails, but they have the sense to do it with a lot more panache. My family hails (on both sides, originally) from farms outside of Three Rivers, that I cannot imagine were particularly profitable, seeing as my ancestors cascaded down to work long-ass hours for practically nothing in textile mills in New Hampshire and Massachusetts. Our culinary traditions reflect this reality, and we eat pauper food.

I have two Memeres. The differences between the two are easy to list: Memere Dubois grew up on a Quebecois farm, the daughter of mill workers; Memere LeBlanc grew up in Maynard MA, the daughter of a butcher. Memere LeBlanc has replaced her complete Pfaltzgraff set three times; Memere Dubois uses her oven to store boxes of Little Debbie. While they both can, by memory, trace roots back to Quebec, you can see how perhaps maybe their perspective on food might vary. Ever so slightly.

Okay, a lot.

But they, and everyone else in my family for that matter, can agree that Pork Pie is excellent, must be served at Christmas, and is properly consumed only with ketchup.

While Memere Dubois is a lot closer to the heritage, Memere LeBlanc is clearly the cook, which made it difficult to determine what recipe to use. Memere Dubois always buys frozen pies from some little old lady in Pinardville, and these have potato in them, which makes sense seeing as it’s a nice cheap filler. But Memere LeBlanc’s preferred recipe, naturally, called for two pounds of unadulterated pork. I decided to go with this version because it is based on an actual family recipe (the potato-pie version was definitely NOT the one Memere LeBlanc knew from memory), and pork is only $2.99 a lb, so really, it is modern-day pauper food, and thereby even more appropriate.

This is the recipe as written, though by the time this was handed to me, I already had the same pie in the oven. Boggle your mind on THAT, (or don’t…Memere gave me the recipe over the phone).

Today's recipe.

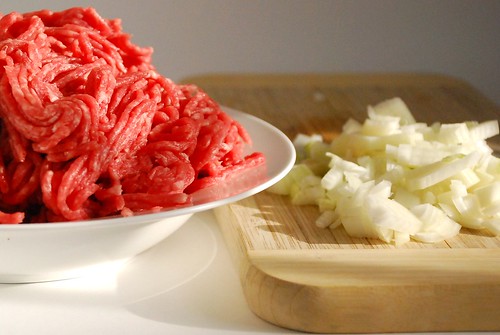
That size is a mite too small to read, but if you had crazy vision, you could see that it calls for pork butts ground twice, which is frankly unsurprising from someone who grew up around lots of meat. The tool I’d procured to follow this exacting direction really didn’t work out, so I had to settle with regular old supermarket ground pork. And the trick, she was done. Along with an onion, that pork is pretty much the only significant ingredient.

That's uh...most of the ingredient list, actually.

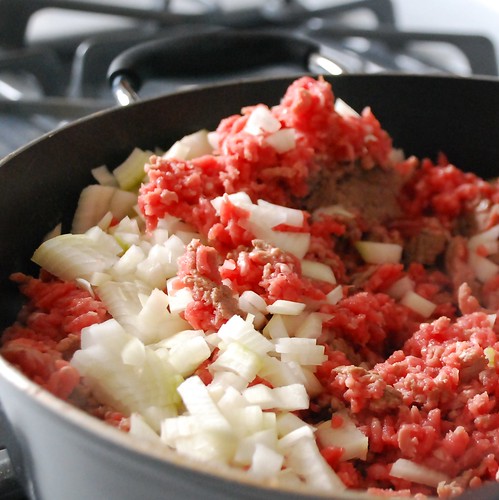
Saute ’em up.

MEAT MOUNTAIN.

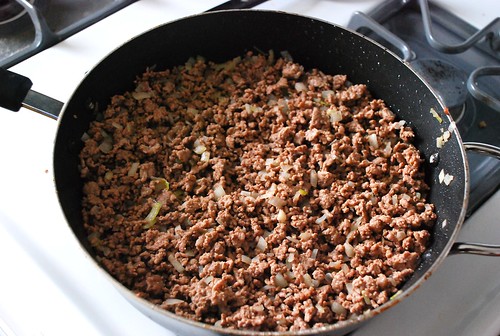
End up with this.

A skillet, a beautiful thing.

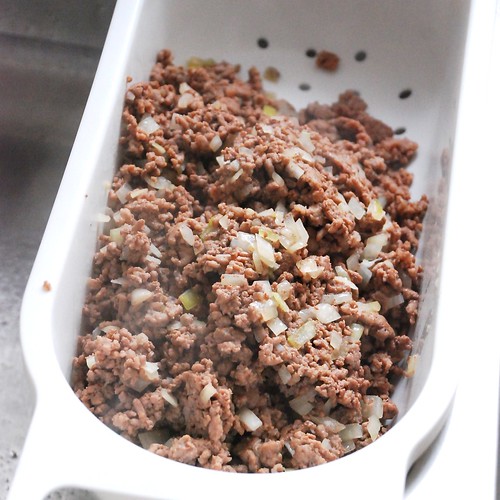
Drain off the grease. Since I won’t be saving the fat for the War Production Board effort, the easiest method I’ve found is using a sieve—it is MUCH more convenient than spooning the stuff out one teaspoon at a time. I have this convenient sieve that sits in my sink.

That misty stuff is steam.

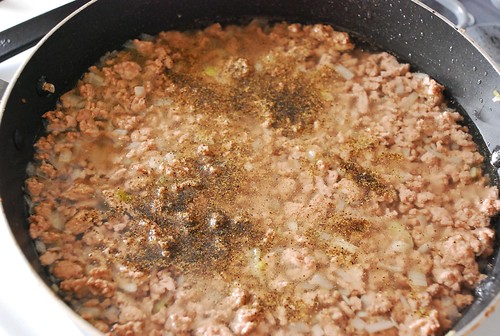
Hhokay, so. Here we hev our meat now covered by ze water.

Wading.

And then you simmer that business for an hour, mixing it up frequently to try to break up all the meat wads. If you change your mind and want to make goetta instead (which is German but somehow Memere Dubois grew up on the stuff), you can boil for an additional hour. No word on when you add the oatmeal, however.

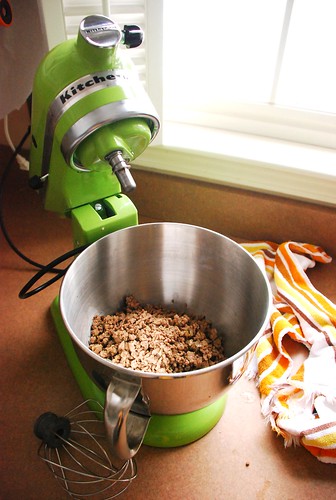
Another strain and now we’re going to use your treasured stand mixer. This will accomplish three things:

  1. It will break up the meat into uniform little granules.
  2. It will mix up the spices and milk with the pork.
  3. It will cool the mix much more quickly than letting it sit out.

Best use of my stand mixer yet.It's not frosting.

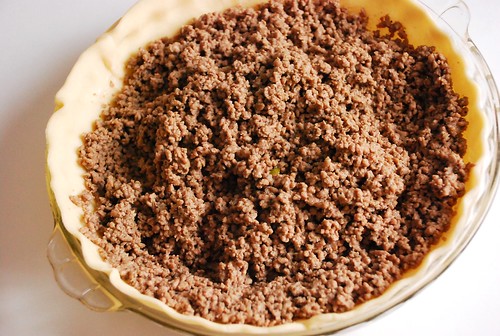
Finally, after like, an hour and a half, you’re ready to start assembling a pie! Go you! I’ve discovered that refrigerated pre-made pie crust comes out tasting just as good as homemade and also doesn’t make me want to shoot myself in the face, so I’m pretty much never making a pie crust by hand ever again. Just sayin is all.

Finally, we're getting to the pie part.

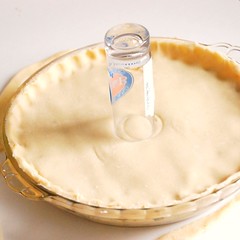
For some reason, pork pies are always topped the same way: a crust with about a 1″ hole in the middle to allow venting. Knowing that I wasn’t going to be able to pull it off freehand, I found a trick for cutting the hole.

A hole trick.Done and done, my friend.
(you’ll notice I can’t even position a glass in the middle of the pie on my first try, which is exactly the reason why freehanding it was such a terrible idea)

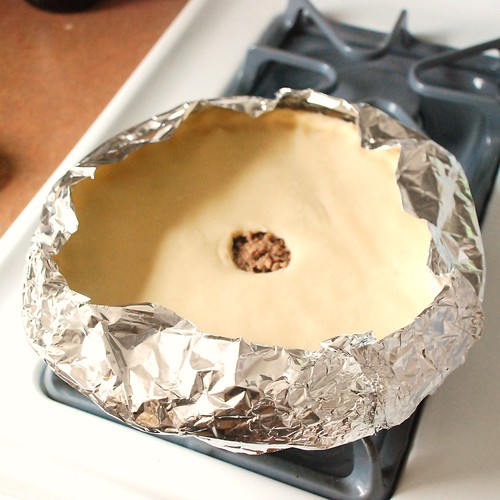
Then I attempted to protect the edges of the crust with aluminum foil.

Yeah, it got too toasty anyway.

It got a little toastier than I would have liked anyway. But at least the edges weren’t burnt, those are the best part!

Pork Pie!

And of course, as any Charbonneau, Levesque or Savoie will shout at you, you have to at least try it with ketchup. Even if you don’t think you’ll like it, that’s the right way to eat it.

With ketchup. The right way.

French Canadian Pork Pie
Coming to you straight from Memere LeBlanc’s memory

2 lbs pork butts, ground twice (plain old ground pork seems to work as well)
1 small onion, finely diced
1 tsp salt
1 tsp ground black pepper
2-3.5 c water
1/2 tsp sage powder
1/4 c milk
pinch nutmeg
pinch allspice
another 1/2 tsp ground black pepper
pie crust for a covered pie (refrigerated, frozen or your own—you decide!)

Brown pork and onions in a large skillet, breaking up meat as much as possible as it cooks. Drain grease, return to pan, and add just enough water to cover the top of the pork (this has varied for me from 2 c to 3.5 c). Simmer, uncovered, 1 hour, making sure to stir regularly (keep on breaking up the meat with your spatula). Do not let the meat dry out, though it does not need to be covered in water the whole time.

Preheat oven to 400o. Drain meat and onions again, toss into a bowl and beat with remaining ingredients (don’t forget the extra 1/2 tsp pepper!) until almost cooled. This will take the 5-10 minutes you’ll need to prepare your double pie crust, so if you happen to have a stand mixer, it’ll come in handy.

Bake for almost an hour, or until the top looks done. Let cool 5-10 minutes before serving with a side of ketchup.

The end!

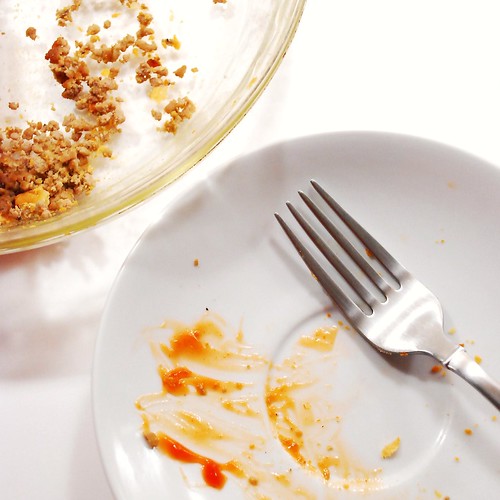
Done et up.

nutrition summary: 180 calories, 11g fat, 0g fiber; ~7 weight watchers points

ENLIGHTENING FEEDBACK


mizike agrees with me, which is enough to be edited in, BUT he also gave me the name of this pie.

Nothing says christmas in Quebec like Tourtiere. Serve it with a side of poutine and a bowl of split pea soup for the maximum french-canadianness possible in one meal.

The Wiki on Tourtière is enlightening and dead-on, we just always called it pork pie. My family never did the poutine thing, but split pea soup is ALWAYS on the stove just after Mom and Dad have made a ham. I salute you, mizike, fellow Franco!


Also, I totally earned some cool points from Adam, and just wanted to point out that I am always accepting cool points. Not that I need them or anything. I may even give them to charity.

The mimosa. A delicious blend of fruit & alcohol that transforms even the most mediocre of brunches into an experience nothing short of magical. But alas, there are times where maybe perhaps a little bit of drinking might not be in the cards. Perhaps your hangover dictates brunch, but the thought of another drink, well, let’s just say you don’t want to think about another drink.

The solution is simple: Faux Mimosa. In addition to the dilemma above, it can be applied to a number of other problems as well. Perhaps you have that teetotaler friend, or worse, a decidedly non-teetotaler friend who gets whiny and annoying. Maybe you have a sister or niece *just* shy of 19 and you want to be the cool older sister (or cool aunt) without all the baggage of being arrested for serving alcohol to someone underage. How cool would you be to have her pals over, as you bemusedly observe the pitch and slurredness of their gossip rise over the course of the evening, so sure they are that this is the real deal. I would warn that you might end up providing crash space.

So imagine my delight in finding this recipe:

Faux mimosa.

Side note: while the Fish House Punch looks like it might be pretty good, you’d think they could come up with a better title. Really. Or just run with it and garnish with fish heads.

This gem comes to us via that 1977 classic Sharing Our Best, a collection gathered by the Devil Worshipping Green Mountain Deputies Association of Vermont. The Devil Worshipping part isn’t explicitly addressed, except for THAT HUGE UPSIDE-DOWN PENTACLE ON THE COVER, which couldn’t possibly be a gross oversight.

Faux mimosa.

We begin our Champagne Mocktail odyssey.

Buy local . . . soda.

I like to buy local whenever possible. Turns out Polar makes its soda, like, 10 miles that way, so it’s extra fresh and better retains its vitamin content. That’s how that works, right?

I decided to squeeze my own orange and grapefruit juice, since I really don’t drink these things anyway and didn’t want to surrender the fridge space. These are also locally-grown oranges and grapefruit. I just love going orange-picking, they have this great farm right in Westborough.

Citrus. Decidedly not local.

I’m just kidding. Citrus plants don’t grow in New England.

In an awkward proportion, to get a cup each of orange and grapefruit juice, it took 3 oranges and 1.5 grapefruit. I think this probably changes depending on season, specific varietal and origin of your oranges, though the grapefruit proportion seems as though it would be a little more reliable. As a frame of reference, 1 orange = 1/3 c juice and 1 grapefruit = 2/3 c juice.

The remains.

The easiest way to get juice out of citrus is with a citrus reamer. They’re cheap, extremely effective, and feel like way less of a pain in the ass than one of those little cup things. Also, you can strain the juice as you make it, which is convenient. Just poke it in your fruit there, mess up the insides, then let the juice drip into the sieve, and presumably the bowl underneath. Last step is to squeeze the orange/grapefruit around the reamer and rotate.

How to ream out an orange.

Get out your finest $5 Ikea pitcher.

I actually do love this thing.

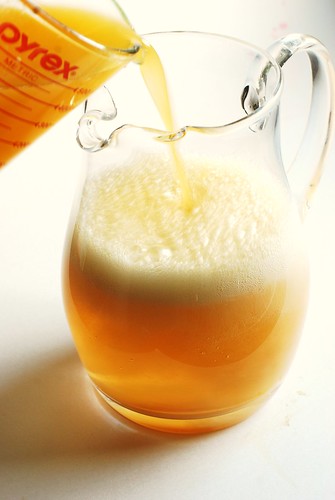
And pour your non-alcoholic champagne.

Ginger ale.

Faux mimosa.

Faux mimosa.

Looks like a nice witbier, eh?

Faux mimosa.

Pour into your completely inappropriately-shaped glass.

But mimosas are for girls. Girls with names like Kelli and Brittany. Let’s girl this up a bit, shall we?

A 3 on the girly scale.

Well, that’s nice, but Kelli and Brittany would kinda feel like you aren’t trying. Put some fruit in there, bitches love that shit.

On the girl scale, perhaps a 6

Okay, we’re getting close. Let’s just go all out.

Kelli and Brittany would totally drink this.

Drink on, ladies, drink on.

This was a bit sweet for my tastes, so I recommend excluding the extra sugar—it just felt so sticky sweet, it was much more refreshing after I diluted a bit with seltzer water. I also think there’s a little room for experimentation here down the seltzer water path, it makes for a dryer-tasting “champagne.” This inordinate sweetness is why you’ll notice I went from making Mock Champagne to Mocktail Mimosa. It just describes it better.

Faux Mimosa
from Sharing Our Best by the Green Mountain Deputies Association (1977)

Feel free to make this low-sugar or sugar-laden according to your preference. Serves 8.

1 liter ginger ale
1 c grapefruit juice (1.5 grapefruit if fresh-squeezing)
1 c orange juice (3 oranges if fresh-squeezing)
1 c water

Mix. Chill. Text Kelli and Brittany and see if they’re doing anything.

nutrition summary (1 serving with diet ginger ale): 23 calories, no fat, no fiber; about .5 weight watchers points

Jul-1-2009

the harvest: fourth week of june

Posted by aleta under what's in season

Weeks 2 & 3 of our CSA harvest were pooled with everyone else’s share because we were in California. But week 4 we had all to ourselves, as Heather & Jon (our share partners) were still in California on pick up day, so that’s almost like only missing the one share, hooray! Here’s what it looked like:

The Harvest: 4th week of June 2009

WE HAVE (roughly left to right)

  • 1 bunch dill
  • 10 radishes (1/2 lb), with leaves
  • 2 pints peas
  • All the nasturtiums I cared to pick (did not find out they were edible flowers until they had been wilting in a vase for awhile)
  • 1 head bibb lettuce
  • 1 lb bok choy
  • 8 garlic scapes,garlic chives, or whatever your farmer’s market or CSA calls them
  • 1 bunch cilantro
  • a big old buncha collard greens
  • 1 bunch scallions
  • 2 kohlrabi
  • 1 head red lettuce

Our cost for a half share is $14.20. Half of the above is worth about $15.03, or $17.53 if you count the flowers, which I do because I buy flowers for the house regularly. It should also be taken into consideration that these are organic vegetables (which drives up the price of the share) and I’m comparing to conventional vegetables at grocery store prices (which is what I’d most likely be buying if I didn’t have a share). We haven’t yet broken even, as I miscalculated the last share, but I think we’ll get there.

The Harvest: 4th week of June 2009

This week’s harvest brought a few new veggies to my kitchen, which was the real draw of this little experiment, and I suspect I’m not alone in this. I’d been itching to get my hands on garlic scapes ever since our farmer mentioned them at the orientation two months ago (those weird circley vine-looking things at the top . . . just to the right of the center . . . don’t see them? Yeah, they don’t really stand out) and they are incredible! They taste pretty much like chives, except with a garlicky bite that doesn’t even leave an aftertaste. Totally refreshing! I tried cooking with them here and there, but I found that no matter how much I added, their flavour seemed to wash out. Moving forward, these are being used like regular chives—chopped and sprinkled atop.

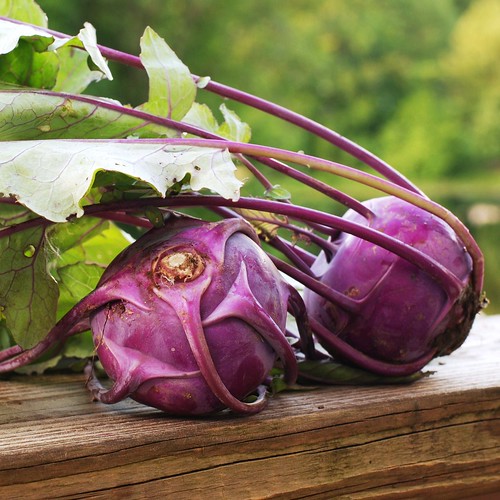
The other new veggie was kohlrabi. This is a funky-looking veggie, and I had high hopes for its flavour to be equally funky, but alas, it works like water chestnuts or cucumber or other bland veggies. Still, one cup has like 35 calories, 5 g fiber and 140% of your vitamin C. So whoah, it’s good for you.

The Harvest: 4th week of June 2009

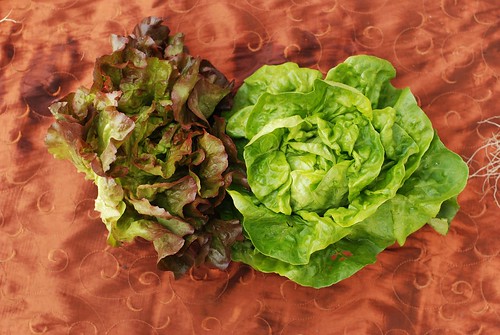
Lettuce is lettuce, but yay for fancy lettuce!

The Harvest: 4th week of June 2009

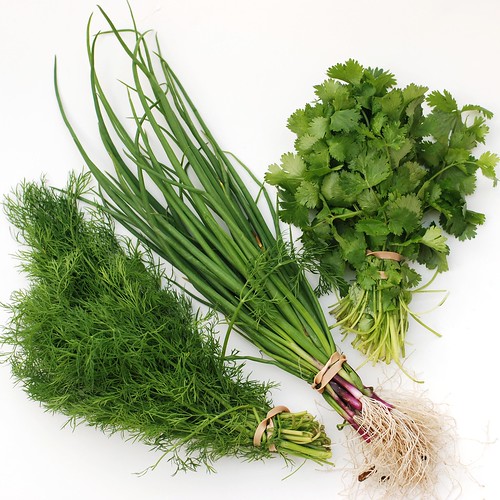
We’re finally starting to get some herbs and I’m so excited about this. I love love fresh herbs. Love them. So much. Mmm!

The Harvest: 4th week of June 2009

And though radishes aren’t the most flavourful of vegetables ever, the purple ones had this beautiful sheen on them, like a purple satin with a golden sheen as it moves. Really, so beautiful.

The Harvest: 4th week of June 2009

But the biggest surprise were peas. Now anybody who’s known me any length of time knows I hate peas, but as it turns out, fresh-from-the-vine peas out-of-the-pod are incredible. They taste, not like the mushy gross woody-tasting crap I remember from my childhood, but unbelievably sweet, like fresh sweet corn. It was, to reuse a word, unbelievable. Of course, in like, two days, they’d become gross woody-tasting crap I remember.

The Harvest: 4th week of June 2009

And those are vegetables! Dano really liked this shot, but I thought it was harder to make everything out than the one at the top. My compromise was to include it at the end.

The Harvest: 4th week of June 2009

So tell me, which veggie shot do you like better?

Jun-8-2009

the box: first week of june

Posted by aleta under what's in season

Metrowest CSA season has officially commenced! We are in the green:

Bounty: First week of June

I took photos of the entire share, but are splitting down the middle for each. Pictured, roughly left to right (thought difficult to pick out where one ends and the next begins):

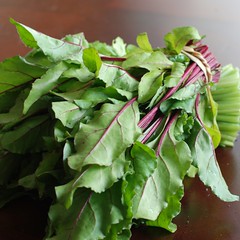
  • a fistful of beet greens
  • 8 oz mixed salad greens
  • fistful of turnip greens
  • 10 Easter egg radishes (so named for their colourful variety)
  • 2 heads lettuce (not sure on the type)
  • 8 oz arugula
  • 8 oz bok choy
  • and in the very center there, baby turnips, which we already went over last Friday.

Choy to your bok.

Beside the enjoyment of delightfully fresh veggies, one of my intentions with this stuff is to get an idea of its worth. Our half share costs about $14.20 for each weekly pickup from June through October, assuming we continue to harvest through then.

Lettuces.

So as it turns out, baby turnips are priceless (in the literal, you can’t buy them way), and you have to buy the beet to get the beet greens, and radishes don’t come with tops. But my estimate is around $18.19 for similar amounts of conventionally-grown (the farm is organic, you see) veggies at Stop & Shop. S&S didn’t have enough of an organic variety to make a reliable estimate. So my return this week was about -$5.11. This is still VERY early season, and I’m quite optimistic for the rest of it!

Beetz!Turnip greens (surprisingly yummy).

The end!

Jun-5-2009

daily nom #29

Posted by aleta under daily noms, what's in season

I’ve been hinting at my first CSA season, which officially commenced last night. While things are still lean around here (lots of leaves, not much in the way of solid vegetables), there are some interesting perks that come with the early season. The first would appear to be these baby turnips, which are nutty and quite delicious raw, if a little difficult to clean and therefore sandy.

I recently learned that veggies like turnips and beets must be thinned out early in the season, or they will crowd out one another and reach deeper into the soil, looking more cylindrical like carrots than nice plump turnips. Interesting, I thought to myself, I must remember to share this on my website. And though I am a complete spacecase, here I am, remembering to do so. Success!

When you thin your turnips you end up with these cute widdo fings, awwww, and why let them go to waste when they make such a nice little snack? Coo chee coo chee coo, etc etc.

Awww, wook at da widdo baby turnips, AWWWW!!!

If you’ve been following along, you’re probably aware that I collect cookbooks. Specifically, cookbooks created by New England civic organizations between 1950 and 1980 for fundraising purposes. With yard sale season in full swing, I find myself solvent with new recipe ideas, among them one I found in this vandalized and water-damaged collection.

No date, no address, not sure.

The picture on the cover somewhat suggests the architecture of Calvary Baptist Church in Easthampton, but I bought the book in Millbury and it has no date (I’ve never been to that Church, I just tried to do some due diligence in my googling). Nevertheless, it *does* include a chocolate cake recipe with a secret ingredient: ice cream.

Ice creeeeaaaammmm!!!

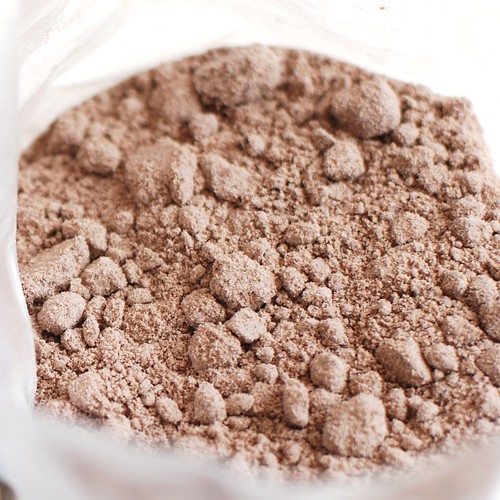
And hey, no cake flour or fancy measuring required, because we’re using cake mix.

The mix.

I let my ice cream soften by scooping it up into small chunks and letting it sit a few minutes. At teaspoon size, your mixer will take care of any further softening required right quick.

Mix together.

The recipe calls for greasing & flouring a tube pan. Since I’m making chocolate cake, I dusted with cocoa powder instead of flour so my cake won’t look dusty. In fact you can do this with any chocolate cake, with the added bonus of a little extra kick of chocolate, and hey, that’s the name of the game, right?

Dusting the tube pan.

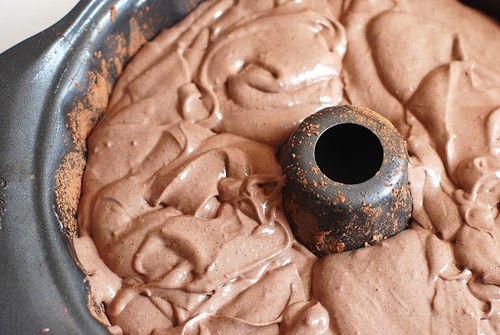
After 4 minutes of beating, the batter kinda just looks like . . . well, melted ice cream.

Whippie.

This is one of those situations where a process shot gives a much clearer picture of the character of the dish than the final picture can. Connie Aubuchon, the contributor of this recipe, assures that the cake is “very moist, rich and chocolatey.”

Mmmmmmm.

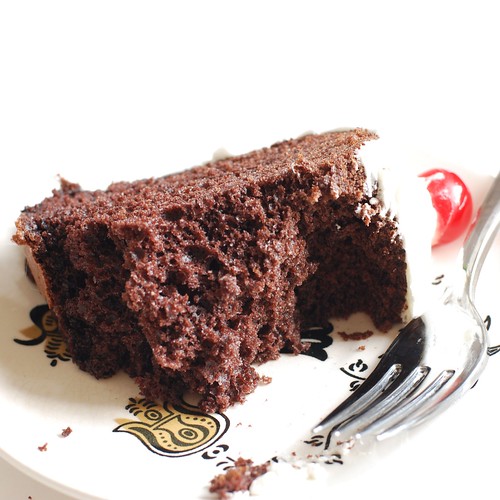
She was right. This is about as moist as a cake gets without being outright wet, and it even has this spongy noise as you cut into it. In short, it is the most delicious chocolate cake you ever had.

Connie was right.

I wanted to see just how chocolatey I could make this, so I stayed true and made a chocolate cake mix with chocolate ice cream. But I was *thisclose* to trying chocolate cake with mint or ginger ice cream, and other combos that come immediately to mind are vanilla mix with mango ice cream, yellow cake mix with strawberry ice cream, and funfetti with pretty much any ice cream. What combo would you make?


Chocolate Ice Cream Cake (but not like you think)
with thanks to Connie Aubuchon

1 box chocolate cake mix (or any other flavour)
1 pint chocolate ice cream, softened (again, any other flavour)
3 eggs
1 c water

Preheat oven to 350o. Grease a tube or bundt pan, then dust with cocoa powder.

Beat all ingredients together for 4 minutes, pour into pan and bake 45 minutes. Serve with a dusting of confectioner’s sugar, a thin icing, whipped cream or the frosting of your choice.

Done!


approximate nutrition summary (will vary depending on the brands used): 230 calories, 6g fat, 1g fiber; about 5 weight watchers points

May-22-2009

daily nom #20

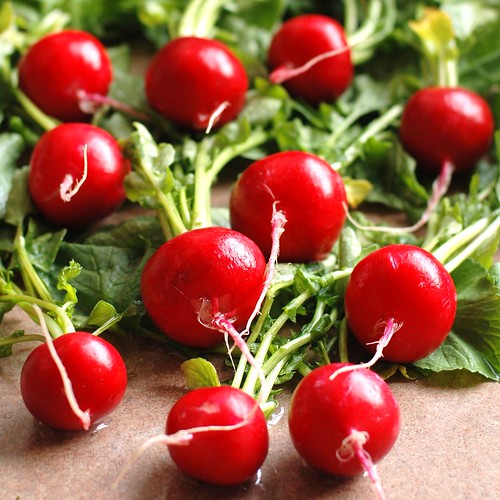
Speaking with a gardening-enthusiast work colleague last week, I found out that radishes are one of the quickest things to grow—and usually the first edible plants of the season (along with rhubarb). Unsurprisingly, this bunch was plucked from Berberian’s Northborough fields in the first week of May.

radishes: pretty much always in season

Tags:

So it would appear that the rest of the country has easy access to local produce for more than 3 months of the year. Must be nice, assholes.

Okay, I lied, nobody’s an asshole, I’m just super jealous. I was raised in the classic suburban white girl tradition of New Hampshire. And to us, the concept of vegetable seasonality was . . . simplistic. We had corn on the cob once a year, my mom made zucchini breads in August (and froze about a dozen), we went apple picking in September and in October we’d choose a pumpkin to carve as a family. The rest of the year we enjoyed carrots, potatoes, apples, oranges and frozen vegetables. My  mom and dad will no doubt read this and lay the guilt on how I make them sound like SUCH bad parents who never fed their kids ANY vegetables, which is not the case, the point here is that seasonality just never stuck with me.

So last year it occurred to me that maybe corn doesn’t get harvested on a single day of the year, and also, what is that day anyway, and hey, plants *do* grow in Massachusetts, so logic would dictate that some of them are edible, right? Perhaps this . . . what do you call it . . . agriculture? thing?? had made its way from the Midwest to our humble corner of the country? This must make me sound horrifically stupid, but really, I’d never seen a well-stocked farmer’s market (they have terrible hours around here, like middle-of-the-afternoon-on-a-Wednesday hours), and the most local veggies I’d seen were singly sold on the side of the road. After much searching, I found Berberian’s Farm in Northborough (no site, no link) and caught up with everyone else that the freshest food is local and that fresh really does make a difference.

This summer I’d like to document an answer to the question that popped up for me only last year: so what’s in season?

On May 13th, it was this junk:

What's in season in New England: May 13

(I do use the term “junk” loosely) We’re looking at radishes, arugula, asparagus, rhubarb and mint.

Needless to say, I did try to think of some clever recipe using only these ingredients, but you know, they really just don’t go together very well, and what’s more, the way I eat them isn’t very interesting. For example, I steamed the radish.

What's in season in New England: May 13

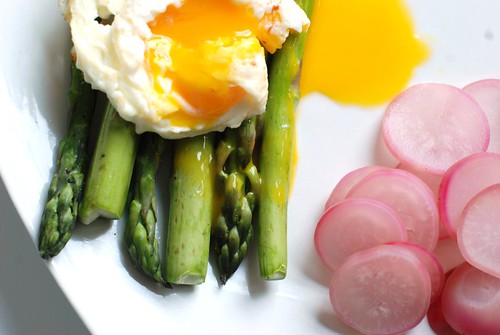
And while its Barbie appeal was heightened significantly, it didn’t taste like much of anything other than maybe overboiled summer squash, so I salted and peppered and ate it on the side with this.

What's in season in New England: May 13

And you can see how I couldn’t in good faith make an entire blog post about this because it’s like cheating . . . wait, what’s that, Bitten Word? Martha had a recipe for poached eggs on asparagus? Wow, either I’m next in line to wear that lady’s heavy crown, or she’s out of actual recipes, because “place poached egg upon steamed asparagus” is not exactly what I would describe as a “recipe” so much as “an idea I came up with on the fly and I’m sure I’m not the first.”

Still, it was really good. Recipe: toss your ‘spargus with 1 tsp olive oil, roast at 500o for 5 minutes while you fry an egg, then salt & pepper & sprinkle with lemon juice if desired and place the egg on top. The end.

Alright, so I did manage to get these big ole honkin rhubarbs though, and I did manage to come up with a recipe for them, and it’s not even strawberry-related! I know, I’m so original, right? First though, check out how huge they were!

What's in season in New England: May 13

The length of my arm, they were! This was the only way I could think to fit them in my lens, as it does not zoom and I’m sick of that overdone depth-of-field bullshit. Anyway, then I chopped ’em up.

What's in season in New England: May 13

Add a healthy dose of sugar because these things are as sour as lemons.

What's in season in New England: May 13

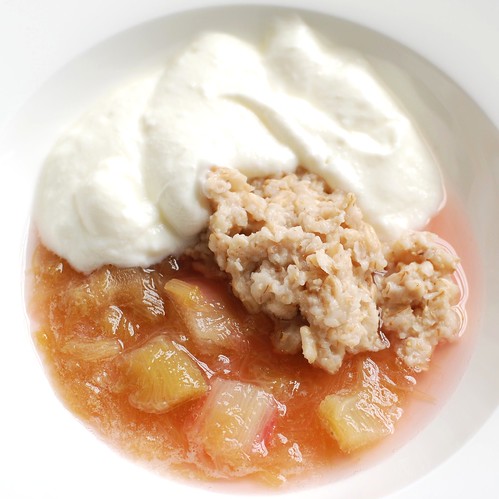
Then stew them for a few moments, make some oatmeal, and enjoy as follows. This makes an excellent breakfast or dessert, complete with vegetable, protein, and fiber. There’s no fat unless you want to add some, it’s easy to make vegan with some yogurt substitution action, and even if you don’t give a shit about any of that diet stuff, you will still like it. The rhubarb tastes just like pink lemonade, there’s just enough oatmeal to make it feel like a real dessert and the yogurt offers a neutral contrast in flavour and texture. I have to say, it far exceeded my vision!

A blushing shade of pink.


Healthy Rhubarb-Parfait-Cobbler-Type-Thing
This dessert (or breakfast) has a rosy blush that can aid a young lady in her pursuit to maintain her girlish figure. In other words, it looks nice and ain’t bad for ya!

2.5 c (about 1/2 lb or 4-5 feet) rhubarb stalks
1/2 c sugar
1/2 c dry oatmeal
3/4 c water
1 c yogurt (fat-free, Greek, full-fat, your pick!)
1/2 tsp sugar (in addition to the sugar above)
1/2 tsp vanilla extract

Rinse the rhubarb, then chop into 1/2″ chunks. Toss with 1/2 c sugar. This is easiest to do in the saucepan you’ll be cooking in—lid it then swirl it around til the chunks are coated. Heat over medium-low heat, stirring every minute or so. You’ll notice that even though you started with no extra water in the pot, suddenly all the rhubarb surrenders its water and you’ll have a kind of stew. Whenever you stir, give one of the chunks a fork to see if it’s tender; as soon as that happens, turn off the heat. It should happen within ten minute or so (if not, try medium heat for a little while, but keep an eye out for burnt bottoms!).

While that’s cooking, prepare the oatmeal. I microwaved mine because um, the stove was kind of already taken. 1/2 c oatmeal to 3/4 water. The oatmeal package will say otherwise; tell it to take a hike. Microwave 2.5 minutes.

Also, mix the yogurt with the vanilla and remaining sugar.

To assemble, we’re really just dividing everything into rough fours: 1/4 c rhubarb, top with a generous tablespoon of the oatmeal, then finish off with 1/4 c yogurt.


nutrition summary (for 1 serving of 4): 185 calories, 1g fat, 2g fiber; about 3 weight watchers points

pre-sprout.

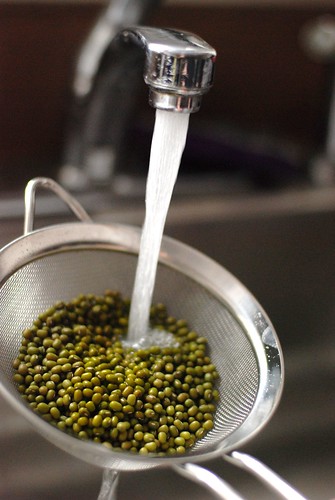
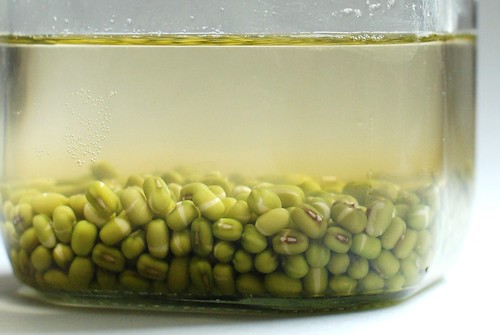
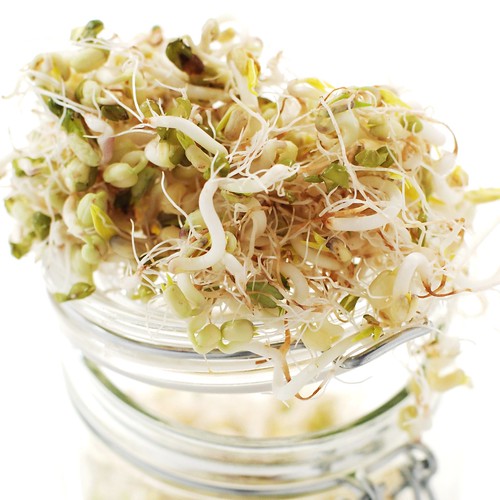
A few months back I thought it would be cool to experiment with sprouting mung beans and share the process. It’s a pretty simple one: soak beans for about 12 hours, drain, then keep in a jar in the dark for a few days, rinsing every 12 hours or so, until—tada!—bean sprouts.

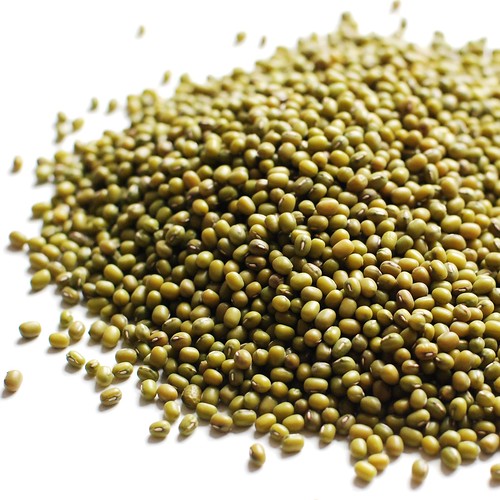
mung beans

This method is foolproof only if you possess an innate ability to plan ahead and are able to couple that with a daily attention to detail.

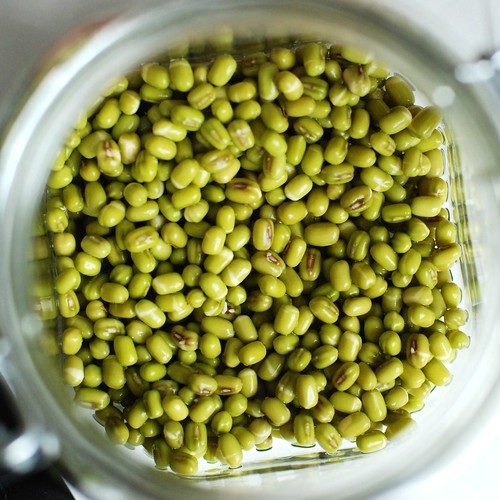
mung beans

Unfortunately, I possess neither. I am, however, completely in love with this specific colour.

My favourite colour.

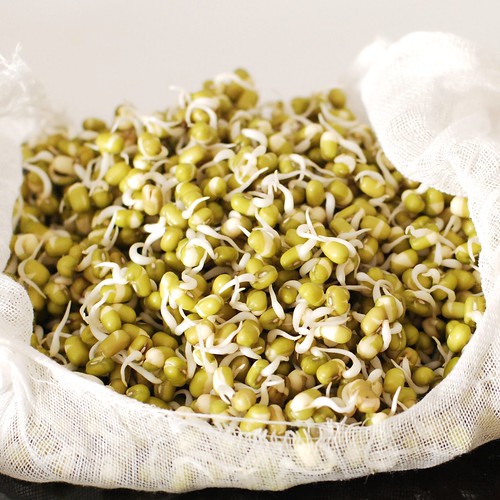
So I tried to sprout these TWICE, and each time made it to the point where things were looking promising.

mung beans

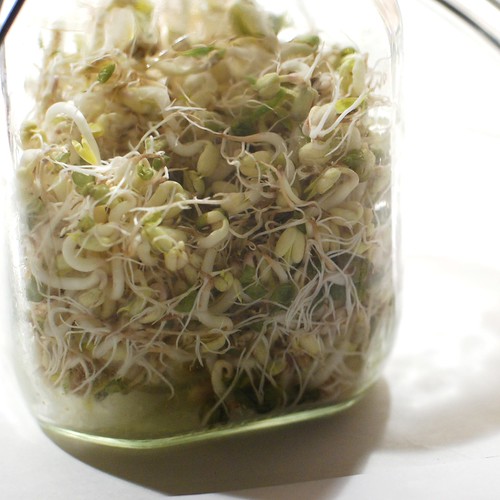
And then both times, I forgot about the damn things in my cupboard until they were oversprouted and bitter and not very edible.

Oversprouted.

And even though they weren’t edible, they were so pretty.

Funky early 90s hair.

Good news, though! Steph of ::steph chows:: did a nice little writeup of her far more successful experience with mung beans, which echoed much of the research I had done in sprouting my own.

Here’s hoping I’m a better farmer in my CSA’s fields this summer, eh?


Whoah, awesome sauce edit!

So if you’re not the comment-reading type, you may have missed this awesome comment from Jasmine, who, rather than pontificating from the opposite side of the globe about how to sprout mung beans, actually hails from that side of the globe and shared some excellent knowledge:

Hi! Here in asia we call these mung beans “green beans”, and use them to make sweetened, ‘cooling’ soups to ward off the heat of summer. Job’s tears (we call them “barley”) and mung beans, together with sugar and some fragrant pandan leaves, put into a pot and on a slow boil will make this humble beverage.

We also sprout mung beans until they are about 2 inches long — they are called “beanstalks” and added into clear soups or sauteed (you may have seen them in “chow mein” or fried noodles). Although you can buy these from your local Chinese grocer’s, I imagine. We sprout them by getting cotton wool (the kind you use for your face will do), soaking it in water and putting those little beans in them, near the sun. Water daily and they’ll grow!

Addendum
Oh, sorry to mention — I’m from Singapore … and here are some local dishes where mung bean sprouts are used!

http://www.noobcook.com/2008/03/11/bean-sprouts-with-salted-fish/

I love reading Omnomicon because I really see what people on the other side of the world is eating! (sorry if all that I’ve said is super ass-vicey)

Jasmine, your comments are not only welcome, but TOTALLY appreciated! And it goes without saying that Omnomicon loves having you for a reader, much of my aim is to gather all kinds of different perspectives on the food I present!

I have an interest in food cultures outside the US (and even outside my little corner of the country), but unfortunately it’s difficult for me to know that the info I am able to gather is even remotely accurate. Next time I’m whipping up a batch of Pho, I’m totally going to try Jasmine’s suggestion. Thanks again, you’re a doll!