online poker

Omnomicon

say it with me now, “om nom nom”

Subscribe to Omnomicon

Archive for the ‘sweets for sharing’ Category

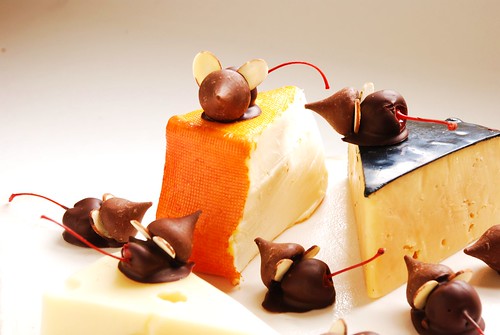
I present to you: that eleventh hour, absolutely perfect finishing touch to your Halloween spread.

Once you’ve gone through caramel apples & popcorn balls, pumpkin bread/cookies/cupcakes/whoopie pies and cider donuts, it’s hard to be all that original without making something that looks like something else. Alas, the very concept of making a dessert that is appealing only insofar as its resemblance to a mummy’s finger or a cat’s litterbox is kind of like saying you would feed those things to your guests if only they were edible just because it’s Halloween. On the other hand is the risk of creating something that just doesn’t quite hit the mark. It’s bad enough that I have to explain my costume (look, I didn’t think Anne Boleyn was all that arcane a reference), to have to explain “See? They’re little ghosts” adds some serious insult to injury. And from a culinary perspective, it’s a little gimmicky and a little lazy and definitely trashy.

Despite the general tackiness of food-that-looks-like-something-else, when done well I can admire such a masterpiece for its cleverness. A couple years ago I came upon this idea somewhere (and if it was yours, please do tell).

The charismatic one.

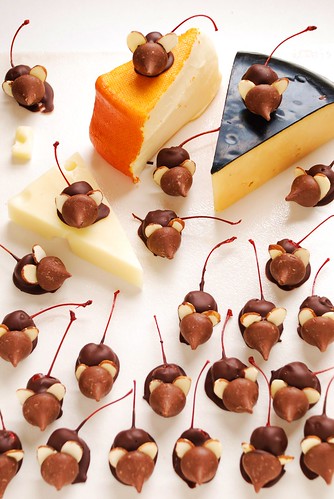
Recognizable, right? It’s like a trick AND a treat all wrapped up in one adorable little package.

The last time I made these little guys I was sorely disappointed by a mushy final consistency to the dipping chocolate, so I took the time this year to learn how to properly temper chocolate at Cooking for Engineers (dot com). Theirs is a great article to consult for a broad discussion of methods and the science involved, and entire books are no doubt available on the subject. I will be detailing only as much as applies to this effort.

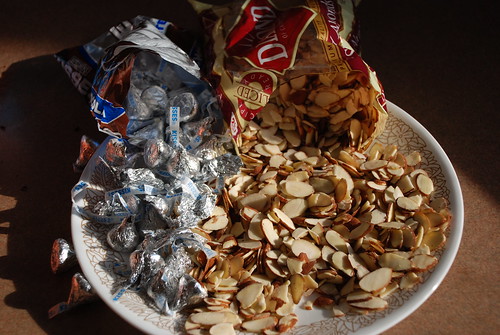
But first! Preparations are at hand. Ever shucked corn? Oh good, today you’ll be shucking Hershey Kisses.

Soon to be heads and ears.

You DO want to do this in advance of getting going with the chocolate, because it is way more of a pain in the ass to unwrap these as you go. You also want to sift through your giant pile of almond slices to pull out the pieces that are complete and have a nice look/size/shape to them. It seems obvious in retrospect, but at the time it didn’t seem as though so many of these slices would be so . . . unsuitable. Also, once the chocolate is on, it’s go time, and it’s not going to stop until you’re done.

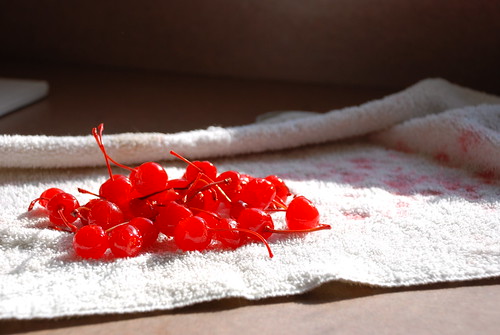
Now drain the cherries,

cherries.

then pat them dry in a towel. I made a little hobo bindle with my kitchen towel and rolled them around in there to dab ’em dry.

cherries.

Previously I was under the impression that tempering one’s chocolate was too difficult to attempt unless you were a chocolatier, figuring that even a chocolate that has seized still tastes pretty good, and as such never bothered. Turns out it’s not actually all that hard, though maybe I just had good luck today.

You will need a thermometer, but no super high heat candy thermometer necessary–a meat thermometer will do nicely. The easiest way to mess up your chocolate is to get water in it, which is why I’d avoid a rainy or otherwise humid day to take this on. So if you’re good on timing and equipment, let’s goOOOo!

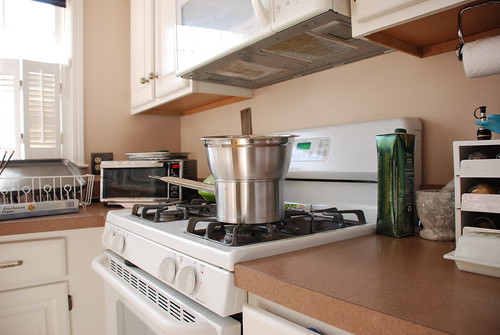
Step 1: Make a double boiler.
Take a metal bowl with a lip and place it on top of a pot with 1″ water, like so.

For double the boil.

Step 2: Chop your chocolate.
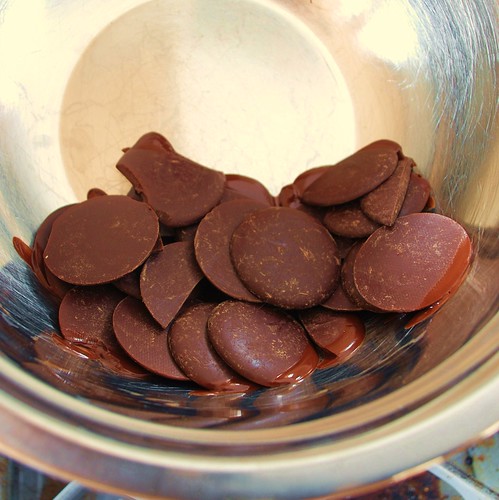
I did not do this, but it would have helped melt everything more easily. One third is going in the pot and the rest is staying behind for later.

Step 3: Melt.
Put chocolate in bowl, set burner to medium high. Once the chocolate begins to melt, reduce heat to medium. Stir the whole time with a rubber spatula until the chocolate’s temperature is near 115 oF (46 oC) (for semisweet chocolate chips, if using milk chocolate or white chocolate 110 oF (43 oC))

Melt.

Step 4: Remove from heat
But leave the bowl in the pot for the next part.

Step 5: Seed.
Take the remaining ounce of chocolate and stir into the molten stuff. Stir continuously until temperature is between 88 oF and 90 oF (for semisweet chocolate chips, if using milk chocolate or white chocolate 86oF and 88 oF).

Seed.

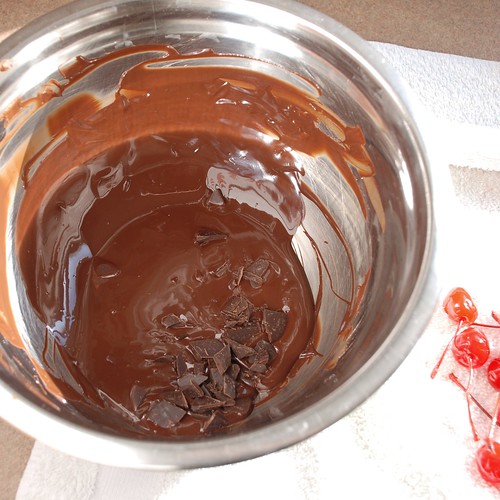
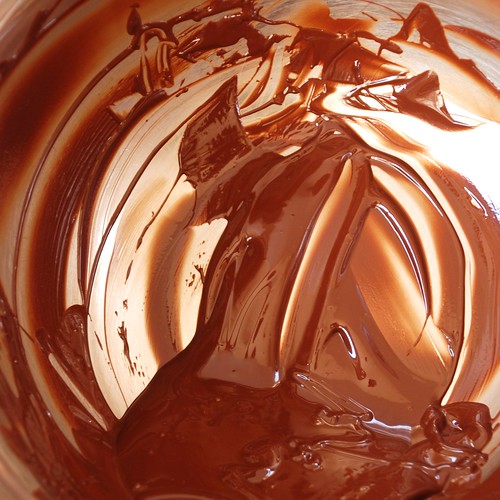
And that’s tempering chocolate, ta da! Here’s how beautifully smooooove it looks.

Perfectly shiny brunette.

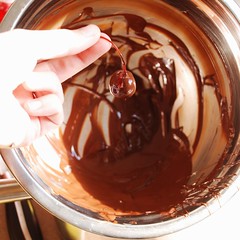
Keeping the bowl at an angle helps with the dipping process (i.e. there’s more to dip into and it holds its heat better).

Step 1
Step 2Step 3!

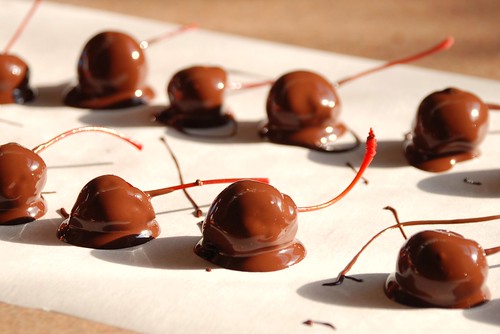
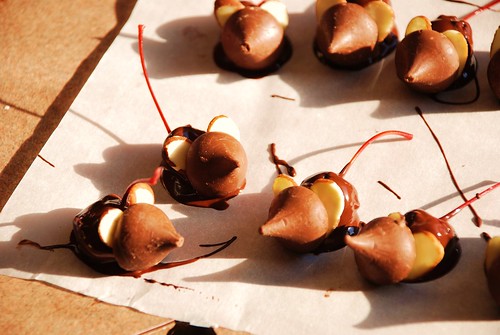
Lay out on parchment paper or wax paper.

Nothing special just yet...

Nothing special just yet...

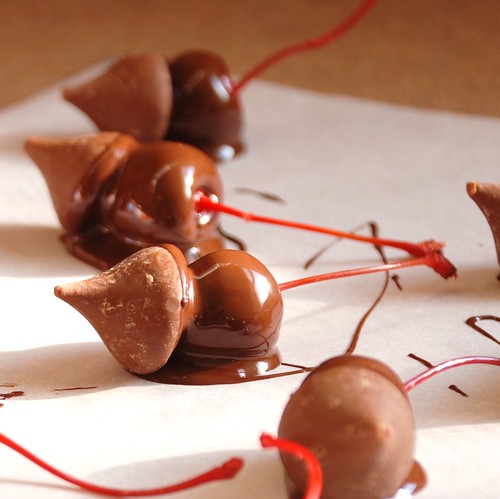
Dab on a Kiss.

(he can't hear you)

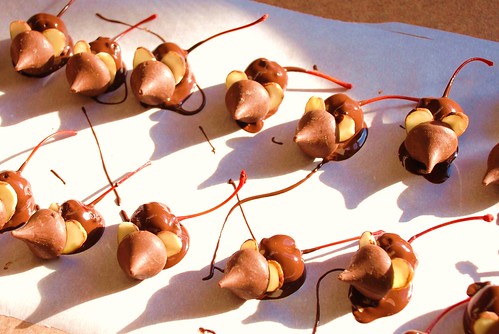
And ears.

Well-tempered mice.

See how well-tempered my mice are? My, Aleta, you are positively . . . punning tonight, bahuffhuffhuff.

Well-tempered mice.

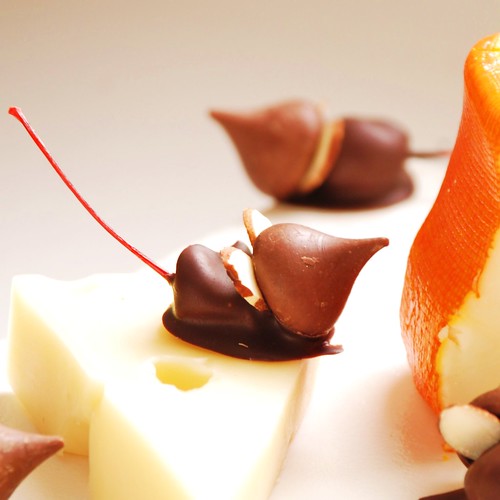
These little guys don’t look like much all stacked together on a plate, but I felt pretty clever sticking them on a cheese plate. Get it? Cuz they’re mice? Oh Martha Stewart, you have some counterculture competition coming your way.

Well-tempered mice.

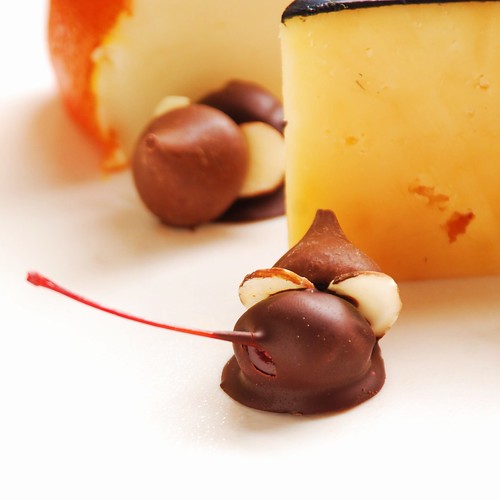
Cute enough to make up for illustrating what in true practice would actually be quite disgusting. I’m calling it a win. When made lovingly, personalities will emerge. There’s the ambitious one.

The curious one.

The so-frugal-it’s-downright-stingy one.

The stingy one.

And the one with a really undeniably cute butt.

The one with a cute butt.

Chocolate Cherry Mice

Small batch (makes 25)

1 small jar Stem-On Maraschino Cherries (10oz; ~25 count)
1/3 bag Hershey Kisses (4oz; 25 total)
4oz chocolate (avoid chips if possible; semisweet, dark, or milk as desired)
50 almond slivers (you’ll need to pick through a lot to get this many, so I recommend starting with a large bag, at least a cup)

Large batch (makes 75, safer in terms of chocolate temper)

1 LARGE (10 oz, ~50 count) jar Stem-On Maraschino Cherries
1 small (16 oz, ~25 count) jar Stem-On Maraschino Cherries
1 bag Hershey Kisses (4oz; 75 total)
12oz chocolate (avoid chips if possible; semisweet, dark, or milk as desired)
150 almond slivers (start with at least 3 cups)

Equipment:
Metal or heatproof bowl with lip
Meat thermometer
Rubber spatula. Word on the internet is no metal, no wood.
A sunny, low-humidity day best tempers chocolate, but rainy day mice will be just as yummy if not as shiny.
Drain cherries, do not rinse. Place a handful at a time in a kitchen towel, craft into a bindle and shake around to absorb as much moisture as possible. Leave in towel for now.

Unwrap all Hershey kisses and set on a platter for easy access.

Sort through almond slices until you have two nicely shaped slices for each mouse’s pair of ears.

Line 1 – 3 cookie sheets or cutting boards with parchment paper or wax paper. They need to be able to fit in your fridge!

Chop chocolate, reserving about a third chopped pieces (1.25oz for batch of 25; 4oz for batch of 75). If using chocolate chips, no need to chop.

Make a double boiler by placing a bowl with a lip over a medium pot/saucepan with about a half inch of water. Set burner to medium high, and once the chocolate begins to melt, reduce to medium. Stir continuously with rubber spatula. As soon as you can see no more individual pieces, check the temperature, and continue to cook until it just enters the appropriate target. Err on the side of removing too soon if the temperature is still rising rapidly as it nears your target.

Dark/Semisweet: 115 oF (46 oC)
Milk Chocolate: 110 oF (43 oC)
White Chocolate: 110 oF (43 oC)

Turn off stove, remove bowl from pot and place on a towel to absorb extra moisture. Add in remaining chocolate and stir constantly until temperature is at tempering range:

Dark/Semisweet: 88 oF – 90 oF (31 oC – 32 oC)
Milk Chocolate: 86 oF – 88 oF (30 oC – 31 oC)
White Chocolate: 80 oF – 82 oF (27 oC – 28 oC)

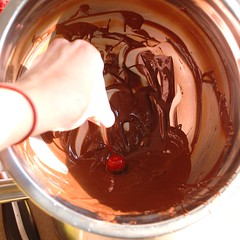
Holding stem, dip each cherry in the liquid chocolate, then set on parchment/wax paper. Set your mice about two inches apart to allow space for the Hershey Kiss and a little fiddling, and so no tails are caught in his neighbor’s warm chocolate.

Once all cherries are dipped, and starting at the beginning again, set a Hershey Kiss in front of each cherry to make a head. It helps to rest it on the cherry at an angle, as though the mouse is looking up. Aesthetically, an upturned nose is cuter.

Once all cherries are headed, and starting at the beginning again, stick one almond slice on either side of the head to make ears. Try not to touch the wet chocolate, but you can use the Hershey Kiss and the tail to help position these just so. If the chocolate is not tacky enough, wait a couple minutes and try again, but be careful not let it get too cool.

And finally, once your mice can hear you, set platters in fridge for 1-4 hours to firm up. To remove, seize the mouse by its tail. Squeak!

Serve on a cheese platter for maximum effect. Really, it’s so adorably cute.

Chocolate Cherry Mice

Welcome, October! People are already handing out free candy, and won’t stop until next year. And hey, why not? Bikinis are at least nine months away (assuming it stops snowing before May gets here), nothing’s in season except squash, and it’s cold—if we can get the kitchen toasty, hopefully some of the heat will drift into the living room and combat the chill emanating from the ill-conceived window door.

What I’m saying is, “It’s time to start baking again.”

I think the Worcester County Homemakers would agree, so I consulted their 1961 tome.

homemakers do it...at home

As per usual, I have an opinion.

I heart Worcester

It’s true: I do so heart Worcester. I’m just so-so on Abraham Lincoln, whose upper torso I found a bit out of place, but a mere moment of googling uncovered a visit to Worcester on September 12, 1848, earning him permanent fixture in the minds of Worcester housewives, even a hundred years later.

Amid such white trash classics as “Clamburgers” and “Baked Stuffed [with onions, carrots, shortening, day old bread, and evaporated milk] Hot Dogs” I came upon a most enchanting proposal.

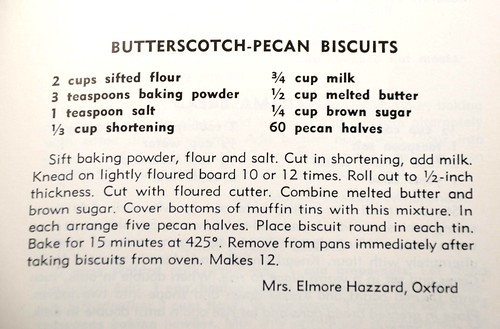
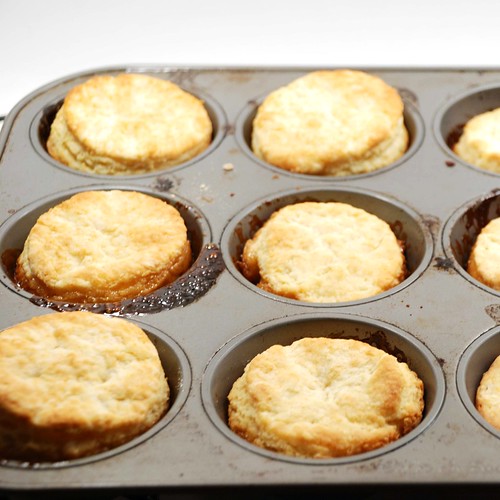
butterscotch-pecan biscuits

Butterscotch! Pecans!! Biscuits!!! Awww, and I bet they’re gonna be so goddamn cute too! Let’s do it. I drag out this clumsy atrocity for its sole function.

butterscotch-pecan biscuits

I love biscuits, but usually have to resign myself to drop biscuits because I hate kneading, likely because I suck at it. These, however, were extremely manageable, and are my new favorite thing to whip up for no reason.

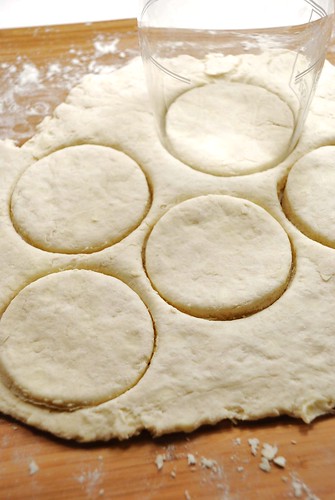
circle circle

The biscuits are going just inside muffin pan cups, so scrounge about for whatever cylinder you have about that’s closest to the right size. In this case, I used this promotional wine glass that came free with the only wine tasting I’ve ever attended.

Inelegant uses for elegant items.

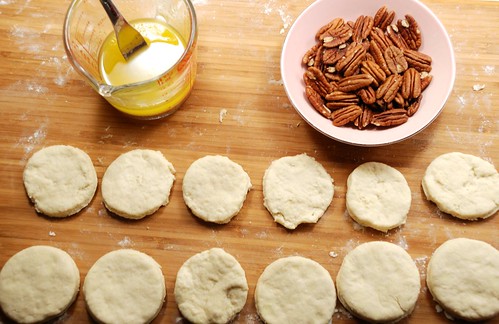
Get a little mis en place going strong…

polka dot dot dot

Now I did follow the recipe for this part. This time. Next time I will not be mixing the butter with the brown sugar because as I quickly discovered it doesn’t exactly make a suspension, and the levels in each cup were . . . variable. But then Math told me the good news: it works out to 2 tsp of melted butter and 2 tsp brown sugar in each cup, making the next part easy.

Just before starting on the dough, set the oven to 425o, cut 2 tsp (2/3 tbsp) into each cup and put it in the oven for a little bit. Keep an eye on that, you want the butter just melted and not sizzling. Once your biscuits are cut and ready, measure a solid 2 tsp of brown sugar into each cup and stir. I like using chopsticks for these kinds of things, and they’re also easy to clean/store.

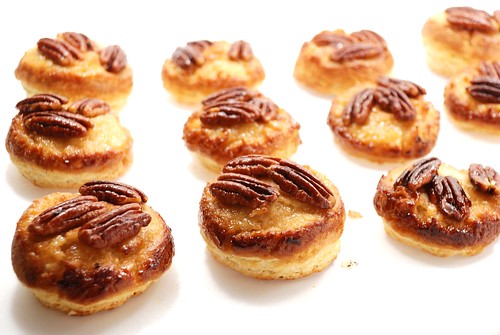
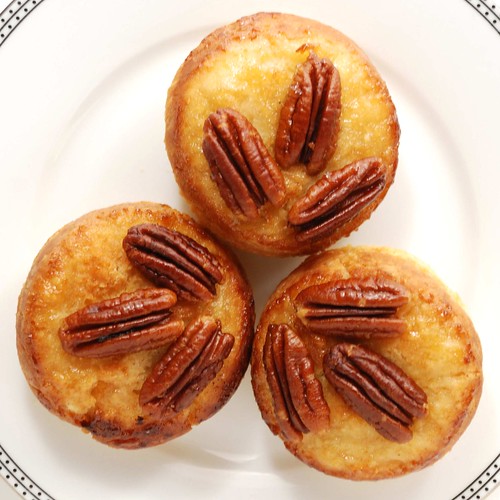
I also discovered only 38 solid pecan halves after dropping $5, so instead of 5 in each cup, I settled for 3, which arrange much more nicely than I imagine 5 might.

almost like little abstract plants

Set biscuits atop each cup and bake for fit-teen minutes.

putting the bisc in biscuit

Now because I stopped to snap that, I really missed out on some delicious butterscotch that cooled onto the pan [that I later scraped out for a midnight snack], so unless you’re f’blogging, pop them out toute de suite. I promise they will not be as syrupy as you expect, but a little bit of parchment will go a long way just in case.
Such brass!

And then eat them. Eat them as soon as they will let you.
and now they're arrows.

Butterscotch-Pecan Biscuits
adapted from Worcester County Homemakers Cook Book (1961, Home Department Advisory Council, Worcester County Extension Service, Worcester, Mass.)

1 stick butter, sliced into 2 tsp (2/3 tbsp) bits
2 cups flour (248g)
1 tbsp baking powder
1 tsp salt
1/3 c cold chopped butter (5 1/3 tbsp)
3/4 c milk
1/2 c packed brown sugar (50g)
36 whole pecan halves (1 c)

Drop 2 tsp butter in each cup of a muffin pan and put into oven as it preheats to 425o. Keep checking as you work on the biscuits, and pull out as soon as it is *just* barely melted; do not let it bubble.

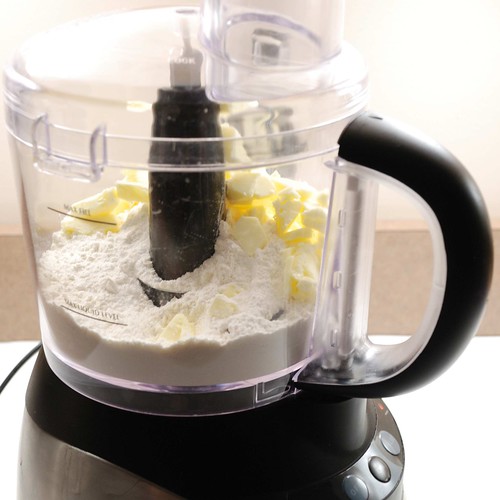
Squizzle flour, baking powder and salt in food processor real quick in lieu of the traditional sifting. If traditional, poor, cheap or have a tiny kitchen, sift into bowl. Cut/pulse in the 1/3 c butter, and once you have coarse pebbles, add milk, work into a ball, and turn onto a floured board. Knead 10-12 times, roll out and cut 12 circles-cum-biscuits (see wine glass notes above).

Your butter should be melted by now, so measure 2 tsp brown sugar into each cup and stir with a chopstick. Plop a biscuit atop each cup, bake 15 minutes.

Flip onto a cutting board covered with parchment immediately upon removal from the oven. Let cool and just try to resist.

cairn.

I’m back! Didja miss me? Vacation was vacation, I won’t bore you with details, but I did meet Steffany from Dinner Love, and she’s a dear.

But hey check it out, while I was glutting myself daily on hotel breakfast Danish, there were 45 Tastebuddies trying out 11 different recipes in a valiant effort to determine which would qualify as THE BEST CHOCOLATE CHIP COOKIES there are. If you have no idea what I’m talking about, welcome to Omnomicon! Here’s where you can read about our monthly Recipe Round-Robin contest.

And here, let me show you what the best looks like, beginning to end.

The making of chocolate chip cookies.

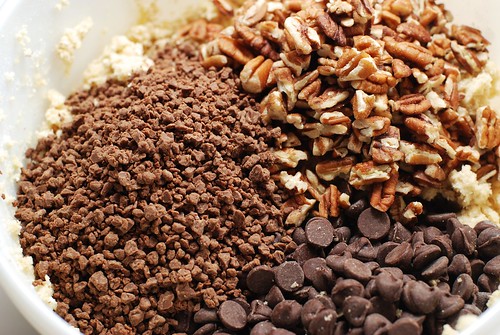
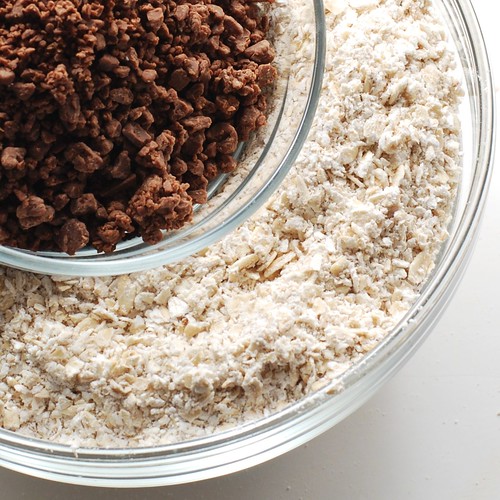
That up there is all the stuff that goes into these suckers. It’s hard to tell, but there are a couple secret ingredients in there.

The making of chocolate chip cookies.

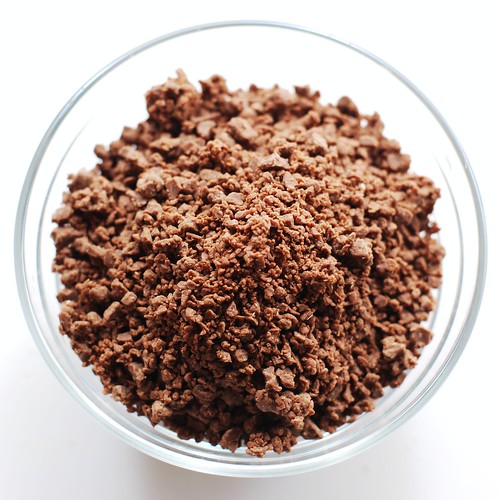
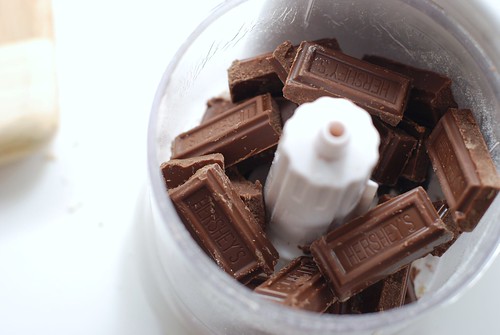
The white stuff is ground oatmeal, and the brown crumbs are grated Hershey bars. Specifically Hershey bars. Except instead of grating, I thought I’d try getting the job done with my food processor.

The making of chocolate chip cookies.

And what do you know, it totally worked.

The making of chocolate chip cookies.

And then stir that into all the other stuff with some nuts and, naturally, chocolate chips.

The making of chocolate chip cookies.

The batter is extremely tempting, but be sure to save some for the cookies, they’re worth it.

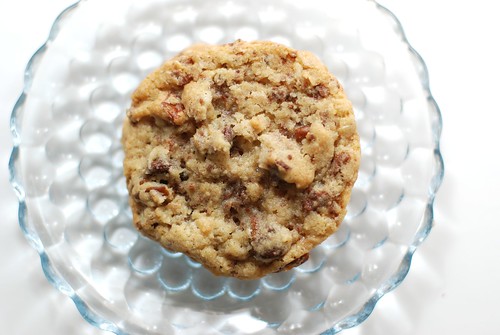
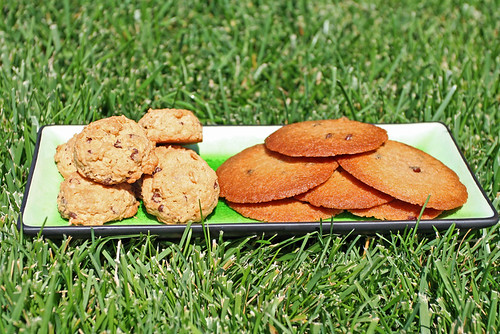
Cookies.

So do you recognize these? They were Bubbe’s Fantastic Chocolate Chip Cookies, code named Recipe L, and many big thanks to Hallie for letting us give them a try! Here’s what she had to say about ’em:

Here is my bubbe’s fantastic recipe for Chocolate Chip Cookies. They’re definitely not low-fat, but they’re the best I’ve ever made (and I’m a pastry chef!).

So these are both pastry-chef and Tastebuddy approved. I knew you’s guys had great taste. My guess is that the groundedness of the oatmeal gives these more texture without being so suggestive of oatmeal cookies. I also have a theory on how the Hershey bar plays into things: usually a chocolate chip cookie is a sugar cookie with bitter chocolate chips here and there, but little to tie these two elements together. Maybe the grated chocolate creates a gentler transition from cookie to chip? Even if my theory is right (and I’m open to the alternative, I know what I don’t know), my word choice is not even remotely technical, so Hallie, please feel free to jump in with your expertise.
Here’s the word I got via email results:

  • Our house votes for recipe L. It had lots of chocolate and grinding the oatmeal was a great idea because it made for flatter and less dry cookies. Recipe L was nice and chocolaty! After we made our decision we did our own taste test with friends and recipe L definitely won hands down.
  • Far and away, I and my 3 co-tasters chose Bubbe’s Fantastic recipe as the best of the two. The finely ground oatmeal added a nice substance to the cookies without giving it the graininess of an oatmeal cookie. They baked up nicely–no flat cookies here–and the ground Hershey’s chocolate gave the cookies a beautiful brown color and a little extra chocolate kick. I used hazelnuts since it said you could add your choice of nuts–not a huge fan of nuts in cookies, but they tasted great in this recipe.
  • The texture was very nice; the oatmeal provided more substance to the cookie and even though some of us had hesitations about whether oatmeal belonged in a traditional chocolate chip cookie, it was quite good.
  • So good. If you’re including technique suggestions, rolling these guys into balls really helped.
  • Who knew oatmeal could help so much?

And here’s the word on the web (leave a comment with a link if I missed your post!):

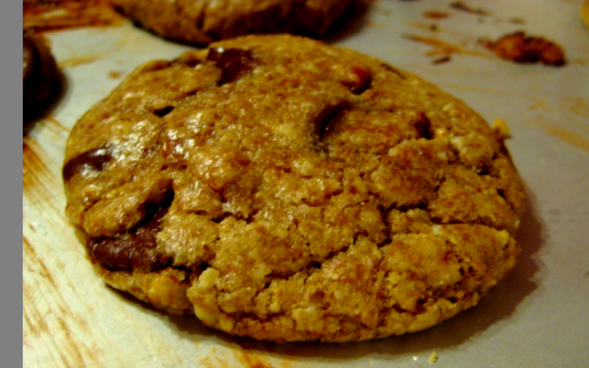
And here’s what they looked like in other people’s kitchens:

Ruth made Bubbe’s
Ruth tries Bubbe's.

And Jeff also made Bubbe’s
Jeff gives Bubbe's cookies a shot.

Then Domestic Ambitions made the Friendly Choco-Chippers . . .
Domestic Ambitions also tried the Friendly Choco-Chippers

. . . and also Sheila’s (nice collage-work, btw).
Domestic Ambitions makes Sheila's cookies.

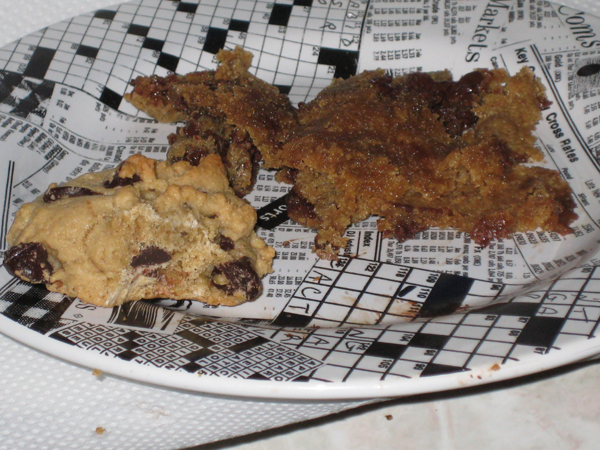
Next up are the Kitten-Free (calls for exactly 0 kittens in the ingredient list, and the cleverness was simply adorable) as compared to the Family Secret recipe, the latter which did not seem to work out for Carly, who may have been too busy with Sunday’s NYTimes crossword to care.
Carly compares the Kitten-Free to the Family Secret chocolate chips cookies...

And lastly, there was the recipe that ended in “Mmm. Eat.” and Ruby’s Plan ahead cookies. I want to give Lisa mad props for this photo, it’s gorgeous.
Mmm Eat vs. Ruby's Plan-Aheaders (courtesy of Lisa)

And there you have it! Yet another Recipe Round-Robin, now with 200% more reader participation. Hooray! So I’m announcing a savoury recipe for July . . . any suggestions? I’m thinking summer-time BBQ dishes—pasta salad, seasoned hamburgers, probably not potato salad because there’s a huge tendency toward grossness and grossed-out taste-testers—but I bet comfort food will work regardless of the time of year. We’ll save fruitcake for December.

Thanks again to everyone for participating. Really, I mean it! I’m so psyched that this works out every month because people are saying they had fun and because I like reading about it, and giving stuff away is fun too.

And last but not least, here’s Hallie’s winning recipe.

Bubbe’s Fantastic Recipe for Chocolate Chip Cookies
yields about 3 dozen cookies

1 cup butter
1 cup sugar
1 cup brown sugar
2 eggs
1 tsp. vanilla
2 cups flour
2 cups oatmeal, ground to mealy texture
1/2 tsp. salt
1 tsp. baking powder
1 tsp. baking soda
12 oz chocolate chips [2 cups]
4 oz grated hershey bar [this amounts to 18.5 rectangles from the Big Bar, but use your algebra to figure it out if you can manage . . . I food processored those suckers, and it seemed to do the trick. If grating by hand, however, one Tastebuddy recommends freezing the bar first so it doesn’t melt in your hand.]
~1 cup chopped nuts of choice (I usually use pecans or walnuts) [editor used pecans, and they were fabulous]

Cream the butter and sugars together.
Add the eggs and vanilla and beat until fluffy.
Mix the dry ingredients and add to egg mixture.
Stir in the chips, nuts, and hershey bar.
Drop by rounded tablespoons onto a lined cookie sheet and bake at 375 for 6-8 minutes. [editor’s note: mine took about 10 minutes, and one Tastebuddy had reported 11-12 minutes. Final recommendation is check in at 6 minutes, and then every two minutes after that until you can see a little bit of browning happening on top].

nom nom nom!

nutrition summary (1 of 36 cookies yield): 220 calories, 12g fat, 1.5g fiber; ~5 weight watchers points

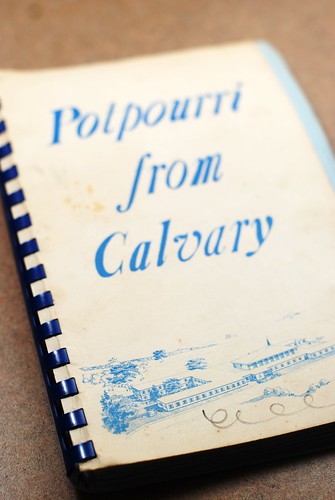
If you’ve been following along, you’re probably aware that I collect cookbooks. Specifically, cookbooks created by New England civic organizations between 1950 and 1980 for fundraising purposes. With yard sale season in full swing, I find myself solvent with new recipe ideas, among them one I found in this vandalized and water-damaged collection.

No date, no address, not sure.

The picture on the cover somewhat suggests the architecture of Calvary Baptist Church in Easthampton, but I bought the book in Millbury and it has no date (I’ve never been to that Church, I just tried to do some due diligence in my googling). Nevertheless, it *does* include a chocolate cake recipe with a secret ingredient: ice cream.

Ice creeeeaaaammmm!!!

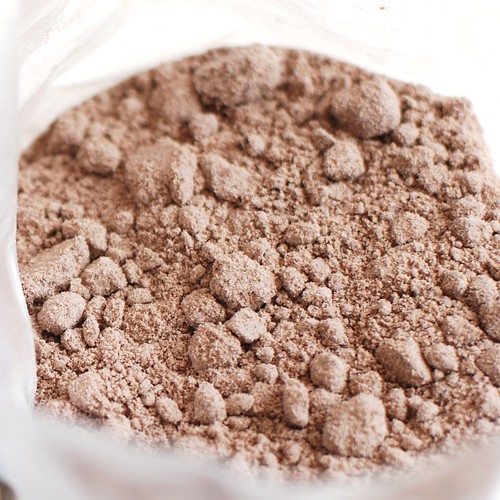
And hey, no cake flour or fancy measuring required, because we’re using cake mix.

The mix.

I let my ice cream soften by scooping it up into small chunks and letting it sit a few minutes. At teaspoon size, your mixer will take care of any further softening required right quick.

Mix together.

The recipe calls for greasing & flouring a tube pan. Since I’m making chocolate cake, I dusted with cocoa powder instead of flour so my cake won’t look dusty. In fact you can do this with any chocolate cake, with the added bonus of a little extra kick of chocolate, and hey, that’s the name of the game, right?

Dusting the tube pan.

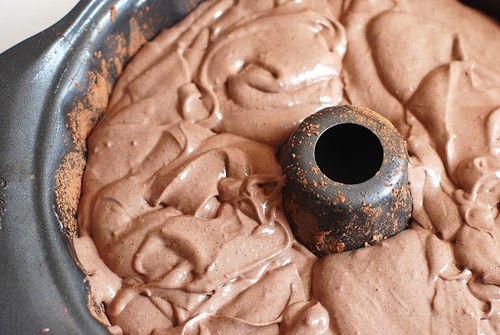
After 4 minutes of beating, the batter kinda just looks like . . . well, melted ice cream.

Whippie.

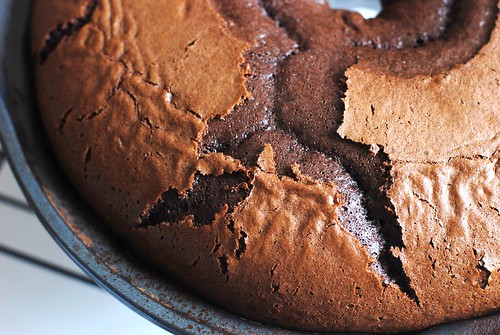
This is one of those situations where a process shot gives a much clearer picture of the character of the dish than the final picture can. Connie Aubuchon, the contributor of this recipe, assures that the cake is “very moist, rich and chocolatey.”

Mmmmmmm.

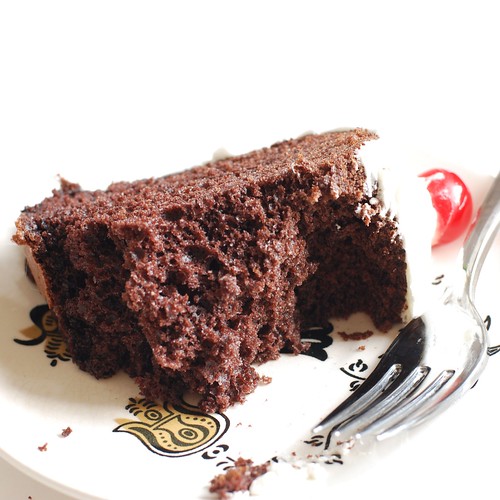
She was right. This is about as moist as a cake gets without being outright wet, and it even has this spongy noise as you cut into it. In short, it is the most delicious chocolate cake you ever had.

Connie was right.

I wanted to see just how chocolatey I could make this, so I stayed true and made a chocolate cake mix with chocolate ice cream. But I was *thisclose* to trying chocolate cake with mint or ginger ice cream, and other combos that come immediately to mind are vanilla mix with mango ice cream, yellow cake mix with strawberry ice cream, and funfetti with pretty much any ice cream. What combo would you make?


Chocolate Ice Cream Cake (but not like you think)
with thanks to Connie Aubuchon

1 box chocolate cake mix (or any other flavour)
1 pint chocolate ice cream, softened (again, any other flavour)
3 eggs
1 c water

Preheat oven to 350o. Grease a tube or bundt pan, then dust with cocoa powder.

Beat all ingredients together for 4 minutes, pour into pan and bake 45 minutes. Serve with a dusting of confectioner’s sugar, a thin icing, whipped cream or the frosting of your choice.

Done!


approximate nutrition summary (will vary depending on the brands used): 230 calories, 6g fat, 1g fiber; about 5 weight watchers points

Revealing my disinterest in ice cream always draws a lot of incredulity on the behalf of the listener. Sometimes the reaction is decidedly offended, as though ice cream were treasured family moment I just figuratively dismissed with a bored wave of my hand. Other times it’s complete confusion. What did you just say? What do you mean, you “don’t like ice cream?” You must like some kind of ice cream. And it’s not like I hate the stuff, it’s just that I don’t care much for it, and if I’m going to down a thousand calories in the span of 10 minutes, I’d rather it be noodles I drag from takeout carton to pursed lips with some bamboo sticks.

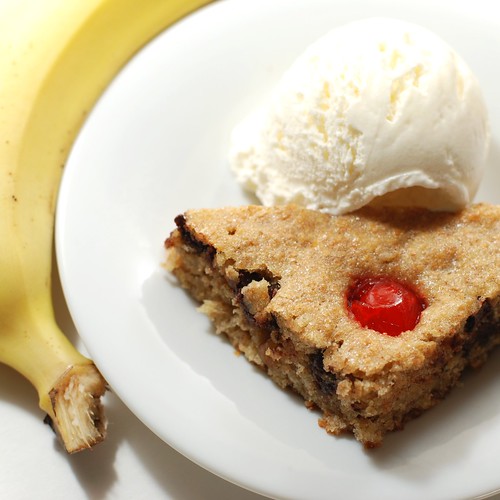
But every now and again, I have this crazy craving for a banana split. And you know, I’m a simple girl in that respect: banana, vanilla ice cream, walnuts, chocolate bits, butterscotch and of course, a maraschino cherry. With this in mind I present a take on blondies that is a little lighter than usual and reminiscent of a banana split.

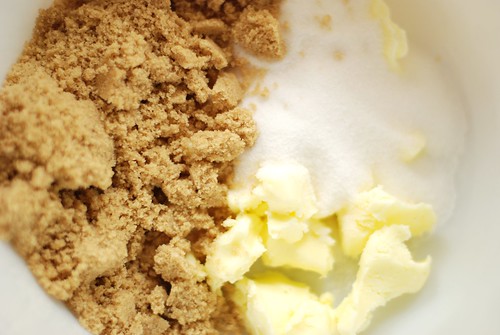
Butter. Sugar. The usual.

I’d like to use this opportunity to let you know, in case you didn’t, that a kitchen scale is a wise investment because then you don’t have to pack brown sugar, which is one of those things that just seems to completely interrupt the flow of my baking process. Similarly, you don’t have to sift your flour in order to measure it only to sift it again into the mixing bowl. And your scale has other uses that will no doubt come up in future recipes as I loudly bang the “really, just get a kitchen scale already” drum.

I thought that these bananas looked rather . . . conversational.

Conversational.

By now we all know to use very ripe bananas in our baking, and by necessity I often end up freezing them too, in an attempt to salvage that lone straggler at the end of the week. This is a convenient circumstance, as freezing then thawing the fruit bursts cells and brings out as much flavour as is possible from it. At least, that’s my understanding, but the actual fact that pre-frozen fruit is better for baking, for whatever reason this is the case, is confirmed by on Mr. Alton Brown who was rambling on in his weird way about it one Sunday afternoon a couple years ago as I nursed a hangover on the couch.

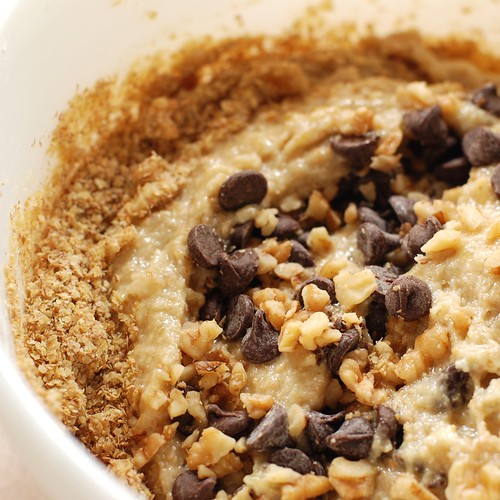
Wheat germ is one of those things I haven’t experimented with very much, but it has an unobtrusive nuttiness that avoids being too earthy. Of course, I’ve only had opportunity to pair it with quite a bit of sugar, so maybe this is different in other contexts. Also, walnuts and chocolate chips.

GERM! EWWW! Jk, it's the good kind.

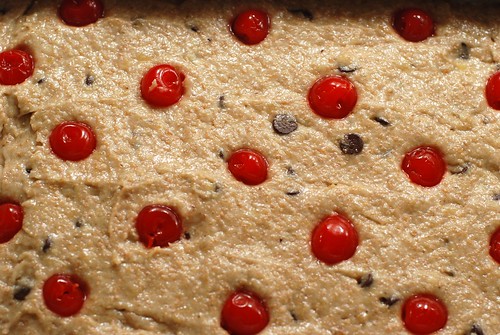
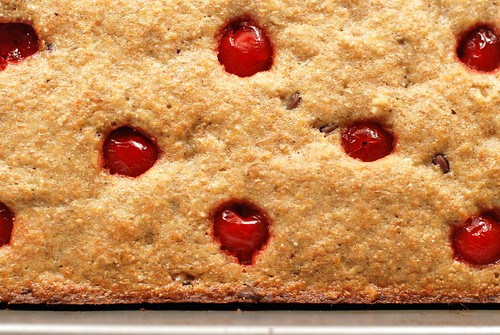
I polka dotted the top with some maraschino cherries. Because they really do scream ice cream, and it was the cutest thing I could think for a garnish.

Before:
Polka dot cherries.

After (all gummy from baking, yum!):
DSC_3532

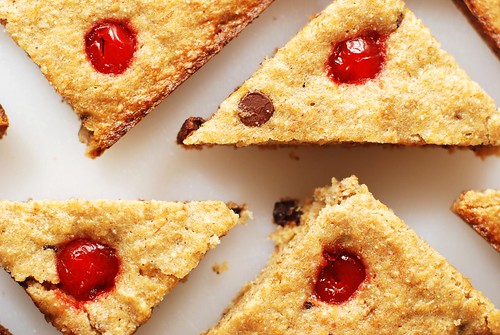
I find that full-on brownie size (more than 3″ on a side!) is just way too big, and really, after the first half I’m eating it because I don’t really want to hold onto the rest. With this in mind, I cut to the chase and halved the usual size. Triangles seem to make the split look more deliberate and less “shit, too many people showed up.”

Blonde triangles.

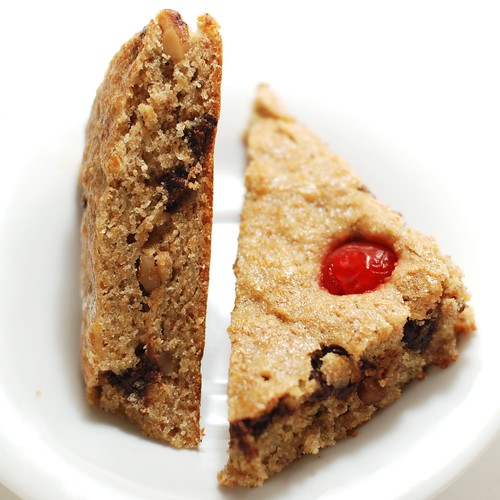
These had just the perfect brownie-imitative texture. They weren’t too cakey, but had a lovely rise to them, avoiding the heavy greasiness of some blondie recipes. Of course, sacrificing that greasiness also sacrifices that amazing chewy crustiness, but the edges on these things are still quite satisfying.

Perfect consistency.

And while the intention was to have a bar that really embraced a banana split all on its own, I would be seriously remiss if I had not tried it with a simple vanilla ice cream.

Banana split blondie!


Banana Split Blondies

1/2 c butter (1 stick), softened
2/3 c sugar
2/3 c light brown sugar (147g)
2 tsp vanilla
4 very ripe bananas (previously frozen is best), mashed
1 egg
1 c whole wheat flour (125g)
1 c white flour (125g)
1 tsp baking powder
1/2 c wheat germ (optional)
1/2 c chocolate chips
1/2 c chopped walnuts
24 maraschino cherries, drained

Preheat oven to 350o.

Cream butter & sugars, add vanilla, bananas and egg. Sift wheat & white flours along with the baking powder into the mix, then combine. Stir in wheat germ, chocolate chips and walnuts.

Spread into well-greased 9×13 metal baking pan—a glass pan will bake differently, so be aware. Dot with staggered maraschino cherries, three to a row, eight to a column.

Bake 35 minutes, and allow to cool completely before cutting. To get the triangle thing going on, first cut into a 3×4 grid (12 pieces), then cut each rectangle diagonally so each piece has one cherry.

The refuse.

nutrition summary: (1 of 24 bars) 174 calories, 7g fat, 1g fiber; about 4 weight watchers points

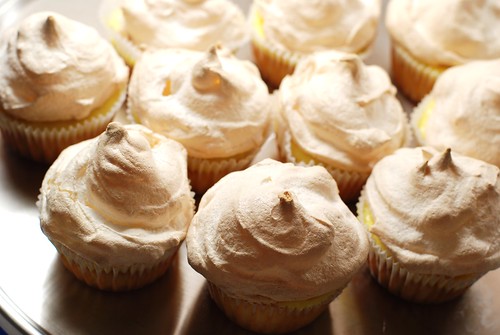
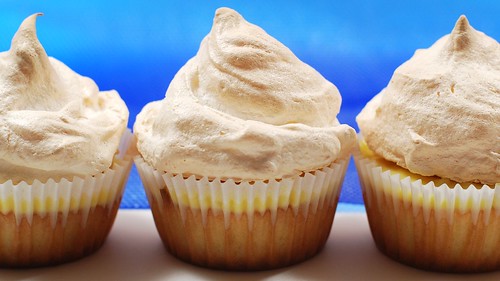
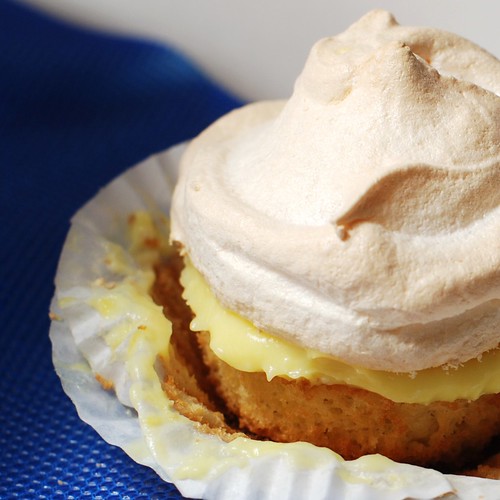
Amazing idea last week: lemon meringue cupcakes. I could make a lemony cake part, then bake a meringue right on top! No need to frost, super easy recipe! I mean look at these. Ladies, how cute would it be to show up at the next get-together with a cheerful tray of these? And guys, how funny would it be to challenge societal gender roles with this kind of delicious underlining your defiance?

Lemon meringue cupcakes.

And to boot, these are 165 calories apiece. Not health food, but far lighter than one would expect from such a tall cupcake.

While the above does appear to be what I described, it is not. No, this recipe has undergone about ten revisions, and unfortunately, that is not fantastic hyperbole. I don’t have pictures of the process, but it boils down to the fact that the pH of the batter is important, and turns out meringue will not hold its shape if baked upon a proper cupcake. And if you bake lemon curd atop a cupcake, the whole thing will taste weirdly sulfuric for some reason. So the final recipe is more involved than I wanted it to be, but the cuteness factor paired with the actual deliciousness is well worth the effort, which in itself is effectively the same as making cupcakes and frosting from scratch, except two frostings. Which is admittedly not the same thing at all.

There are a few “specialty” tools required for this recipe. Nothing too specialized—you should be able to find in your grocery store—but I generally avoid these things because in the past I always tried to work around them: a hand mixer, parchment paper, cake flour, food scale. The mixer is really just for the meringue, the parchment paper for baking the meringue, the scale for measuring the cake flour, and the cake flour because All-Purpose Flour is a misnomer, as it is not good for cakes. I think this recipe is lenient enough to allow you to substitute all purpose flour for cake, but can’t be held accountable for the resulting texture. In the worst case your texture is off, but you will still end up with something yummy if not presentable.

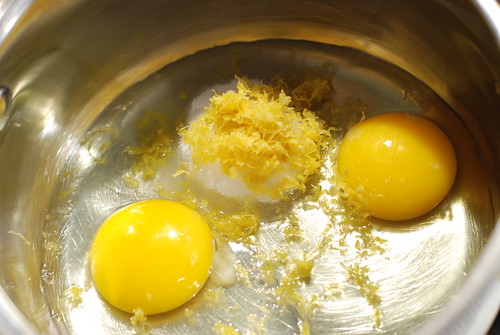
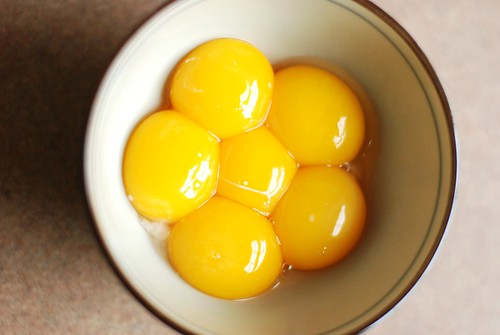
Start with the curd so it has time to chill while all that other stuff is going on. Have you ever had this stuff? I saw it all over left-coast food blogs back when Meyer lemons were in season, but since citrus is um, never in season in Massachusetts, I hadn’t really any good occasion to create a curd until now. And it’s a surprisingly quick (5 minute) ordeal with HUGE payoffs. I could spoon this into my mouth all day, and I hear people put it on toast and things like that. I don’t need to remind you that I put it on cupcakes. By itself, it’s a delightful frosting too!

Curd food.

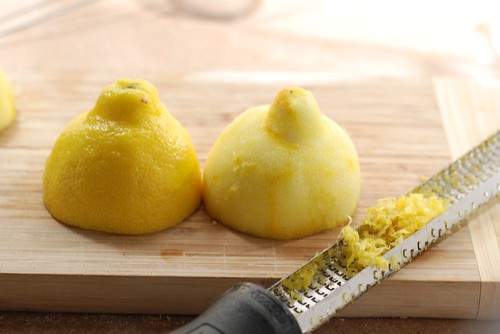
This isn’t a bad time to go over how to zest a lemon. The white rind is bitter, while the nice sunny yellow part is what offers the bright lemony flavour, so grating away at the skin until you hit the poor lemon’s pulp is exactly NOT the way to do it. My strategy is to shoot for exactly one pass over each bit of the lemon’s surface exactly once. Remember, this is not a sheep-shearing contest, so there’s no need to get every little bit of yellow off the lemon. Just zip your micrograter or zester right along and don’t spend too much time on it.

How to zest a lemon.

Also, isn’t that lemon HUGE? My god, it’s like Monsanto’s answer to the lumpy F-cup boob job.

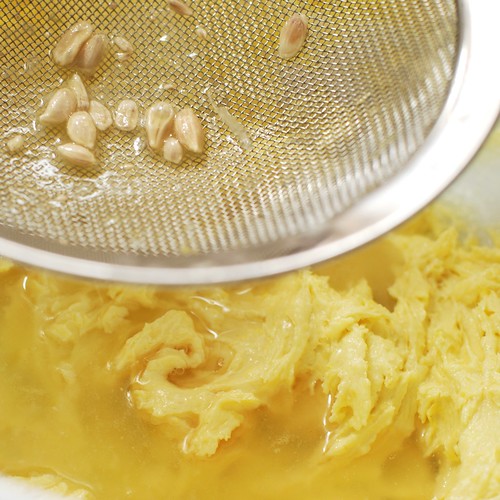
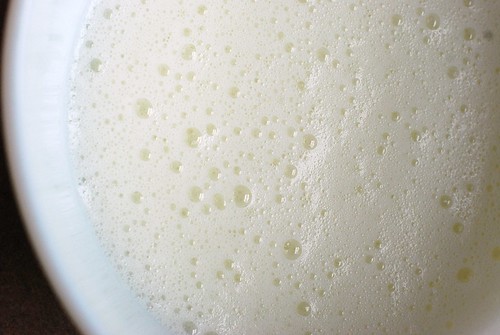
Speaking of lemons, for both the curd and the batter, I recommend straining your fresh lemon juice. I find that when I leave lemon seeds in my desserts, people never seem to go back for seconds.

It's a strain.

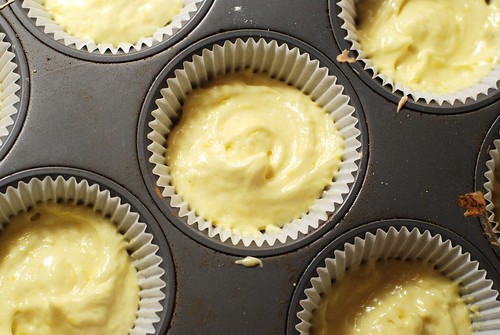
The batter has this subtle speckle of lemon rind yellow. Gorgeous.

Future cupcakes of america.

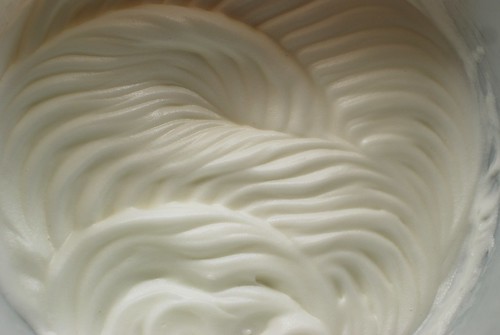
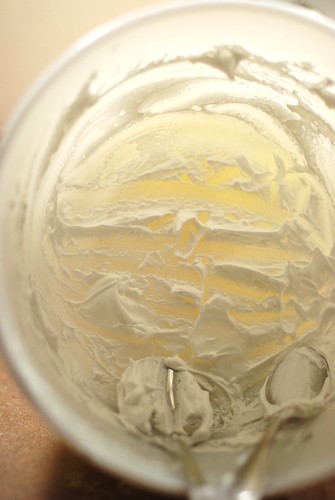
While that’s in the oven, we make our way to the third part: meringue. This is what it should look (roughly) like right before you start adding the sugar.

Meringue. Luscious.

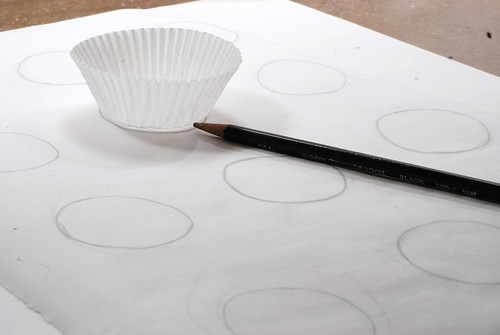
Now we need a way for the meringues will fit the cupcakes. I use the liners as a guide and trace out circles on the BACK of the parchment paper upon which I shall bake the meringues.

Circles

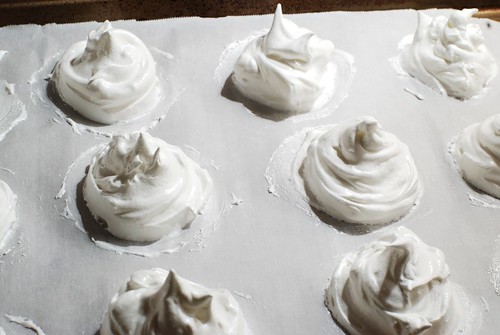
Then I spoon the meringue onto each dot and smooth it out to the circumference of the paper circle, then around in a spiral to make that nice swirly peak. To do so, I washed my hands very thoroughly, then used something kicking around to smooth and swirl. I can’t remember what right now, but it definitely wasn’t my finger if that’s what your thinking. I mean, if I DID use my finger, I did wash my hands very thoroughly, but I wouldn’t use my finger because that would be very uncouth.

Swirly peaks.

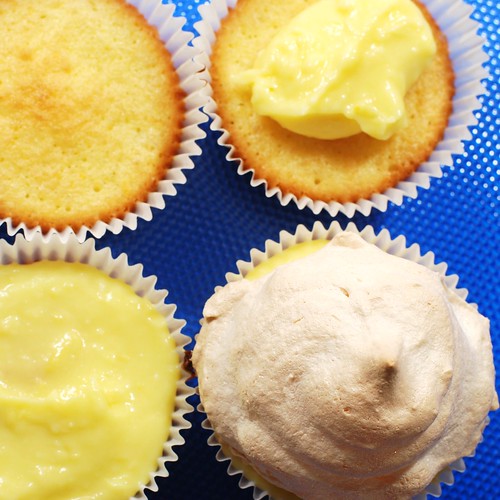
And now that everything’s all squared away and set, let’s assemble!

Putting it together.

I cannot get over how successfully adorable these are.

Lemon meringue cupcakes.

And luscious too.

Lemon meringue cupcakes.

Lemon Meringue Cupcakes
an original recipe, in three acts


Prologue
Heat oven to 350o


Act One: Lemon Curd
2 eggs
1 lemon: zest of & juice of (about 2 tsp & 3 tbsp, respectively)
2 tbsp sugar
1/4 c butter (4 tbsp), chopped

Whisk eggs, lemon zest & juice and sugar in a small saucepan, no heat. Add the butter bits, then bring to a boil over medium heat, whisking all the while. After three minutes or so, you’ll begin to see the bottom of the pan here and there as you whisk, and the mixture will almost instantly thicken. Remove from heat and chill in fridge until needed.


Act Two: Cupcakes
2 egg yolks

1/4 c sugar
1/4 c butter (room-temp is best)
1 lemon: zest of

1/2 c sifted cake flour, or 64g if you’re able to weigh (best method). Feel free to try all-purpose and let me know how it goes!
1/2 tsp baking soda

1/2 tsp vanilla
1 lemon: juice of

Beat egg yolks. Add sugar, butter and zest, and mix until creamed. Sift flour and baking soda, then mix until combined. Lastly, add 1/2 tsp vanilla and strain 1 lemon’s worth of juice, then stir to combine. Nimbly scoop batter into 12 cupcake liners (quicker is better). Bake for 15 minutes.


Act Three: Meringue

Beat on high until stiff peaks form (about 3-4 minutes):
2 egg whites
1/2 tsp cream of tartar
1/4 tsp vanilla
pinch cornstarch

Add in a continuous stream, beating on high all the while:
1/2 c sugar

On a piece of parchment, use a cupcake liner as a stencil to draw 12 circles. Flip liner so the drawing is face down (in contact with the cookie sheet), then spoon 1/12 of the meringue into each area.

Wash your hands thoroughly. Use the circles as a guide for what the meringues should be sized, then using a finger, swipe around the glob of meringue to give it a shape. You’ll have to play around with this, as it will be slightly different for everyone, but what works for me is to pat down the meringue to roughly the intended size, then swipe around with a damp finger to make it as circular as possible. Then I spiral inward, and once at the center, lift finger to create a peak.

Bake at 350o for 15 minutes. Do not open the oven while baking, unless you smell something burning or something. Remove from oven to wire rack, let cool 1 minute, then with a metal spatula, pop each meringue from the parchment so it does not stick there while it cools completely (which you must do before moving onto the next step).


Assembly

Spread about a tablespoon of lemon curd upon each cupcake, then top with a meringue. Ta da! Lemon Meringue Cupcake! Store in an airtight container, and for extra crisp meringues, don’t top cupcakes until ready to serve.

The end!


nutrition summary: (for 1 of 12 cupcakes) 165 calories, 9g fat, 0g fiber; about 3 weight watchers points

I don’t have much to say about the Daffodil Cake other than it appeared in my What’s Cooking in Massachusetts! 4H cookbook, and a quick Google is telling me that it is an Eastery-Springy-type of cake. So I guess I just missed Easter, which is fine because something in me still resists holiday seasonality. My guess is I still haven’t outgrown that jaded teenager phase, where family stuff is stupid and cheesey.

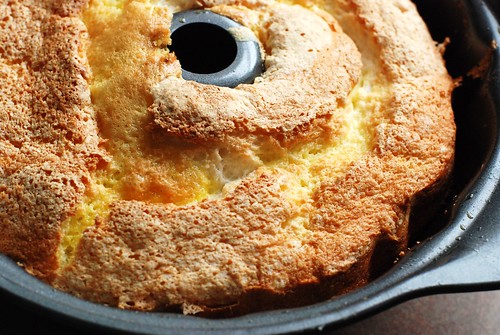
Foamy.

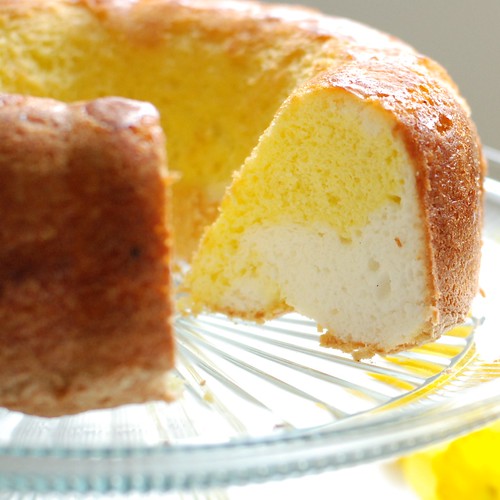
In line with the Spring theme we accidentally have going here, this cake is EXTREMELY light—for cake. It’s similar to an angel food cake, except that you are not left with an inordinate amount of unemployed egg yolks. In this cake, the egg yolks are used to make a second batter, this one all yellow, naturally, and the result is a little two-toned cake that is not as cool a surprise as say, a rainbow cake, but still pretty neat! It can be served in a manner similar to angel food cake, and in that vein would be quite delicious with some strawberries and whipped cream!

Egg yolks that are busily not going to waste.

I made this bad lawrence twice in an attempt to fix major problems from the first go at it. I cite as evidence:

Exhibit 1.

You can see how including that particular photo might counter any culinary abilities y’all might have thought I had. The good news is that I only had to try this one more time to get much more satisfying results, and I identified my major issues here. The first:

Daffodil cake.

Let me just say up front that is not meant to be a dick joke.

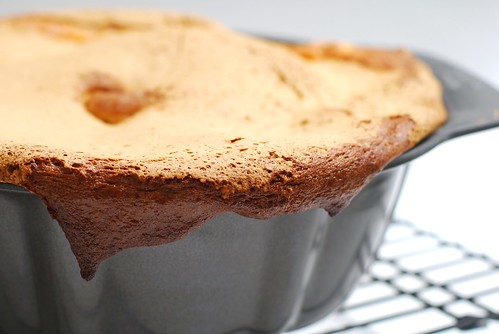
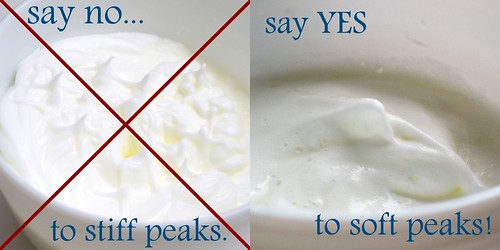
The terminology in the original recipe says “beat until stiff.” Now I’m going to venture that, in this case anyway, stiff does not imply stiff peaks, because the first time around it took me damn near 45 minutes with a handmixer to attain stiff peaks, which even then were passable at best. And then my cake exploded out of my pan and burnt to the bottom of my oven in a smelly mess (see above).

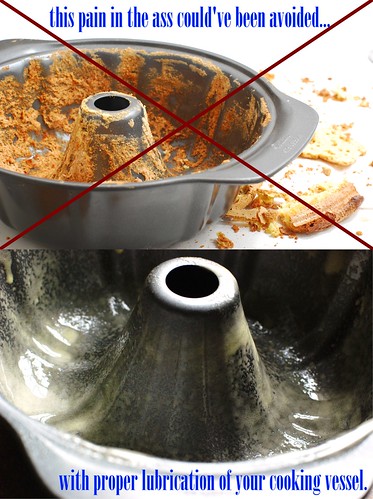
The other big hint that something was wrong was when I tried to remove the cake from the pan and then had to kind of grope it out with my fingers. It was embarrassing.

Mess.

Perhaps in 1962, they had nonstick tube pans they don’t make like they used to, but my nonstick bundt could not handle that baby, and as you can see, this time around I was plenty generous with my cooking spray. That cake might be soggy coming out of the pan, but it’s coming out of that pan on its own, goddammit!

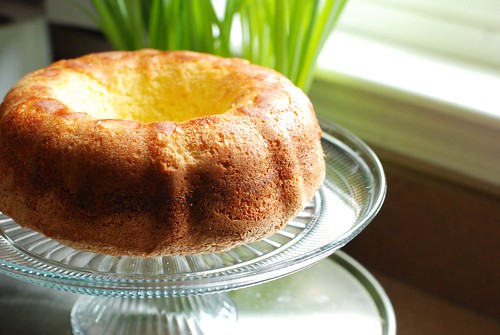
Here’s a rare Omnomicon action shot.

Two tone!

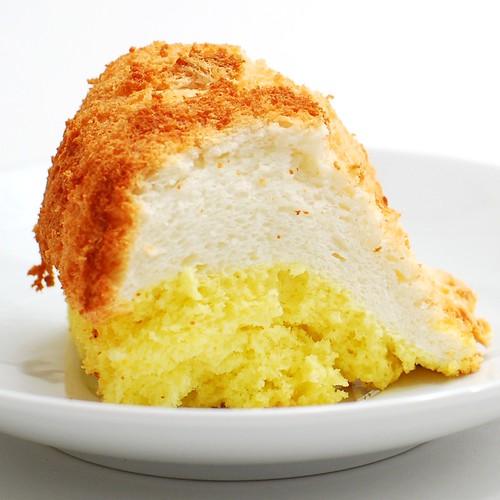
And the bottom was the most delicious part of this. If you aren’t big on presentation, I recommend eating the entire crust off the bottom, because the cake is moist and fluffy and once you flip it onto the bottom and leave it that way for a few hours, the delicious crunchy almost-meringuey texture becomes the texture of just . . . regular cake. Not as magical at all.

Nice bottom.

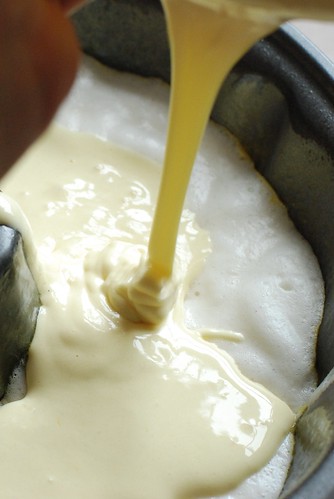
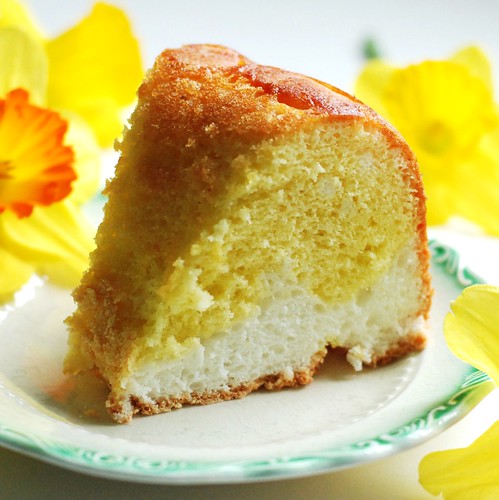
Interestingly, though you pour the yolk mixture on TOP of the whites mixture (which would logically put it on the bottom of the cake once flipped out of the pan), the yolk mix is denser and therefore sinks to the bottom of the pan. In this particular piece, it looks like a funky ying yang.

Cake Shui.

But when I overbeat the white mixture, the yolk stayed right where one would expect it to—to the top of the pan and bottom of the cake. I have to assume this is due to the increased firmness in a longer beat time for the white.

Daffodil cake.

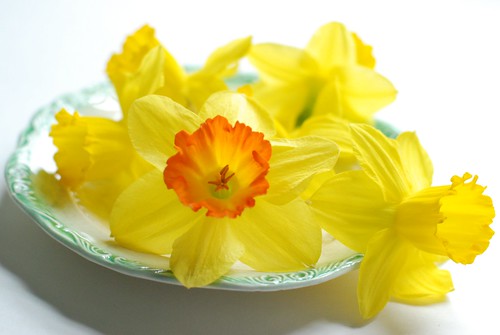
So then I took some literal shots with a daffodil, which really don’t complement the visage of the cake very well, but I bought those flowers and by golly they’re gonna be in my pictures!

Daffodil cake.

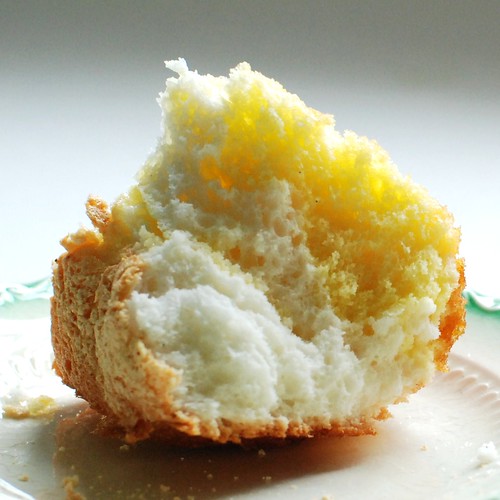
The best way to describe the plush airiness of these, however, is with this shot, wherein I tore a piece of cake in half. Verily, I rent it asunder for the visceral pleasure of it.

Daffodil cake.

And then one more picture of daffodils. Just so I can get my money’s worth.

Just daffodils. No cake.

Daffodil Cake
adapted from a 60s era 4H fundraiser book: What’s Cooking? In Massachusetts

6 egg whites
1/2 tsp cream of tartar
1/2 tsp salt
3/4 c sugar
1/2 c cake flour
1 tsp vanilla

Preheat oven to 325o.Beat egg whites until foamy. Add cream of tartar and salt, and beat until the mixture can hold a little bit of shape, but not until stiff peaks form (it should take you about 5 minutes to reach this consistency with a mixer on medium). Briefly beat in vanilla. Sift sugar and flour four times (seems like overkill to me, but just to be safe I went ahead and did it), then fold into egg white mixture. Pour into well-greased tube or bundt pan and set aside.

Now it’s time for the egg yolks!

6 egg yolks
1 tsp vanilla
1/4 tsp salt
3/4 c sugar
3/4 c cake flour
1 tsp baking powder
1/4 c boiling water

Put about 2 c water on the stove to boil. You’ll want to measure your boiling water after it’s come to a boil instead of before (what with evaporation and what have you). Beat egg yolks 3 minutes, add salt and vanilla, then gradually beat in sugar. Sift the flour and baking powder four times (again, it couldn’t hurt) and add alternately with hot water. Pour atop the white mixture in the pan.

Bake 50 minutes, let cool completely (at least an hour) before removing from pan.

Serve by itself for a cottony delicious treat, or with fruit and the whipped topping of your choice for a more full-blown sort of dessert.

Fun variation:
So some versions of the daffodil cake include a lemon icing, and this one in particular calls for either vanilla or lemon extract in the yellow batter. My awesome idea is to dye the white part with lemon extract and the yellow mixture with vanilla. It will taste the same, and 90% of people won’t notice which is which, but it’ll be really funny for that one person with the particularly sharp tastebuds.

Daffodil cake.

nutrition summary (for 1 of 8 servings): 260 calories, 4g fat, 0g fiber; 5 weight watchers points

Now I’m going to tell you: my mother’s whoopie pie recipe is SO GOOD that I will often tell people that I don’t like whoopie pies at all, because I have yet to find another recipe that I actually like. Other people’s whoopie pies are too cakey, or too cookie-like, or (as is usually the case) the filling is pure frosting, which is WAY too sweet and totally the wrong texture altogether. My mom’s whoopie pies were famous in our circles, and she generously provided them whenever demanded, particularly when visiting my Uncle and Aunt in Maine for Thanksgiving and Christmas. I ate more whoopie pies in my childhood than cupcakes, brownies or cookies combined; they were a true and strong family tradition.

Antonia, a faithful reader, pointed to a NYTimes article about the Whoopie Pie and well hey, I’m not usually up to snuff on anything topical, and since I have an authentic family recipe on hand, I am suddenly compelled to showcase my (rather specialized) expertise!

A proper whoopie pie is not merely some cloying abomination of sugar and fat. No no, it is delicate in its way, the sweetness ever-present and yet subdued. Please do not compare them to a Devil Dog or Moon Pie. Please do not make them with cake mix and tub frosting. A whoopie pie is a very specific delicacy and there are rules.

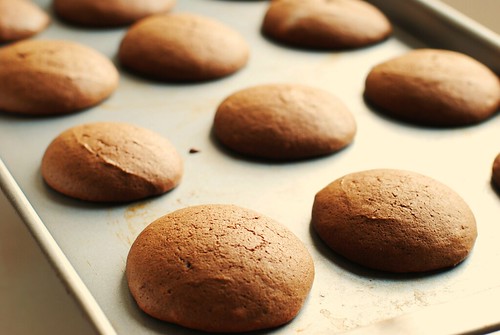
The proper texture.

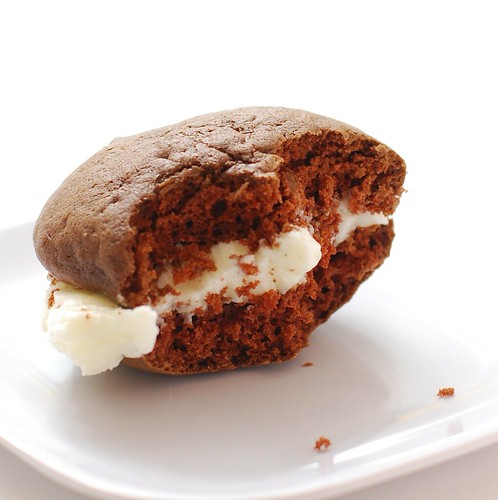
A proper whoopie pie “cookie” is a medium-brown shade, fairly dry (not all oily and moist like a Little Debbie’s snack), but still somewhat densely cakelike, maybe a vein or two where the scoop let go of the batter. They crack ever so slightly, but sometimes they don’t and maybe that has something to do with the barometric pressure. I dunno, they still taste right and seem to have the right texture, so aesthetics aside, it’s fine either way.

Okay, so maybe the filling is an abomination of fat and sugar.

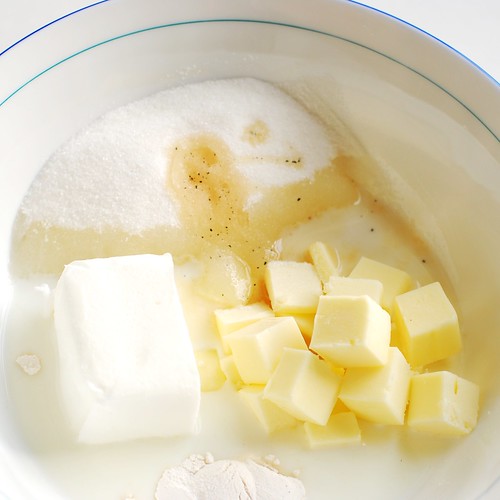
The proper whoopie pie filling is made with Crisco (which, apparently, no longer contains trans fats), butter, whole milk, sugar, a tiny smidge of flour and a regular portion of vanilla. Did you notice that it has no Fluff in it? That’s because Fluff is for fluffernutters, not whoopie pies. You will also notice that the filling is not a frosting, but a creme. While eating, one will lose all the filling out the sides and must open the pie, collect up the creme that has splooshed out back onto the bottom piece, then recreate the sandwich, only to do it all again in the next bite or two. This is the proper way to eat a whoopie pie.

This process presented many lovely photo ops. Let’s take a look!

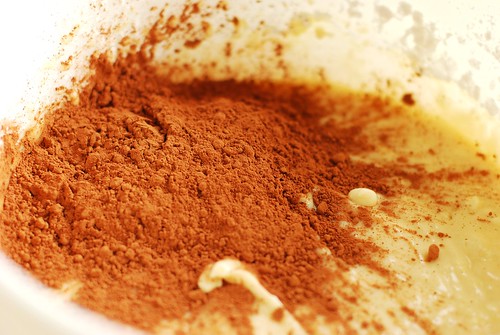
Where the chocolate comes in.

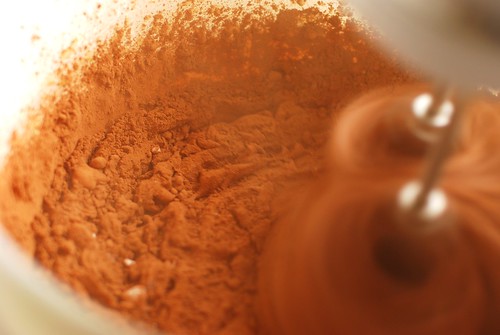
This one reminds me of a dusty construction site.

Cocoa construction site.

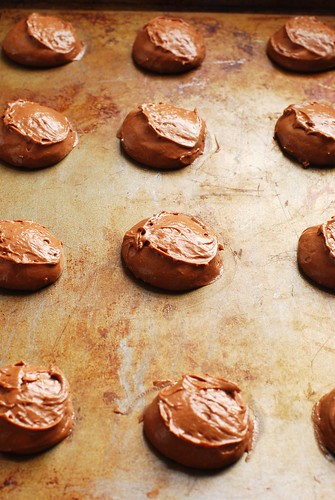
Ungreased cookie sheet...

The cookies can be removed from the cookie sheet almost immediately, but you really need to use a metal spatula and carefully scrap them off. I like the texture underneath, it gets a little crispy as it cools and it is so so satisfying to snack on the odd unmatched whoopie pie cookie before they’re frosted.

The underside.

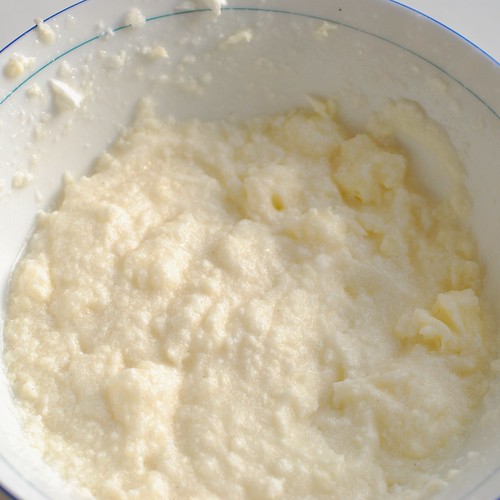
The creme takes a convenient 10 minutes to make, which you can most likely complete between the time the first batch of cookies goes into and comes out of the oven. I’ve found it nearly impossible to make the creme without an electric mixer (stand or hand, your choice), and sometimes it takes longer than others. For the first several minutes of mixing, your creme will look like this: kinda gross.

Porridge?

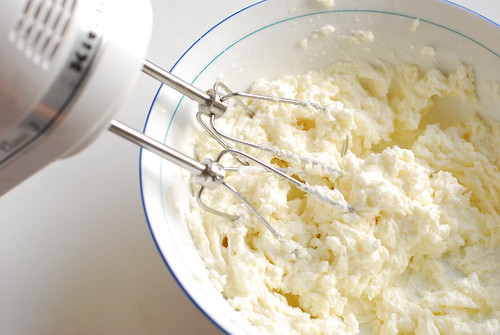
And then you’ll hear a cherub giggle, and an angel wing will brush against your shoulder as suddenly the creme whips up into this glorious appearance. The texture is extremely creamy, but still looks like this.

As if by magic.

After a little assembly . . .
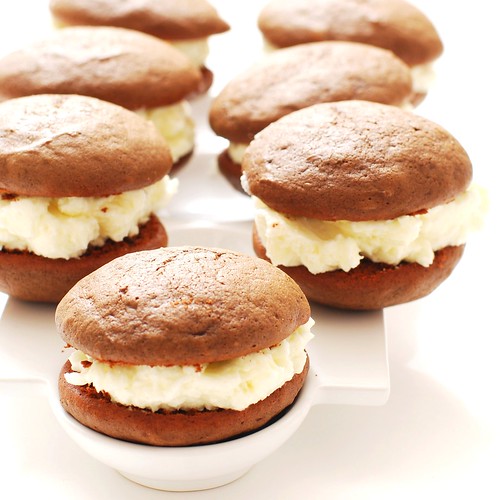
Mom's perfect whoopie pies.

Since I started making my own food, I’ve lived on these for days at a time. Not particularly healthy nor affluent days, but certainly enjoyable ones.

Well of COURSE I ate some as I went along.


Mom’s Famous Whoopie Pies
makes about 14 after batter & cookie sampling
brought to you by very fortunate family ties.

Blend Add
1/4 c Crisco 2 c flour
1 c milk 1/4 c + 1 tbsp cocoa
1 c sugar 1.5 tsp baking soda
1 egg 1 tsp salt
1 tsp vanilla  

Drop by the small tablespoonful onto an ungreased cookie sheet—a tablespoon-sized bakery scoop works best. Bake exactly 8 minutes at 375o, see if a toothpick comes out clean, and if it doesn’t, bake another 2 minutes (10 total). Upon extraction from the oven, remove from pan immediately to wire rack to cool.


And now the creme filling (reminder: it’s not frosting, guys)

1/2 c margarine or butter (room temp is best)
1/2 c Crisco (my mother is insistent that this MUST be Crisco and CANNOT be generic shortening, nor substituted in any way . . . but if you do get it to work with a substitution, please let me know!)
1 c sugar
1 tbsp  flour
1 tsp vanilla
1/2 c warm whole milk (20 seconds in the microwave should do it)

Beat with a mixer (stand or hand, your choice) for-freakin-ever. It will start out just like, well, lumps of Crisco floating in milk, then bits will get smaller and smaller, then it’ll slosh around for a little bit, and, much like the butter making process, you’ll be wondering if this will ever become anything or if you maybe messed it up somehow. Suddenly, about five minutes later, your mix will look weird for a second, and within moments your slushy mess will turn into a glorious white creme, smooth and perfect in a way rarely seen outside the confines of uber-processed food with chemicals you can’t pronounce that are not even available to the consumer in their pure form.


Assembly

As soon as the whoopie cookies are cool, match each whoopie with its closest brother in size—even if yours didn’t all come out the same size, evenly matched whoopies will look much much nicer. Spread some filling on the flat side of one, then place the second on top. Repeat. This does not need to be done immediately before serving, as the filling tends to maintain its consistency surprisingly well, and some (like my mom) would argue that a day-old whoopie pie is even better than fresh. I like them all.

No need to refrigerate, sealed plastic or plastic wrap will keep them fresh.

. . . and that’s it. Congratulations! You just made the best whoopie pies known to man.


Not like it’s diet food or anything, but these are not quite as totally terrible as I thought they’d be!
Nutrition Summary (for 1 whoopie pie of yield 15): 330 calories, 17g fat, 1g fiber; 8 Weight Watchers Points

So I know diet diner food isn’t a great sell for everybody, and frankly, I think baking takes far prettier pictures. That said, I have, for Valentine’s Day, a visual gift for all y’all. Strawberry shortcake is a beautiful thing all on its own, but for dessert for two, it can be improved upon.

Generally, in place of shortcake, I make some sweet biscuits, slice ’em open and throw some sugary strawberries and whipped topping on there. However, I’ve been reading aaalllll about different flours and decided to try out the theory that the low protein levels in cake flour makes for a more perfect crumb.

OH MY GOD, I will never go back to all-purpose flour. All-purpose flour varies from region to region and season to season, so while in theory it can make for a seasonal flair, there’s something to be said for fabulous consistency. This recipe makes a tender, delicious, and all-around omnommy shortcake biscuit.

Enter strawberries.

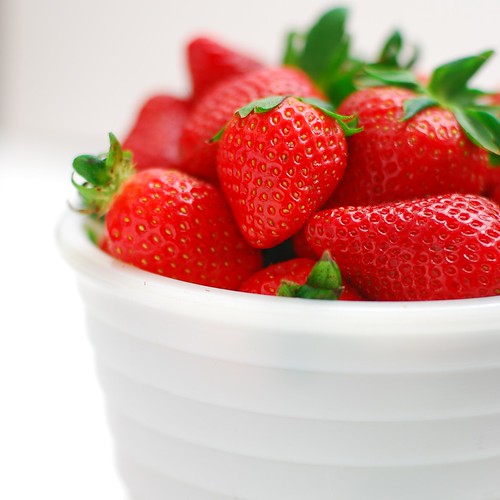
Strawberries.

They’re out of season, but available in most stores. Do yourself a favour and throw out any that aren’t red inside. White strawberries are blech, ugh, and above all else, yucky.

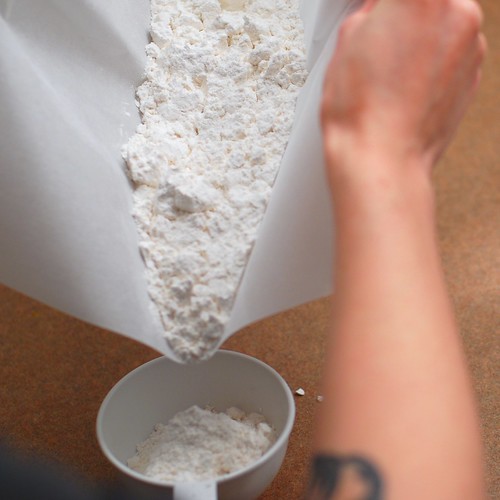
Here’s how to measure your flour perfectly. First, sift onto a flexible cutting board or, as seen here, parchment paper.

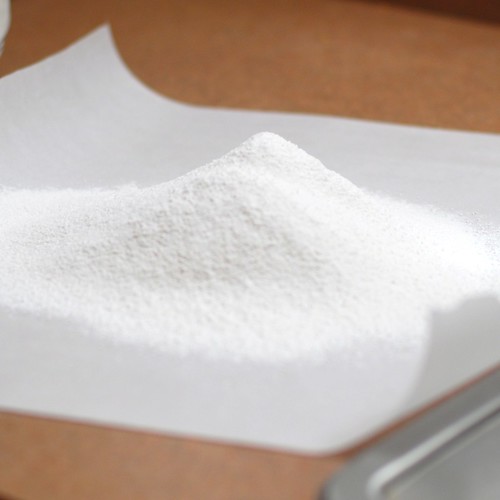
Flour!

Funnel the flour into the measuring cup. Oh hey, bitch has tattoos, check that out.

Measuring . . .

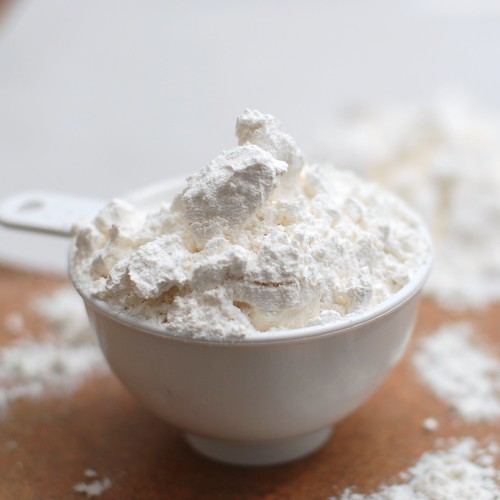
Overfill the cup with flour, and DO NOT shake to level it off–this repacks the flour and undoes all your fancy sifting.

Abundance.

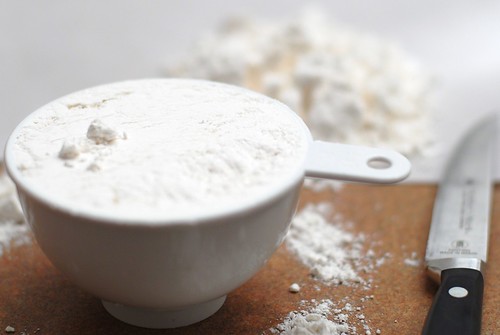
Instead, kinda slice off the top with a knife into the sink, or back into your flour bag/box if you can manage it. It’s messy, but it’s the best way.

Cut!

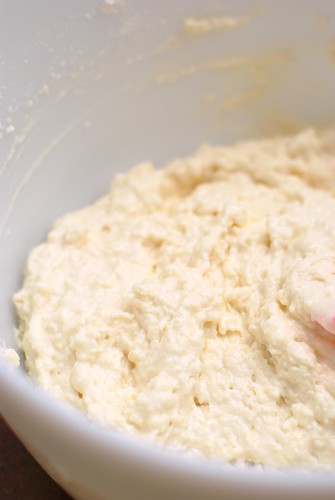
Use a pastry blender or two knives to blend the butter into the flour until it kinda disappears in there. Then add some heavy cream, light cream, or fat free half and half. This is a batter rather than a dough, so no folding out is required, and it will be goopy.

Pre-shortcake.

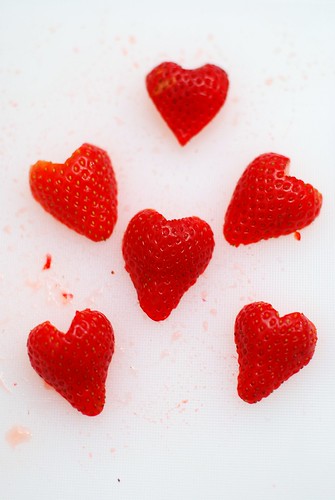
And hey, back to the strawberries! Except this time they’re seasonally-themed.

I <3 strawberries.

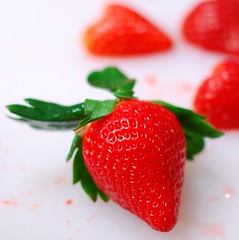
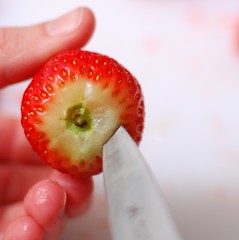
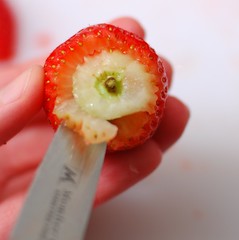
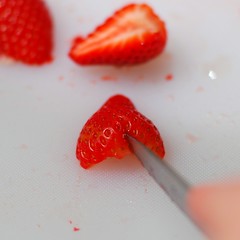
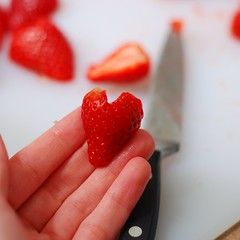
Select the pointiest berries to create the hearts. Then remove the stem and carve out the little stem-pit there. Also, this berry was a poor example, as there was a lot of white under that stem.

Pointy berry.Shink!Scrooch!

Cut the strawberries in half length-wise, then carve a little V out of the top. To further carve out the heart-shape, slice from the already-sliced side and round out the edges. This takes a little bit of practice, and I really didn’t know how to show it in photos (sorry!). Really, though, the strawberries are going to be pushed into the batter anyway, so the edges really don’t have to be all that perfect. They just take better pre-baked photos that way. And that’s how to make strawberry hearts.

V . . . not consummate, sadly.<3.

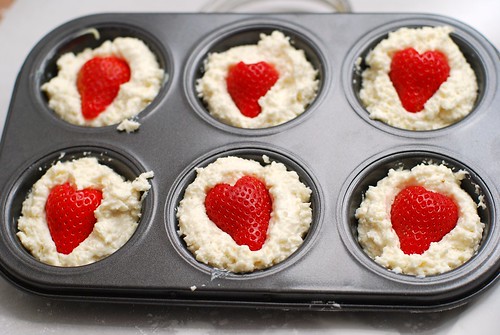
Scoop two heaving tablespoons of batter into each spot of your muffin pan, then press one of the strawberry hearts into each.

Oh look, it's all my love.

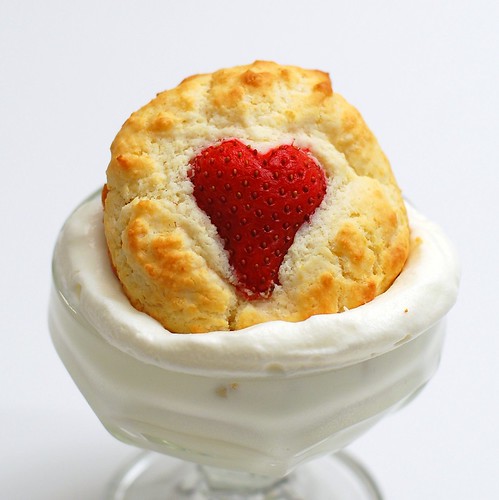
Then bake to perfection. And hey, don’t serve yours this way . . . you need to serve it with sugared strawberries. Really. Trust me. This just took the best picture.

Much love.

Strawberry Heart Shortcake Cupcakes
makes 8 cakes

1 lb fresh strawberries.
2c sifted cake flour (if using all-purpose flour, which is not recommended, reduce to 1.75c sifted)
1 tbsp baking powder
3 tbsp sugar (1 tbsp for the shortcake, 2 for the strawberry topping)
1/2 tsp salt
6 tbsp cold butter
3/4 c light or heavy cream, half and half, or fat-free half and half
Whipped cream, whipped topping, or cream-in-a-can

Rinse the berries, reserving 8-10 small to medium ones with pointy tips. These will be your hearts. Heat the oven to 450.

Slice remaining strawberries into quarters and toss with 2 tbsp sugar to coat. Set aside.

Sift flour on a flexible cutting board or parchment paper. Gently pour into measuring cup, then level off with a knife. I’ll repeat it again just in case you missed it the first time: do not level off by shaking or tapping the measuring cup. You’ll get dry nasty muffins, and nobody wants that.

Sift the sifted flour AGAIN, this time with baking powder, salt and sugar. Cut up the butter, which should have been in your fridge all this time, a little bit to get the blending going. Dump into the flour, then use a pastry blender or two knives to blend together. You’re done when there are no remaining chunks of butter in there. Add in the cream or half and half all at once, then mix until all ingredients are moistened.

Let that sit a bit while you create your strawberry hearts. Pull off stems, carve out the pit with a paring knife, then slice in half. Shape each half into a heart by carving a V at the notch (where the stem used to be). Since the berries will be pushed into the dough, the edges don’t need to make a perfect heart, but the V at the top is pivotal.

Bake for 12 minutes. Remove from oven, let cool a minute or two in the pan, then transfer to wire rack to cool. Serve to your dearest love with the sugared strawberries and whipped cream.

Love, Aleta.

Love,
Aleta

Aaannnndddd, she’s back!

So I did mention something about health and/or diet food in my last post, and while this recipe is the latter, it is most certainly not to be confused with the former. I posted about my rainbow cake here, and it got a lot of traffic on over to my livejournal, and everyone wanted the “recipe.” The cool thing is that if you’re making something so distractingly colourful, people will think it’s delicious no matter what.

This presents me with the option to use an old Weight Watchers trick—the one-point cupcake. Except I’m making a cake and I created my own frosting. Kinda. I’ve seen it done before, but I swear I made it up first!

This cake is suitable for many occasions:

  • A child’s birthday
  • Your mom’s birthday
  • Coming out to your conservative parents
    • If you’re a lesbian, they’ll be thrilled that you won’t be forgoing your feminine kitchen duties.
    • If you’re the kind of gay dude who makes cakes for your parents, they were probably on to you anyway.
  • Coming out to your conservative parents on your mother’s birthday
  • Your friend’s jam band CD release party

. . . so I’m sure you’ll find a use for this recipe soon.

And of course, you can use any white cake recipe you’d like. This is just how I make it because I have delusions of wearing size 2 someday.

Oh yes, and do me a favour: DOUBLE THE RECIPE AS PHOTOGRAPHED HERE!! The recipe at the bottom is accurate, but this made for a really REALLY small cake, and there was not nearly enough frosting, especially considering its lightness.

Okay, on with the ingredients.

how to: rainbow cake!

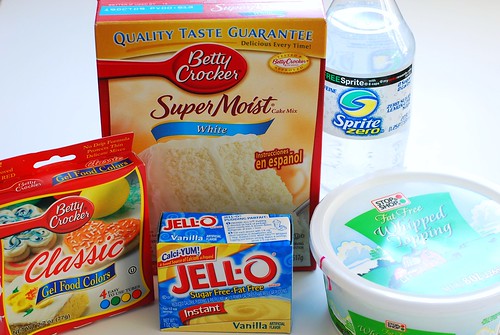
That’s all. Notice the lack of fat in here? Mmmmmm . . . chemicals. Though I don’t need to defend my method thanks to the double-dub (WW) aspect, even when I make a “real” cake I usually use box mix because let’s face it: Betty’s been doing it way longer than I have, and has pretty much perfected the art.

Pour a can of soda (12 oz) 2-12 oz cans of soda into the cake mix two boxes of cake mix. No eggs, no oil, no water, no sweat.

how to: rainbow cake!

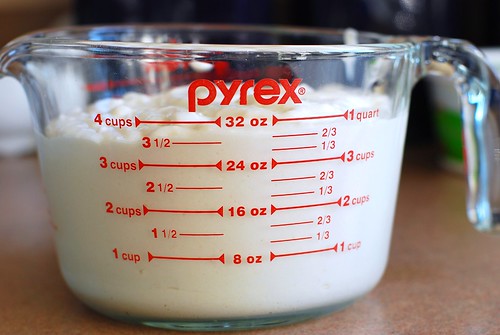
The action shots weren’t too thrilling. Now we measure it.

how to: rainbow cake!

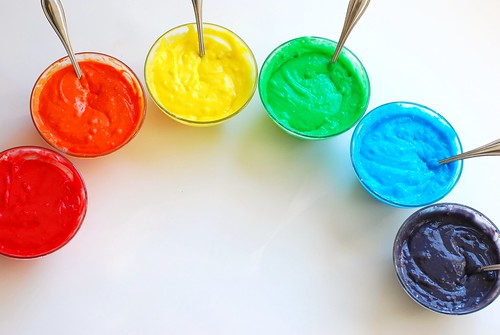
I’m going to round to 30 oz 60 oz because I have six colours and isn’t that just too convenient? It worked out to 3/4 c 1.5 c per colour, measurementwise. So I divvied that up and used my gel colours.

how to: rainbow cake!

(the gel colours, while not as good as pigment dye, are much bolder than the very liquidy food colouring you probably grew up with)

how to: rainbow cake!

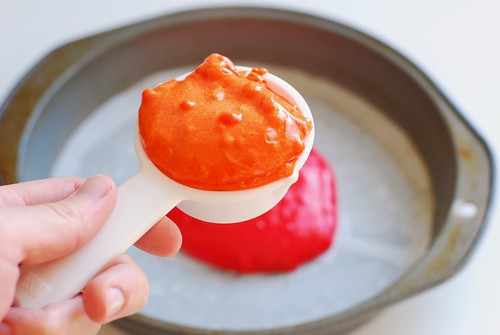
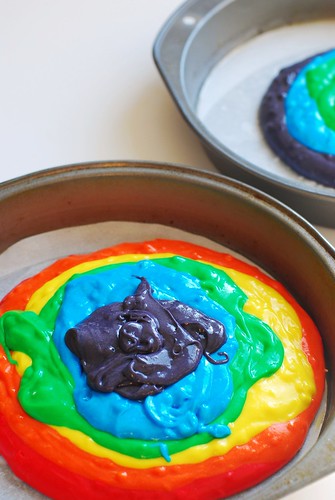
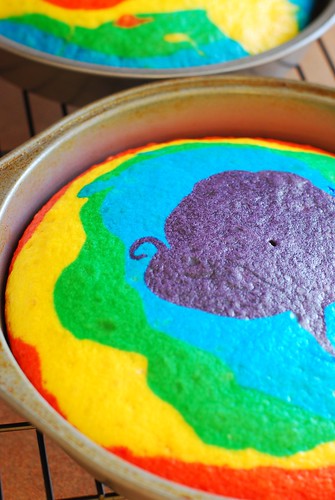
The first colour you drop into the pan, use about 2/3 of the mix for that colour. Otherwise, the top (last) colour will really dominate. I used a heaping 1/4 c 1 cup of each colour.

how to: rainbow cake!

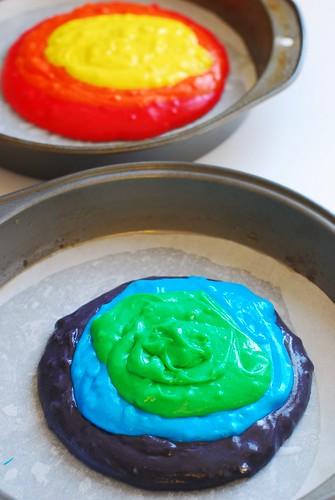
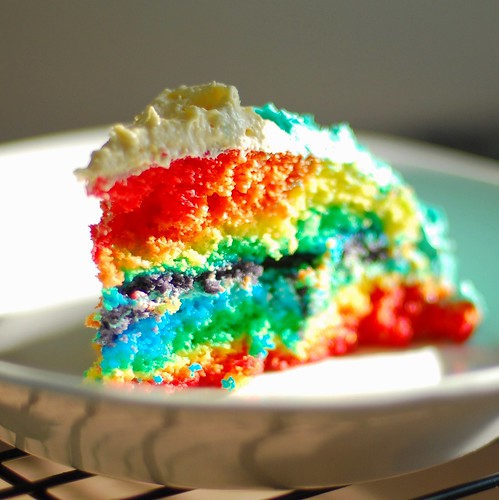
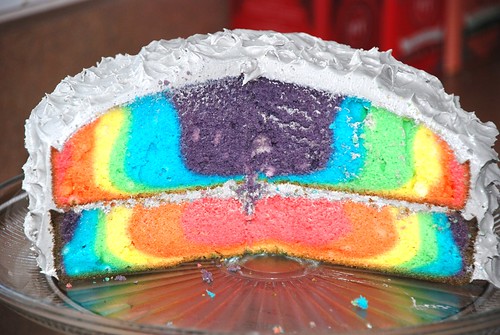
Drop the colours, one by one, into the middle of the pan, in neat concentric-ish gobs. Remember the cake is going to be sliced in the side there, so mixing it around on top isn’t going to make your slices any more psychedelic (trust me, I did the three-dimensional thinking for you already).

When you’re three colours in, start doing the reverse with the other pan. Since I’m going in rainbow order: red, orange, yellow, green, blue, purple, I got from red to yellow in the first pan, then purple, blue, green in the second. This is so that your two pans are equal if your measurements aren’t exact (and they’re not likely to be).

how to: rainbow cake!

Now finish up.

how to: rainbow cake!

Follow the box’s baking instructions and do your dishes.

how to: rainbow cake!

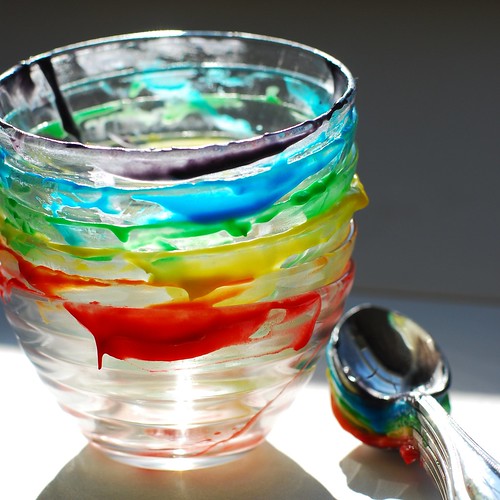
Such lovely dishes!

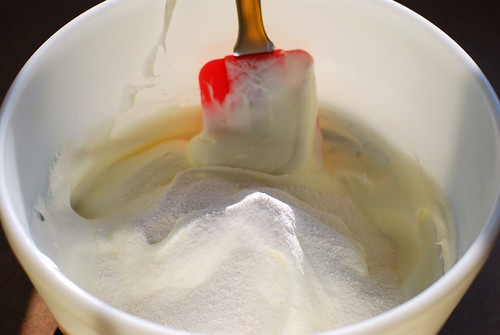
Now for the frosting: 1 box 2 boxes of fat free sugar free pudding mix, and 8 oz 16 oz (two of the 8 oz tubs pictured) of fat-free whipped topping. Or sugar-free. Or light. Or regular. They’re all pretty much the same. But that’s it.

how to: rainbow cake!

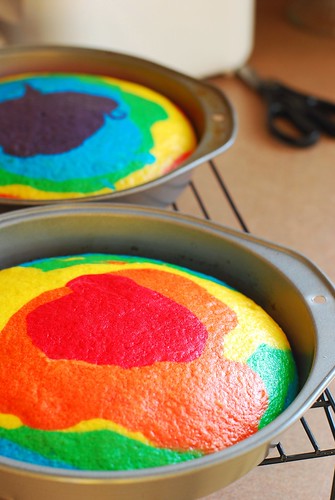
Holy shit, the cake’s done! Toothpick clean and everything! Get that shit out of the oven!!!

how to: rainbow cake!

The purple top kind of made a little turkey silhouette.

how to: rainbow cake!

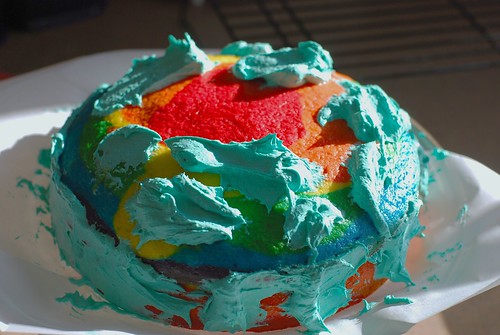
The frosting will be a little tough to spread, so treat it like a buttercream (I guess, I’ve never frosted a cake with buttercream). Putting gobs all over, then smoothing in worked well for me.

how to: rainbow cake!

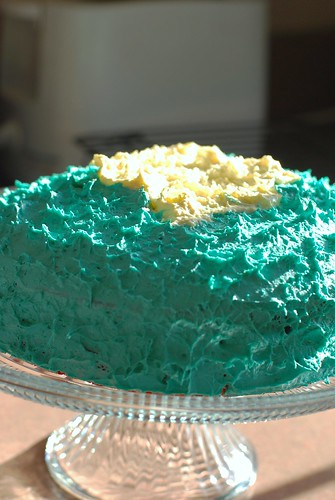
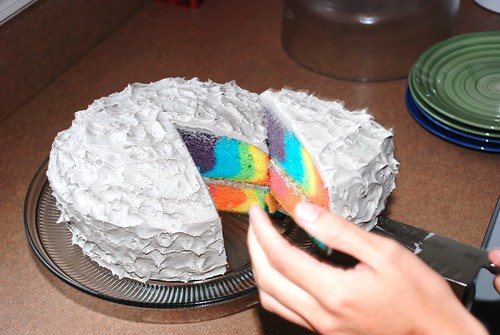
And look at that thing! It’s so pretty-lookin.

how to: rainbow cake!

Here’s what this particular cake looked like. See how it’s tiny and too rounded and it kind of isn’t all that great? That’s because I didn’t double the recipe. It’s a mistake I’ll only make once.

how to: rainbow cake!

Here’s what that really should look like: same process, twice the batter.

DSC_0598

Mmmmm.

Sunny Day Rainbow Cake

2 boxes white cake mix
24 oz of clear diet soda (2 cans, ginger ale and sprite work well)
gel food colouring
16 oz whipped topping
2 oz instant fat-free sugar-free pudding mix (2 smallish boxes)

The Dieting
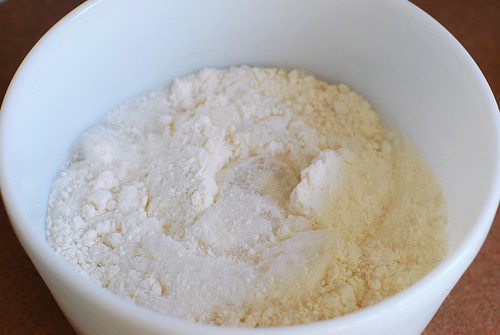
Mix the cake mix with the soda according to regular instructions on box. It will be lumpy afterward. Again, you can use any white cake recipe you want, this is just how I do it.

The Rainbowing
Measure the total volume (by my estimate, 64 oz), then divide by 6 and measure into separate bowls. There are 8 oz in a cup, so 64/6 = 10 to 11 oz, or 1 cup + 2 tbsp.

Stir colour into each bowl with its own spoon. For the first colour into the pan, measure out 2/3 to 3/4 of your mix (in this case about 1 c) as close to the middle as you can. Drop in your first three colours, then work on the other pan with the last three colours. So if you’re doing rainbow order, the first pan should have red, then orange, then yellow, and now the purple, blue and green go into the second pan. As a recap, this is so both layers are roughly the same size.

Bake the cake for however long the box tells you to bake it. Check it when the box says to, but usually it’ll need an extra 5 or 10 minutes or maybe more because of the density of the soda method. Just keep baking, checking back every 5 minutes or so until a toothpick to the center comes out clean. Let cool completely before moving to a wire rack.

The Frostinging
Meanwhile, make your frosting. Just mix the pudding mix in with the whipped topping for a few minutes. Dye if you’re into that.

Frost your fat-free cake with your fat-free whipped frosting. Eat.

Edit 1 (one week later)


No children were harmed in the making nor consumption of this cake.

People seemed to miss the point that I am a 25-year-old woman on a diet with no kids. Since kids don’t really need fat-free anything, there’s no need to use the soda recipe if you don’t like the idea, and if you don’t like dye, don’t make this for dinner for them every night for a month. Okay, folks, thanks for the allowance to disclaim.

Edit 2 (two weeks later)


A note to Weight Watchers (the people on the diet, not the company):
WW has long advertised 1/12 of a cake mix with diet soda to be a “one point cupcake.” I have no idea why they insist this is the case when according to the “as packaged” nutrition information, this much cupcake has 170 calories, 3g fat and no fiber . . . by my calculation, that’s 4 points. That said, 1/12 of this recipe, (2 box mixes + 16 oz whipped topping + 2 oz or so pudding mix) works out to 10 points a slice. Not bad considering that a comparable cake would be 14 points.

Edit 3 (two months later)


FAQ
Here are questions I get over and over again about this cake. I just don’t want to answer any more emails about it. These questions apply to any cake, so please don’t blame your epic fail on me.

Omg my cake burnt!
Next time don’t bake it for as long.

My cake stuck to the pan!
Grease your pan better next time.

My cake burnt/stuck to the pan/was underdone/crumbled. Is this because of the food colouring I used?
No, the food colouring has nothing to do with the failure of your cake. You baked it too long/didn’t grease enough/didn’t bake long enough/moved it before it was cool.

I’m making this for my kids, can I use non-diet soda for this cake?
I don’t know why you would, you certainly wouldn’t be saving much in the way of calories, and I don’t really think your kids need more sugar. Just make a regular cake and then put food colouring in it, it will look the same, promise.

If I don’t make it with soda, will the colours run?
No. In fact, like I keep saying, please just use whatever the hell cake recipe you like. Please. The rainbow part has nothing to do with Weight Watchers.

The frosting, it’s so thick!
Yes, buy a tub of Duncan Hines frosting as a backup plan.

The cake, it fell apart!
Let it cool before you move it, and more importantly, don’t jostle the thing about.

I don’t like the cake this made, blech!
You probably aren’t on a diet, so I don’t know why you bothered to make diet cake.

I don’t get it, you make two cakes and then you put them on top of each other?!
Yes, it’s called a layer cake, and pretty much any cake you buy at a grocery store is constructed in the same manner.

But I don’t *like* food colouring.
Well, you’re wasting your time reading this, aren’t you?

I totally saw this on Something Awful’s Goons with Spoons Rainbow Cake thread, way to steal the idea, asshole.
Me too, fellow goon, me too. And in fact, I posted my original rainbow cake there. If you have no idea what I’m talking about and would like to see about a hojillion rainbow cakes, and a rainbow cheesecake, please check out the thread that put this on my radar.

DSC_0603

9/26/2014
closing comments because way more spam bots are hanging around than humans, and after at least 2000 actual people comments, there probably isn’t much left to say. however, my email address remains active, so if you wanna be social, send it that way.

thanks, internet, this was fun.