online poker

Omnomicon

say it with me now, “om nom nom”

Subscribe to Omnomicon

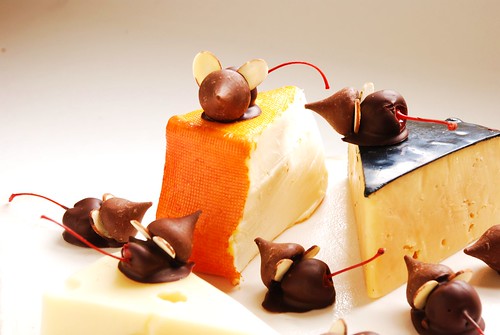
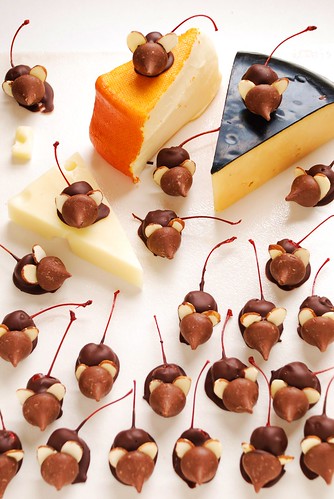
I present to you: that eleventh hour, absolutely perfect finishing touch to your Halloween spread.

Once you’ve gone through caramel apples & popcorn balls, pumpkin bread/cookies/cupcakes/whoopie pies and cider donuts, it’s hard to be all that original without making something that looks like something else. Alas, the very concept of making a dessert that is appealing only insofar as its resemblance to a mummy’s finger or a cat’s litterbox is kind of like saying you would feed those things to your guests if only they were edible just because it’s Halloween. On the other hand is the risk of creating something that just doesn’t quite hit the mark. It’s bad enough that I have to explain my costume (look, I didn’t think Anne Boleyn was all that arcane a reference), to have to explain “See? They’re little ghosts” adds some serious insult to injury. And from a culinary perspective, it’s a little gimmicky and a little lazy and definitely trashy.

Despite the general tackiness of food-that-looks-like-something-else, when done well I can admire such a masterpiece for its cleverness. A couple years ago I came upon this idea somewhere (and if it was yours, please do tell).

The charismatic one.

Recognizable, right? It’s like a trick AND a treat all wrapped up in one adorable little package.

The last time I made these little guys I was sorely disappointed by a mushy final consistency to the dipping chocolate, so I took the time this year to learn how to properly temper chocolate at Cooking for Engineers (dot com). Theirs is a great article to consult for a broad discussion of methods and the science involved, and entire books are no doubt available on the subject. I will be detailing only as much as applies to this effort.

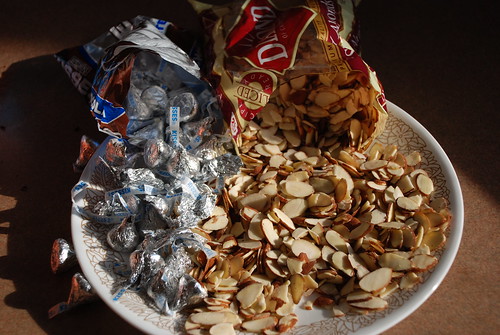
But first! Preparations are at hand. Ever shucked corn? Oh good, today you’ll be shucking Hershey Kisses.

Soon to be heads and ears.

You DO want to do this in advance of getting going with the chocolate, because it is way more of a pain in the ass to unwrap these as you go. You also want to sift through your giant pile of almond slices to pull out the pieces that are complete and have a nice look/size/shape to them. It seems obvious in retrospect, but at the time it didn’t seem as though so many of these slices would be so . . . unsuitable. Also, once the chocolate is on, it’s go time, and it’s not going to stop until you’re done.

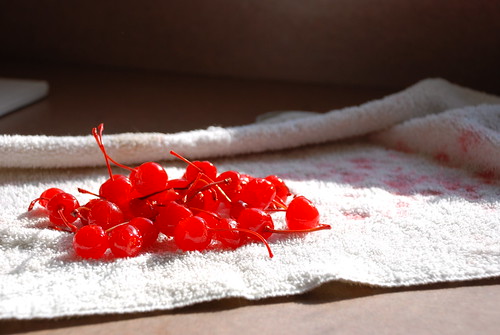
Now drain the cherries,

cherries.

then pat them dry in a towel. I made a little hobo bindle with my kitchen towel and rolled them around in there to dab ’em dry.

cherries.

Previously I was under the impression that tempering one’s chocolate was too difficult to attempt unless you were a chocolatier, figuring that even a chocolate that has seized still tastes pretty good, and as such never bothered. Turns out it’s not actually all that hard, though maybe I just had good luck today.

You will need a thermometer, but no super high heat candy thermometer necessary–a meat thermometer will do nicely. The easiest way to mess up your chocolate is to get water in it, which is why I’d avoid a rainy or otherwise humid day to take this on. So if you’re good on timing and equipment, let’s goOOOo!

Step 1: Make a double boiler.
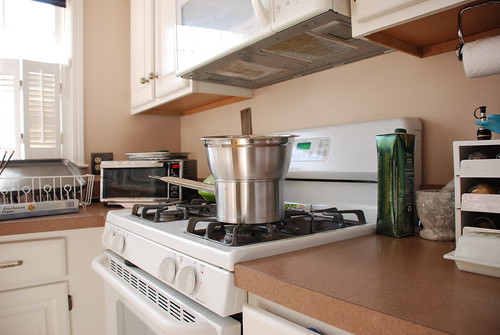
Take a metal bowl with a lip and place it on top of a pot with 1″ water, like so.

For double the boil.

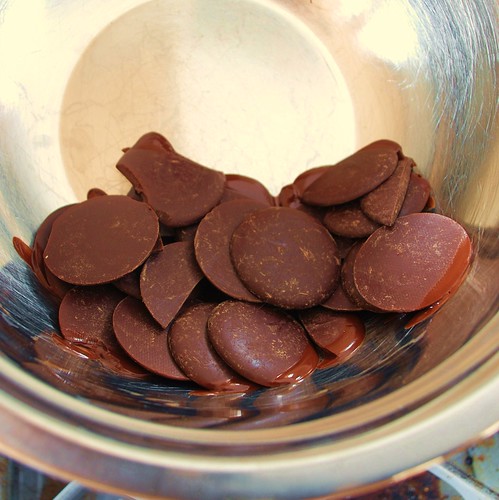
Step 2: Chop your chocolate.
I did not do this, but it would have helped melt everything more easily. One third is going in the pot and the rest is staying behind for later.

Step 3: Melt.
Put chocolate in bowl, set burner to medium high. Once the chocolate begins to melt, reduce heat to medium. Stir the whole time with a rubber spatula until the chocolate’s temperature is near 115 oF (46 oC) (for semisweet chocolate chips, if using milk chocolate or white chocolate 110 oF (43 oC))

Melt.

Step 4: Remove from heat
But leave the bowl in the pot for the next part.

Step 5: Seed.
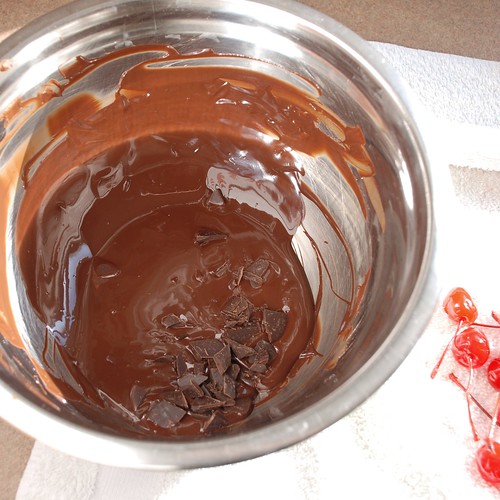
Take the remaining ounce of chocolate and stir into the molten stuff. Stir continuously until temperature is between 88 oF and 90 oF (for semisweet chocolate chips, if using milk chocolate or white chocolate 86oF and 88 oF).

Seed.

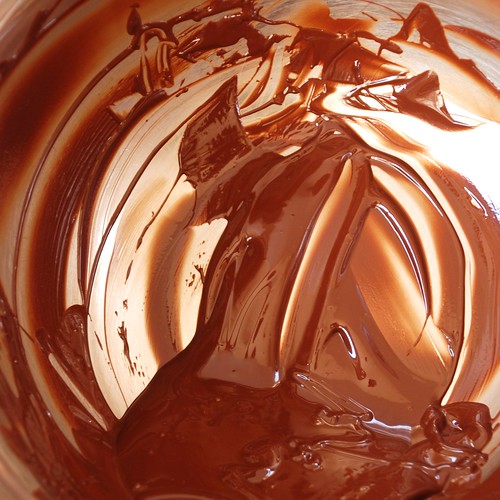
And that’s tempering chocolate, ta da! Here’s how beautifully smooooove it looks.

Perfectly shiny brunette.

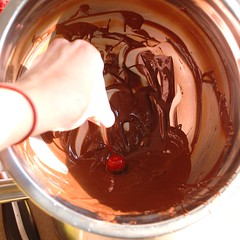
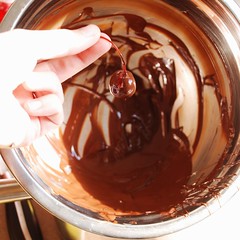
Keeping the bowl at an angle helps with the dipping process (i.e. there’s more to dip into and it holds its heat better).

Step 1
Step 2Step 3!

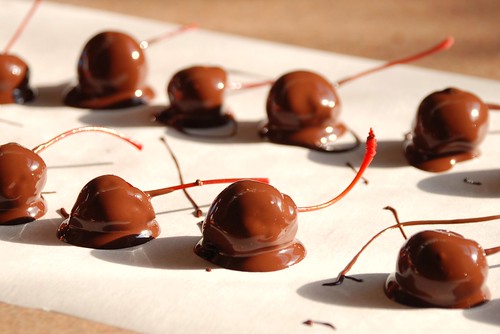
Lay out on parchment paper or wax paper.

Nothing special just yet...

Nothing special just yet...

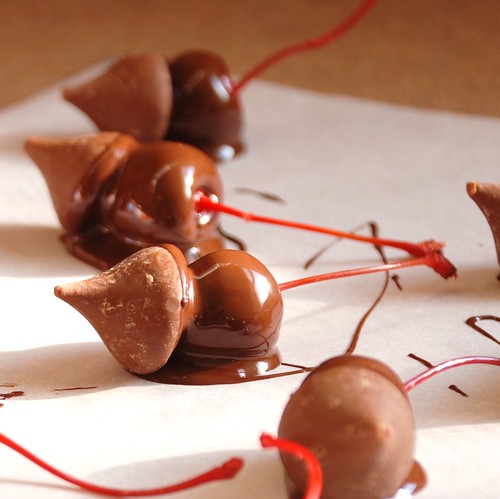
Dab on a Kiss.

(he can't hear you)

And ears.

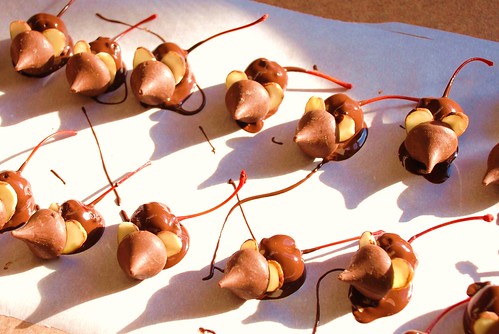
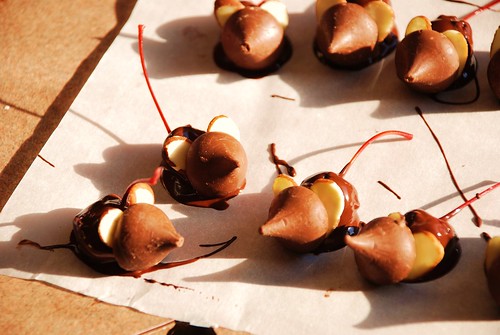
Well-tempered mice.

See how well-tempered my mice are? My, Aleta, you are positively . . . punning tonight, bahuffhuffhuff.

Well-tempered mice.

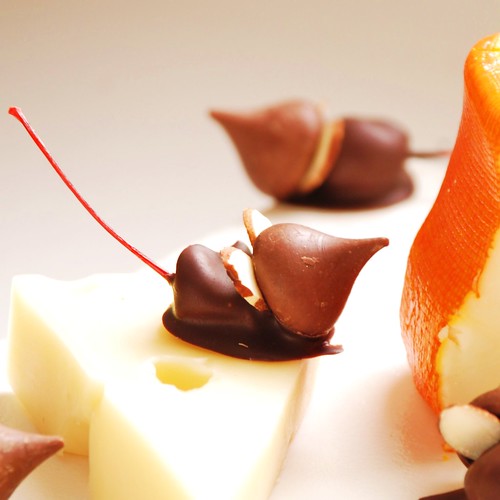
These little guys don’t look like much all stacked together on a plate, but I felt pretty clever sticking them on a cheese plate. Get it? Cuz they’re mice? Oh Martha Stewart, you have some counterculture competition coming your way.

Well-tempered mice.

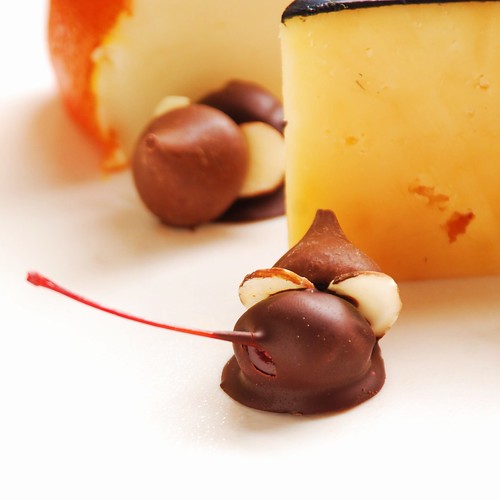
Cute enough to make up for illustrating what in true practice would actually be quite disgusting. I’m calling it a win. When made lovingly, personalities will emerge. There’s the ambitious one.

The curious one.

The so-frugal-it’s-downright-stingy one.

The stingy one.

And the one with a really undeniably cute butt.

The one with a cute butt.

Chocolate Cherry Mice

Small batch (makes 25)

1 small jar Stem-On Maraschino Cherries (10oz; ~25 count)
1/3 bag Hershey Kisses (4oz; 25 total)
4oz chocolate (avoid chips if possible; semisweet, dark, or milk as desired)
50 almond slivers (you’ll need to pick through a lot to get this many, so I recommend starting with a large bag, at least a cup)

Large batch (makes 75, safer in terms of chocolate temper)

1 LARGE (10 oz, ~50 count) jar Stem-On Maraschino Cherries
1 small (16 oz, ~25 count) jar Stem-On Maraschino Cherries
1 bag Hershey Kisses (4oz; 75 total)
12oz chocolate (avoid chips if possible; semisweet, dark, or milk as desired)
150 almond slivers (start with at least 3 cups)

Equipment:
Metal or heatproof bowl with lip
Meat thermometer
Rubber spatula. Word on the internet is no metal, no wood.
A sunny, low-humidity day best tempers chocolate, but rainy day mice will be just as yummy if not as shiny.
Drain cherries, do not rinse. Place a handful at a time in a kitchen towel, craft into a bindle and shake around to absorb as much moisture as possible. Leave in towel for now.

Unwrap all Hershey kisses and set on a platter for easy access.

Sort through almond slices until you have two nicely shaped slices for each mouse’s pair of ears.

Line 1 – 3 cookie sheets or cutting boards with parchment paper or wax paper. They need to be able to fit in your fridge!

Chop chocolate, reserving about a third chopped pieces (1.25oz for batch of 25; 4oz for batch of 75). If using chocolate chips, no need to chop.

Make a double boiler by placing a bowl with a lip over a medium pot/saucepan with about a half inch of water. Set burner to medium high, and once the chocolate begins to melt, reduce to medium. Stir continuously with rubber spatula. As soon as you can see no more individual pieces, check the temperature, and continue to cook until it just enters the appropriate target. Err on the side of removing too soon if the temperature is still rising rapidly as it nears your target.

Dark/Semisweet: 115 oF (46 oC)
Milk Chocolate: 110 oF (43 oC)
White Chocolate: 110 oF (43 oC)

Turn off stove, remove bowl from pot and place on a towel to absorb extra moisture. Add in remaining chocolate and stir constantly until temperature is at tempering range:

Dark/Semisweet: 88 oF – 90 oF (31 oC – 32 oC)
Milk Chocolate: 86 oF – 88 oF (30 oC – 31 oC)
White Chocolate: 80 oF – 82 oF (27 oC – 28 oC)

Holding stem, dip each cherry in the liquid chocolate, then set on parchment/wax paper. Set your mice about two inches apart to allow space for the Hershey Kiss and a little fiddling, and so no tails are caught in his neighbor’s warm chocolate.

Once all cherries are dipped, and starting at the beginning again, set a Hershey Kiss in front of each cherry to make a head. It helps to rest it on the cherry at an angle, as though the mouse is looking up. Aesthetically, an upturned nose is cuter.

Once all cherries are headed, and starting at the beginning again, stick one almond slice on either side of the head to make ears. Try not to touch the wet chocolate, but you can use the Hershey Kiss and the tail to help position these just so. If the chocolate is not tacky enough, wait a couple minutes and try again, but be careful not let it get too cool.

And finally, once your mice can hear you, set platters in fridge for 1-4 hours to firm up. To remove, seize the mouse by its tail. Squeak!

Serve on a cheese platter for maximum effect. Really, it’s so adorably cute.

Chocolate Cherry Mice

Part of the reason for my lapse in posting has to do with the whole rigamarole of planning something at least moderately unique and replete with a set of photographs. If this site had no photos, I’d update like, every day.

But I’ve been concocting all kinds of late-night improvisational meals and desserts and sharing only with my closest friends. Omnomicon’s mission statement is really to share dinner parties with the Internet-at-large, and so I feel like I’ve really been leaving some important guests off the list. The improvisational nature of these goodies really impede their shareability—I’m most creative around midnight, substituting everything for what I have on hand with guests gracing my living room, and I never know if it will truly come out. To photograph would be rude, and seems to jinx my success anyway.

So despite a lack of photographs, I have to share what turned out to be my most incredible late-night cheese platter to date. Use your colourful imagination to pretend that my house is impeccably kept and my serving platters not chipped. Imagine also the excellent company eccentrics such as Dano and myself might keep, and you’re probably right on.
World’s Most Incredible Improvisational Cheese Platter
intended to be served at least two hours after dessert, between the hours of 12am and 3am

Please amend according to your own stockpile of cheese & emergency guest crackers. I’ve paired the components together in the manner in which they are intended to be enjoyed, but of course experimentation is bound to occur.

1 box Water Crackers
8 oz whipped Neufchatel cheese mixed with 2 tbsp pesto concentrate (found in the fancy part of the pasta aisle in a paint-tube)

Leftover cheese from dinner, in this case, fresh mozzarella
1 tbsp leftover fig paste (just dab the mozzarella in there…this stuff can be overpowering)

Lindt Excellence Dark Chocolate Chili Chocolate bar, each square cut into four pieces
Cold tart green grapes, to cool the mouth after each piece of chocolate

Babybel cheese (the delicious little round things in red wax, just because they are hell of fun)

Ideas for variations:
Whole sugar-toasted almonds
Frozen sliced Ho-Hos (don’t laugh, they’re surprising and delicious)
Some kind of meat and earn yourself the right to call it charcuterie
Apricot jam substituted for fig paste
Make a cheese ball of the pesto cream cheese: roll in pine nuts & stick on dried cranberries


daily nom #8

If you don’t hear from me in the meantime, Happy Holidays from Omnomicon! Treat yourself to something delicious on my behalf.

<3,
Aleta

I’m back! Didja miss me? Vacation was vacation, I won’t bore you with details, but I did meet Steffany from Dinner Love, and she’s a dear.

But hey check it out, while I was glutting myself daily on hotel breakfast Danish, there were 45 Tastebuddies trying out 11 different recipes in a valiant effort to determine which would qualify as THE BEST CHOCOLATE CHIP COOKIES there are. If you have no idea what I’m talking about, welcome to Omnomicon! Here’s where you can read about our monthly Recipe Round-Robin contest.
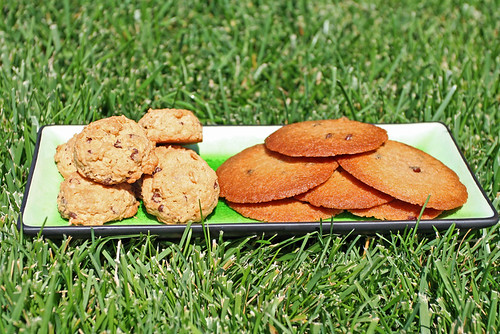
And here, let me show you what the best looks like, beginning to end.

The making of chocolate chip cookies.

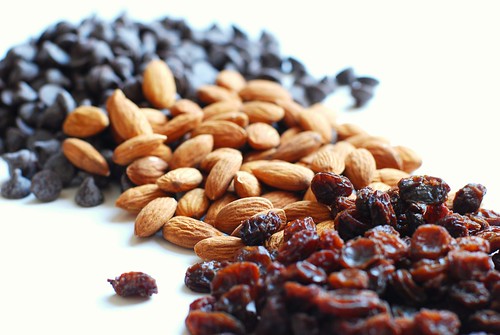
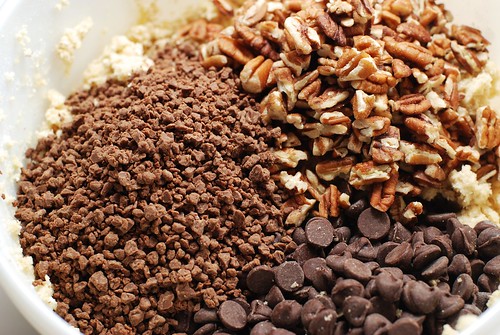
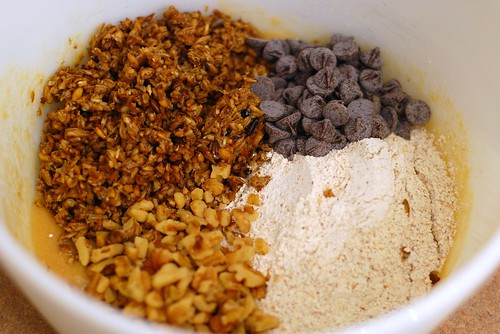
That up there is all the stuff that goes into these suckers. It’s hard to tell, but there are a couple secret ingredients in there.

The making of chocolate chip cookies.

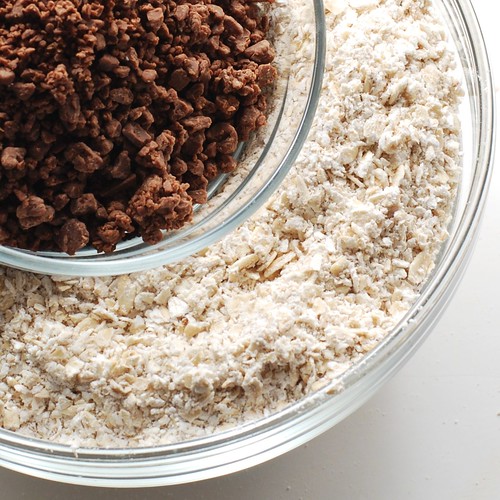
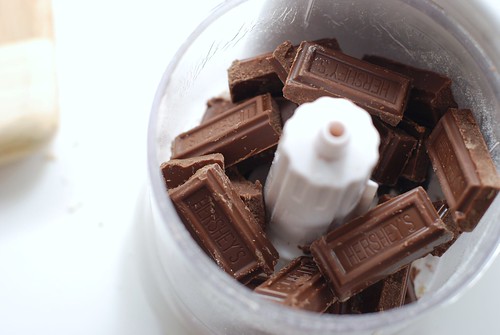
The white stuff is ground oatmeal, and the brown crumbs are grated Hershey bars. Specifically Hershey bars. Except instead of grating, I thought I’d try getting the job done with my food processor.

The making of chocolate chip cookies.

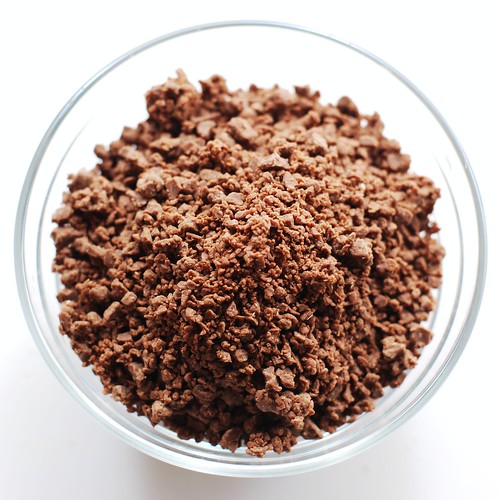
And what do you know, it totally worked.

The making of chocolate chip cookies.

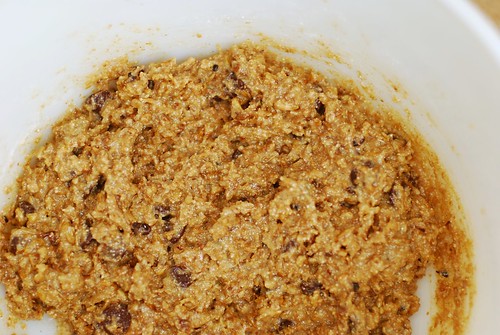
And then stir that into all the other stuff with some nuts and, naturally, chocolate chips.

The making of chocolate chip cookies.

The batter is extremely tempting, but be sure to save some for the cookies, they’re worth it.

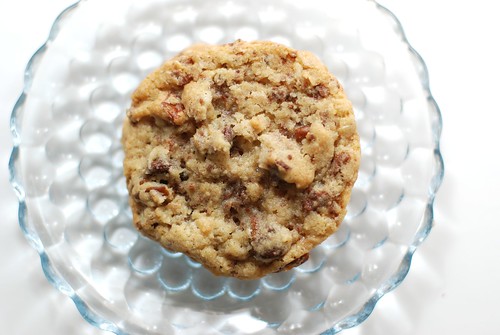
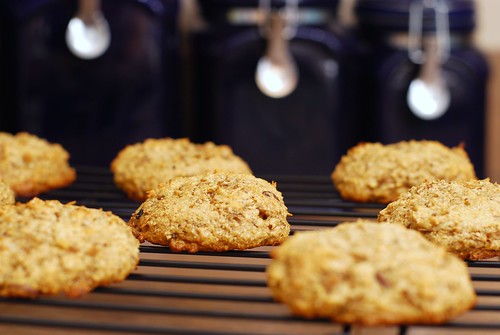
Cookies.

So do you recognize these? They were Bubbe’s Fantastic Chocolate Chip Cookies, code named Recipe L, and many big thanks to Hallie for letting us give them a try! Here’s what she had to say about ’em:

Here is my bubbe’s fantastic recipe for Chocolate Chip Cookies. They’re definitely not low-fat, but they’re the best I’ve ever made (and I’m a pastry chef!).

So these are both pastry-chef and Tastebuddy approved. I knew you’s guys had great taste. My guess is that the groundedness of the oatmeal gives these more texture without being so suggestive of oatmeal cookies. I also have a theory on how the Hershey bar plays into things: usually a chocolate chip cookie is a sugar cookie with bitter chocolate chips here and there, but little to tie these two elements together. Maybe the grated chocolate creates a gentler transition from cookie to chip? Even if my theory is right (and I’m open to the alternative, I know what I don’t know), my word choice is not even remotely technical, so Hallie, please feel free to jump in with your expertise.

Here’s the word I got via email results:

  • Our house votes for recipe L. It had lots of chocolate and grinding the oatmeal was a great idea because it made for flatter and less dry cookies. Recipe L was nice and chocolaty! After we made our decision we did our own taste test with friends and recipe L definitely won hands down.
  • Far and away, I and my 3 co-tasters chose Bubbe’s Fantastic recipe as the best of the two. The finely ground oatmeal added a nice substance to the cookies without giving it the graininess of an oatmeal cookie. They baked up nicely–no flat cookies here–and the ground Hershey’s chocolate gave the cookies a beautiful brown color and a little extra chocolate kick. I used hazelnuts since it said you could add your choice of nuts–not a huge fan of nuts in cookies, but they tasted great in this recipe.
  • The texture was very nice; the oatmeal provided more substance to the cookie and even though some of us had hesitations about whether oatmeal belonged in a traditional chocolate chip cookie, it was quite good.
  • So good. If you’re including technique suggestions, rolling these guys into balls really helped.
  • Who knew oatmeal could help so much?

And here’s the word on the web (leave a comment with a link if I missed your post!):

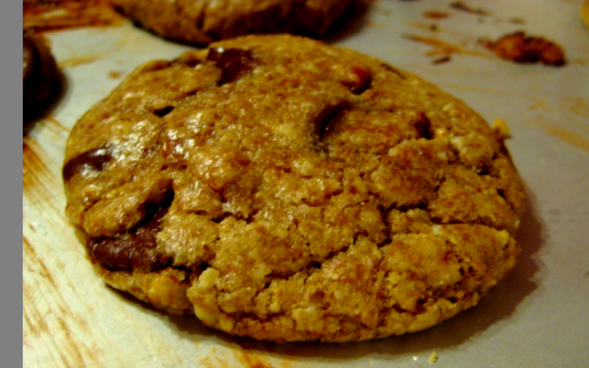
And here’s what they looked like in other people’s kitchens:

Ruth made Bubbe’s
Ruth tries Bubbe's.

And Jeff also made Bubbe’s
Jeff gives Bubbe's cookies a shot.

Then Domestic Ambitions made the Friendly Choco-Chippers . . .
Domestic Ambitions also tried the Friendly Choco-Chippers

. . . and also Sheila’s (nice collage-work, btw).
Domestic Ambitions makes Sheila's cookies.

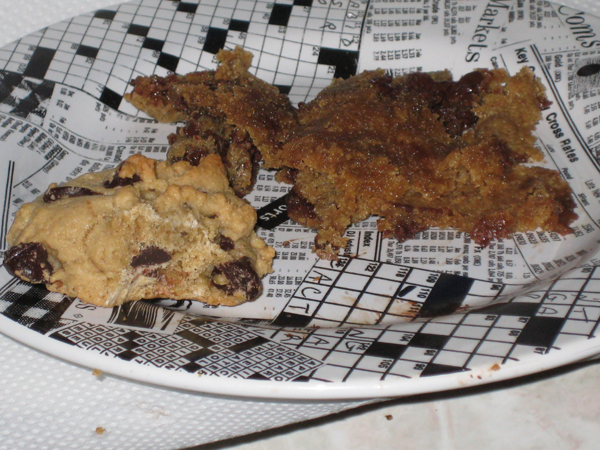
Next up are the Kitten-Free (calls for exactly 0 kittens in the ingredient list, and the cleverness was simply adorable) as compared to the Family Secret recipe, the latter which did not seem to work out for Carly, who may have been too busy with Sunday’s NYTimes crossword to care.
Carly compares the Kitten-Free to the Family Secret chocolate chips cookies...

And lastly, there was the recipe that ended in “Mmm. Eat.” and Ruby’s Plan ahead cookies. I want to give Lisa mad props for this photo, it’s gorgeous.
Mmm Eat vs. Ruby's Plan-Aheaders (courtesy of Lisa)

And there you have it! Yet another Recipe Round-Robin, now with 200% more reader participation. Hooray! So I’m announcing a savoury recipe for July . . . any suggestions? I’m thinking summer-time BBQ dishes—pasta salad, seasoned hamburgers, probably not potato salad because there’s a huge tendency toward grossness and grossed-out taste-testers—but I bet comfort food will work regardless of the time of year. We’ll save fruitcake for December.

Thanks again to everyone for participating. Really, I mean it! I’m so psyched that this works out every month because people are saying they had fun and because I like reading about it, and giving stuff away is fun too.

And last but not least, here’s Hallie’s winning recipe.

Bubbe’s Fantastic Recipe for Chocolate Chip Cookies
yields about 3 dozen cookies

1 cup butter
1 cup sugar
1 cup brown sugar
2 eggs
1 tsp. vanilla
2 cups flour
2 cups oatmeal, ground to mealy texture
1/2 tsp. salt
1 tsp. baking powder
1 tsp. baking soda
12 oz chocolate chips [2 cups]
4 oz grated hershey bar [this amounts to 18.5 rectangles from the Big Bar, but use your algebra to figure it out if you can manage . . . I food processored those suckers, and it seemed to do the trick. If grating by hand, however, one Tastebuddy recommends freezing the bar first so it doesn’t melt in your hand.]
~1 cup chopped nuts of choice (I usually use pecans or walnuts) [editor used pecans, and they were fabulous]

Cream the butter and sugars together.
Add the eggs and vanilla and beat until fluffy.
Mix the dry ingredients and add to egg mixture.
Stir in the chips, nuts, and hershey bar.
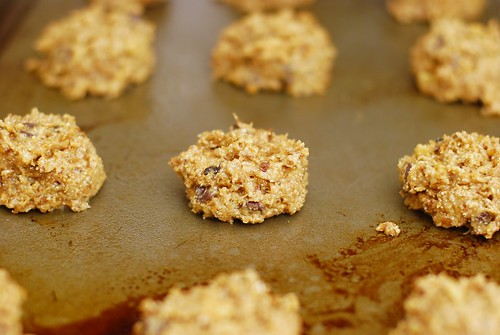
Drop by rounded tablespoons onto a lined cookie sheet and bake at 375 for 6-8 minutes. [editor’s note: mine took about 10 minutes, and one Tastebuddy had reported 11-12 minutes. Final recommendation is check in at 6 minutes, and then every two minutes after that until you can see a little bit of browning happening on top].

nom nom nom!

nutrition summary (1 of 36 cookies yield): 220 calories, 12g fat, 1.5g fiber; ~5 weight watchers points

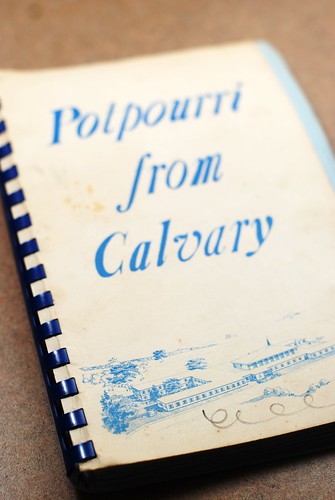
If you’ve been following along, you’re probably aware that I collect cookbooks. Specifically, cookbooks created by New England civic organizations between 1950 and 1980 for fundraising purposes. With yard sale season in full swing, I find myself solvent with new recipe ideas, among them one I found in this vandalized and water-damaged collection.

No date, no address, not sure.

The picture on the cover somewhat suggests the architecture of Calvary Baptist Church in Easthampton, but I bought the book in Millbury and it has no date (I’ve never been to that Church, I just tried to do some due diligence in my googling). Nevertheless, it *does* include a chocolate cake recipe with a secret ingredient: ice cream.

Ice creeeeaaaammmm!!!

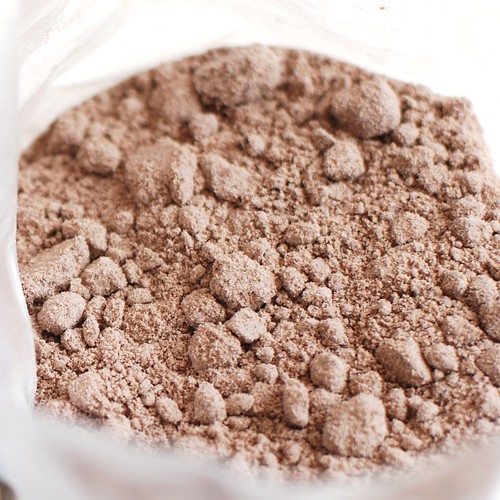
And hey, no cake flour or fancy measuring required, because we’re using cake mix.

The mix.

I let my ice cream soften by scooping it up into small chunks and letting it sit a few minutes. At teaspoon size, your mixer will take care of any further softening required right quick.

Mix together.

The recipe calls for greasing & flouring a tube pan. Since I’m making chocolate cake, I dusted with cocoa powder instead of flour so my cake won’t look dusty. In fact you can do this with any chocolate cake, with the added bonus of a little extra kick of chocolate, and hey, that’s the name of the game, right?

Dusting the tube pan.

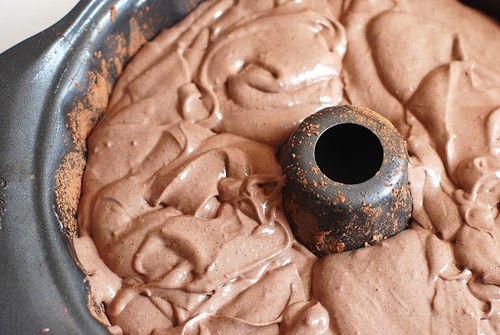
After 4 minutes of beating, the batter kinda just looks like . . . well, melted ice cream.

Whippie.

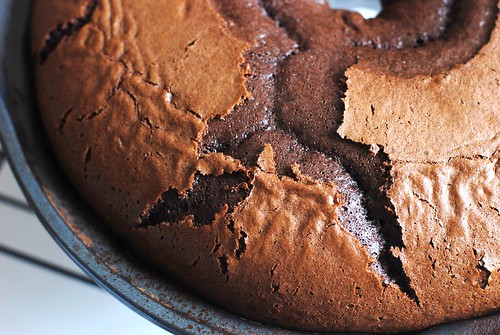
This is one of those situations where a process shot gives a much clearer picture of the character of the dish than the final picture can. Connie Aubuchon, the contributor of this recipe, assures that the cake is “very moist, rich and chocolatey.”

Mmmmmmm.

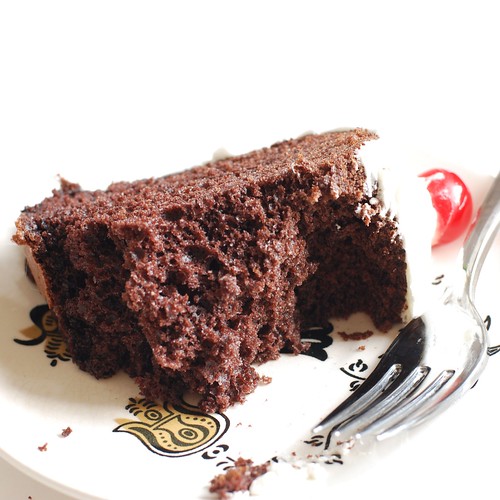
She was right. This is about as moist as a cake gets without being outright wet, and it even has this spongy noise as you cut into it. In short, it is the most delicious chocolate cake you ever had.

Connie was right.

I wanted to see just how chocolatey I could make this, so I stayed true and made a chocolate cake mix with chocolate ice cream. But I was *thisclose* to trying chocolate cake with mint or ginger ice cream, and other combos that come immediately to mind are vanilla mix with mango ice cream, yellow cake mix with strawberry ice cream, and funfetti with pretty much any ice cream. What combo would you make?


Chocolate Ice Cream Cake (but not like you think)
with thanks to Connie Aubuchon

1 box chocolate cake mix (or any other flavour)
1 pint chocolate ice cream, softened (again, any other flavour)
3 eggs
1 c water

Preheat oven to 350o. Grease a tube or bundt pan, then dust with cocoa powder.

Beat all ingredients together for 4 minutes, pour into pan and bake 45 minutes. Serve with a dusting of confectioner’s sugar, a thin icing, whipped cream or the frosting of your choice.

Done!


approximate nutrition summary (will vary depending on the brands used): 230 calories, 6g fat, 1g fiber; about 5 weight watchers points

May-5-2009

daily nom #7

Posted by aleta under daily noms

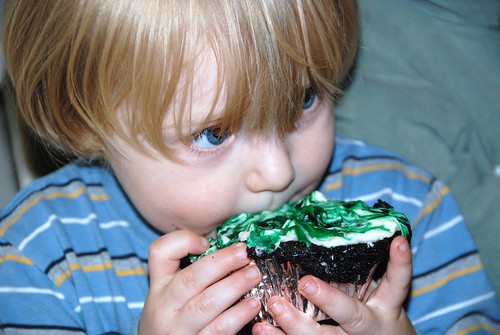
More than any other photo I’ve snapped, this is one of the most enticing. It just makes me want to enjoy the world’s hugest chocolate cupcake with the goofiest happy face every time I look at it. Pictured is one of my best friends’ son enjoying a self-decorated cupcake on his third birthday. And cupcake aside, how gorgeous are those eyes? Somewhere, there is a 3-year-old girl who is going to fall HARD for this kid in about 15 years. I guarantee it.

First taste.

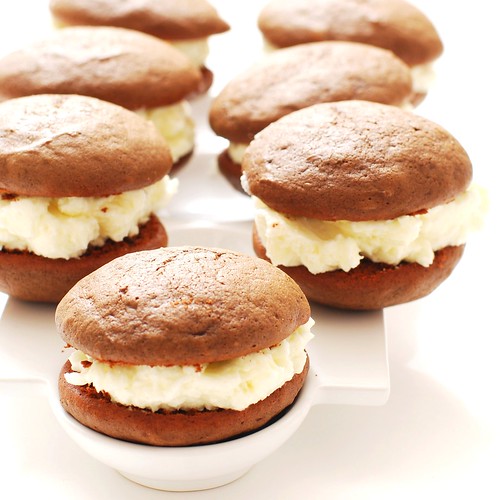
Now I’m going to tell you: my mother’s whoopie pie recipe is SO GOOD that I will often tell people that I don’t like whoopie pies at all, because I have yet to find another recipe that I actually like. Other people’s whoopie pies are too cakey, or too cookie-like, or (as is usually the case) the filling is pure frosting, which is WAY too sweet and totally the wrong texture altogether. My mom’s whoopie pies were famous in our circles, and she generously provided them whenever demanded, particularly when visiting my Uncle and Aunt in Maine for Thanksgiving and Christmas. I ate more whoopie pies in my childhood than cupcakes, brownies or cookies combined; they were a true and strong family tradition.

Antonia, a faithful reader, pointed to a NYTimes article about the Whoopie Pie and well hey, I’m not usually up to snuff on anything topical, and since I have an authentic family recipe on hand, I am suddenly compelled to showcase my (rather specialized) expertise!

A proper whoopie pie is not merely some cloying abomination of sugar and fat. No no, it is delicate in its way, the sweetness ever-present and yet subdued. Please do not compare them to a Devil Dog or Moon Pie. Please do not make them with cake mix and tub frosting. A whoopie pie is a very specific delicacy and there are rules.

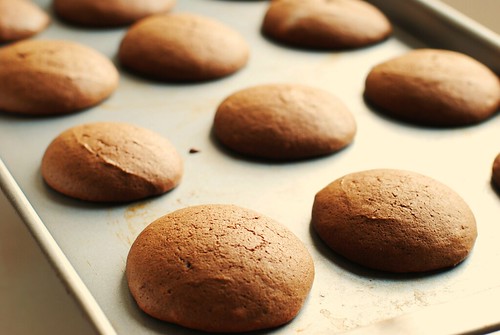
The proper texture.

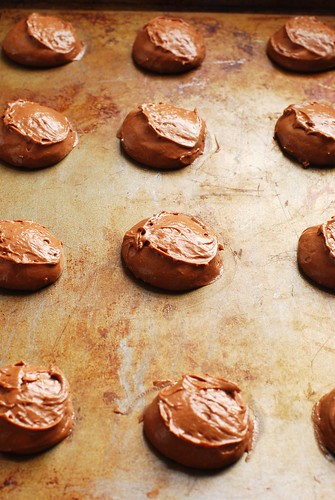
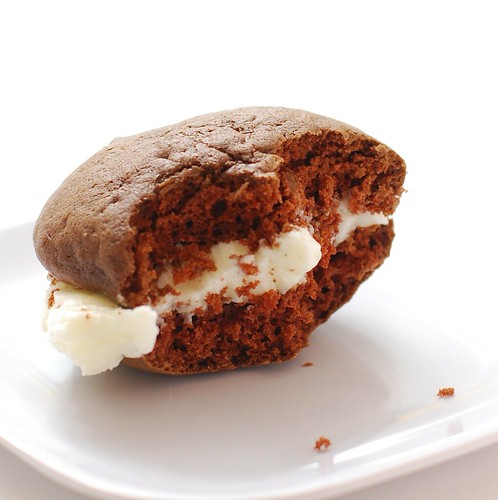
A proper whoopie pie “cookie” is a medium-brown shade, fairly dry (not all oily and moist like a Little Debbie’s snack), but still somewhat densely cakelike, maybe a vein or two where the scoop let go of the batter. They crack ever so slightly, but sometimes they don’t and maybe that has something to do with the barometric pressure. I dunno, they still taste right and seem to have the right texture, so aesthetics aside, it’s fine either way.

Okay, so maybe the filling is an abomination of fat and sugar.

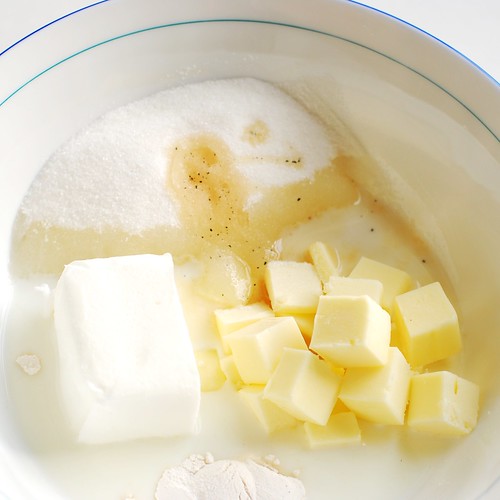
The proper whoopie pie filling is made with Crisco (which, apparently, no longer contains trans fats), butter, whole milk, sugar, a tiny smidge of flour and a regular portion of vanilla. Did you notice that it has no Fluff in it? That’s because Fluff is for fluffernutters, not whoopie pies. You will also notice that the filling is not a frosting, but a creme. While eating, one will lose all the filling out the sides and must open the pie, collect up the creme that has splooshed out back onto the bottom piece, then recreate the sandwich, only to do it all again in the next bite or two. This is the proper way to eat a whoopie pie.

This process presented many lovely photo ops. Let’s take a look!

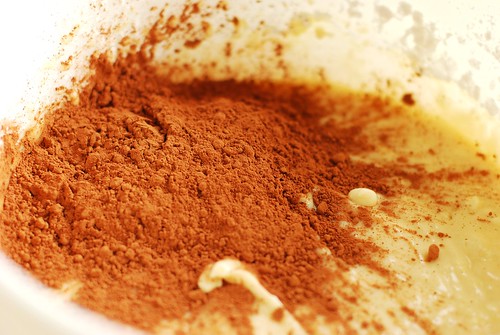
Where the chocolate comes in.

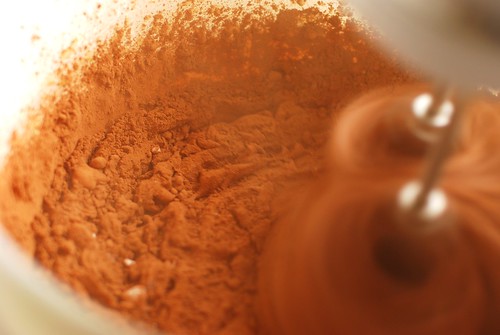
This one reminds me of a dusty construction site.

Cocoa construction site.

Ungreased cookie sheet...

The cookies can be removed from the cookie sheet almost immediately, but you really need to use a metal spatula and carefully scrap them off. I like the texture underneath, it gets a little crispy as it cools and it is so so satisfying to snack on the odd unmatched whoopie pie cookie before they’re frosted.

The underside.

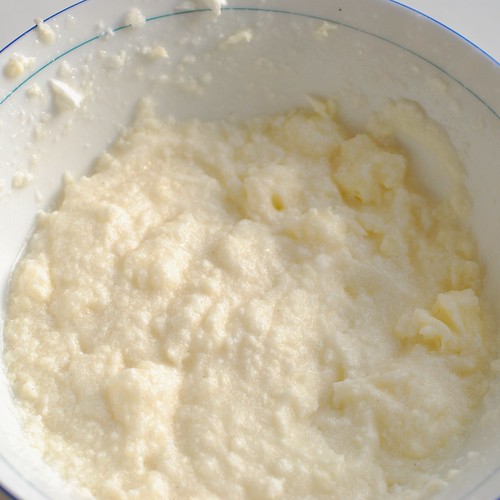
The creme takes a convenient 10 minutes to make, which you can most likely complete between the time the first batch of cookies goes into and comes out of the oven. I’ve found it nearly impossible to make the creme without an electric mixer (stand or hand, your choice), and sometimes it takes longer than others. For the first several minutes of mixing, your creme will look like this: kinda gross.

Porridge?

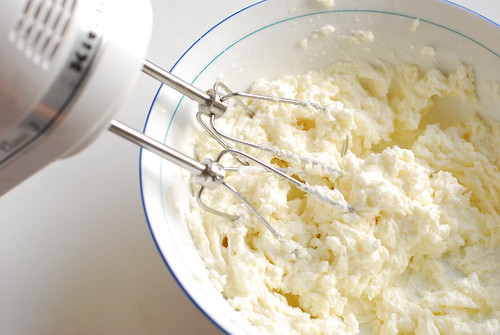
And then you’ll hear a cherub giggle, and an angel wing will brush against your shoulder as suddenly the creme whips up into this glorious appearance. The texture is extremely creamy, but still looks like this.

As if by magic.

After a little assembly . . .
Mom's perfect whoopie pies.

Since I started making my own food, I’ve lived on these for days at a time. Not particularly healthy nor affluent days, but certainly enjoyable ones.

Well of COURSE I ate some as I went along.


Mom’s Famous Whoopie Pies
makes about 14 after batter & cookie sampling
brought to you by very fortunate family ties.

Blend Add
1/4 c Crisco 2 c flour
1 c milk 1/4 c + 1 tbsp cocoa
1 c sugar 1.5 tsp baking soda
1 egg 1 tsp salt
1 tsp vanilla  

Drop by the small tablespoonful onto an ungreased cookie sheet—a tablespoon-sized bakery scoop works best. Bake exactly 8 minutes at 375o, see if a toothpick comes out clean, and if it doesn’t, bake another 2 minutes (10 total). Upon extraction from the oven, remove from pan immediately to wire rack to cool.


And now the creme filling (reminder: it’s not frosting, guys)

1/2 c margarine or butter (room temp is best)
1/2 c Crisco (my mother is insistent that this MUST be Crisco and CANNOT be generic shortening, nor substituted in any way . . . but if you do get it to work with a substitution, please let me know!)
1 c sugar
1 tbsp  flour
1 tsp vanilla
1/2 c warm whole milk (20 seconds in the microwave should do it)

Beat with a mixer (stand or hand, your choice) for-freakin-ever. It will start out just like, well, lumps of Crisco floating in milk, then bits will get smaller and smaller, then it’ll slosh around for a little bit, and, much like the butter making process, you’ll be wondering if this will ever become anything or if you maybe messed it up somehow. Suddenly, about five minutes later, your mix will look weird for a second, and within moments your slushy mess will turn into a glorious white creme, smooth and perfect in a way rarely seen outside the confines of uber-processed food with chemicals you can’t pronounce that are not even available to the consumer in their pure form.


Assembly

As soon as the whoopie cookies are cool, match each whoopie with its closest brother in size—even if yours didn’t all come out the same size, evenly matched whoopies will look much much nicer. Spread some filling on the flat side of one, then place the second on top. Repeat. This does not need to be done immediately before serving, as the filling tends to maintain its consistency surprisingly well, and some (like my mom) would argue that a day-old whoopie pie is even better than fresh. I like them all.

No need to refrigerate, sealed plastic or plastic wrap will keep them fresh.

. . . and that’s it. Congratulations! You just made the best whoopie pies known to man.


Not like it’s diet food or anything, but these are not quite as totally terrible as I thought they’d be!
Nutrition Summary (for 1 whoopie pie of yield 15): 330 calories, 17g fat, 1g fiber; 8 Weight Watchers Points

Oct-16-2008

spent grain chocolate chip cookies

Posted by aleta under sweets for sharing

Lookit what I got!

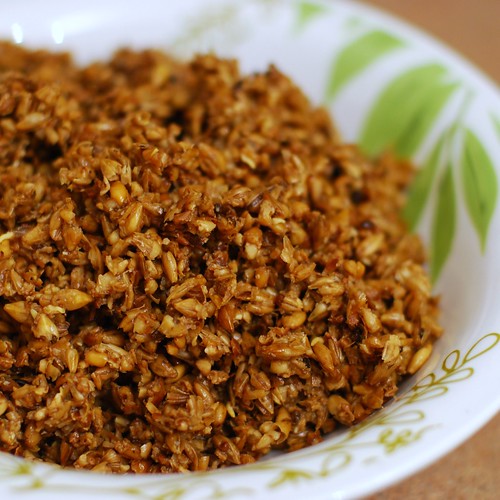
Spent grain.

In case you aren’t a homebrewer, that there is spent grain. This is what’s left after you brew the beer (but before it ferments), and it’s often used as fertilizer, mulch or animal feed. But it’s just grains, full of fiber and totally good for you, so my pal Heather filled up a nice big bag for me to play with. What a doll!

I found this recipe and tried a couple batches. The first was the recipe as written (which includes peanut butter—not my favourite), and the second was my little take, sans peanut butter and nuts. And the winner is . . . definitely the recipe as written. Mine came out dense and I daresay even fudgy, but not the good kind like you want. Also, the peanut butter doesn’t shine, it just adds to the nuttiness of the grains, and though I could probably work out some butter in its place, I would make this with peanut butter again. I did replace the oil with butter because I think it makes things a little fluffier and I felt these ran the risk of being too dense. But these tasted like super-earthy oatmeal cookies. I used only whole wheat flour and it didn’t even taste like dirt!

And hey if you don’t have access to these, no worries! I would imagine this recipe would work well for any grain mixture you might prefer. I’m thinking of bulgur in particular, but I’m not big on grain cereals. Since these grains are wet when they go in the recipe, make sure yours are cooked (and wet) before you measure them and toss them in.

Let’s take a look!

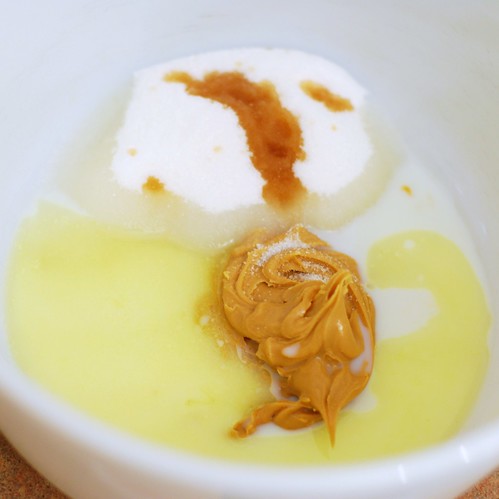
It begins.

Say what you want about the taste and calorie content, peanut butter is beautiful. Onto the dry ingredients.

Now the dry stuff.

At this point, I felt like it was time to spread these on a pinecone, and was a little skeptical about the recipe.

Batter.

These are generous tablespoons smushed down just a little bit so they’ll have a nice cookie shape.

Plop down generous tablespoons.

My MY aren’t you all so lovely.

Hey kid, cool it!

Enjoy!

Tender, cakey, delicious, healthy.

Nutty Spent Grain Chocolate Chip Cookies
Adapted from a recipe featured by Seven Bridges Cooperative.

1/3 cup peanut butter
2 tbsp melted butter
1 cup sugar
1/3 cup milk
1 tsp vanilla
1.5 cups spent grains (or alternatively, 1.5 cups of your favourite grain meal, prepared and still wet)
2 cups whole wheat flour
1 tsp baking soda
1/2 tsp salt
1/2 cup chocolate chips
1/2 cup chopped nuts

Mix in the peanut butter, regular butter, sugar, milk and vanilla. Then add the flour, baking soda and salt. Once that’s all mixed, stir in the nuts and chips.

Bake on a greased cookie sheet at 425F for 8-10 minutes until the tops are just getting golden, but before the bottoms burn. Let sit on the pan for about five minutes before transferring to wire rack to cool. Serve with love.

Makes about 2 dozen cookies after batter sampling.

One time I tried to make fudge. From scratch. I followed my Memere’s advice and selected a dry, beautiful, sunny day (apparently fudge is THAT sensitive to moisture), and I even invested in a candy thermometer. I ended up with a grainy, lumpy, nasty mess. The next day my roommate made fudge in the microwave with a lump of marshmallow Fluff. Of course hers was perfect.

I don’t use the Never Fail recipe, but Five Minute Fudge is another workaround that comes out great every time. I’m not a big fan of chocolate, and I will eat just enough to make sure it came out, so I haven’t tried to do this from scratch. But I did get a marvelous idea last night as I drifted off to sleep.

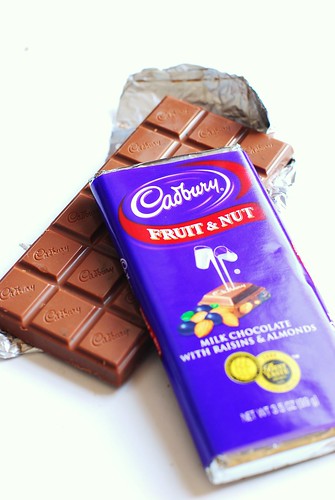
Have you ever had one of these?

The inspiration.

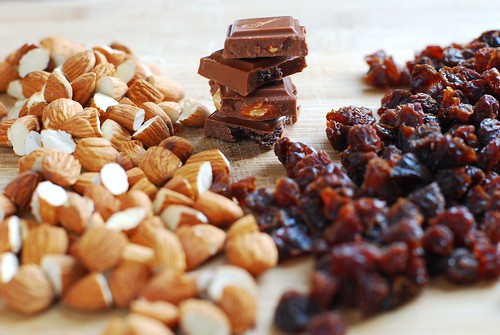
If you have, you know that it is the best way to eat chocolate. I set out to recreate it in fudge form. It is necessary to chop the almonds in half, but leave the raisins whole. This seems to preserve the consistency the chocolate possesses.

Preparations underway.

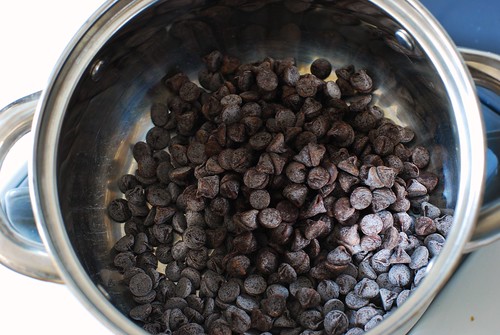
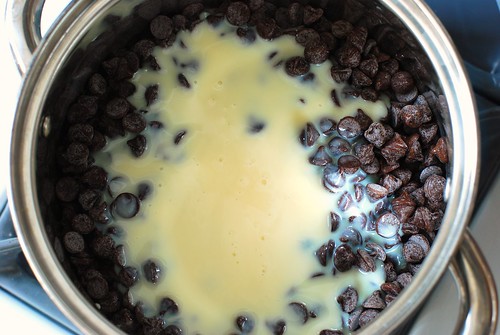
Then we melt our ingredients. First, three cups of chocolate chips.

It begins.

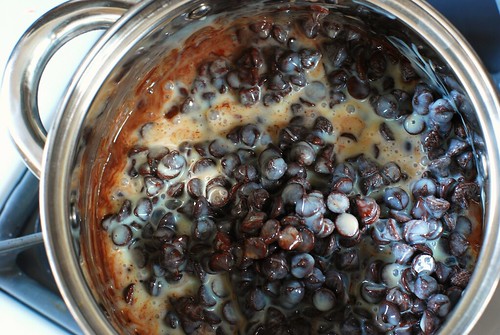
Now ooze your condensed milk and vanilla extract in there.

DSC_0744

Melting . . .

Melting . . .

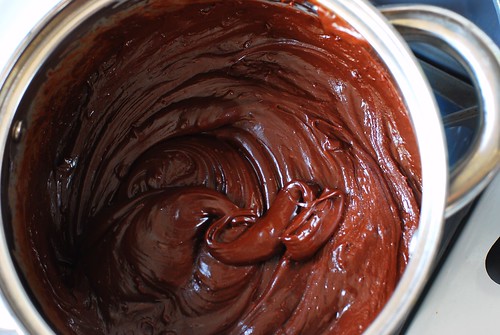
. . . and in just a few minutes of stirring, you have fudge!

Ready for additions.

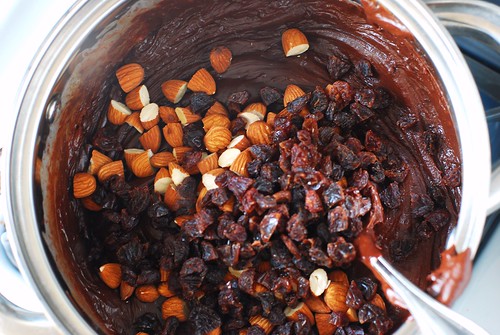
Now we make like Cadbury.

Stirring in.

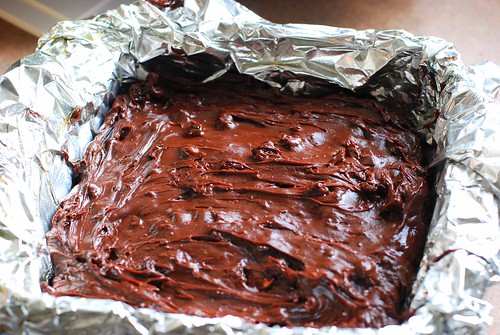
And voila! Lumpy fudge. I like to lightly spray the foil so the fudge releases easily when it comes time.

Lumpy!

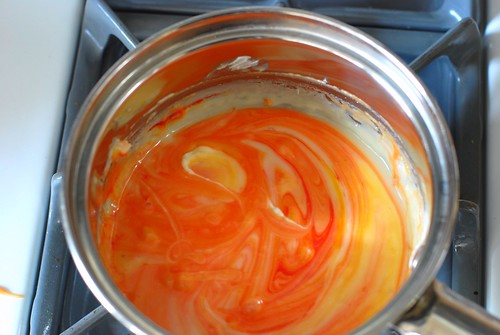
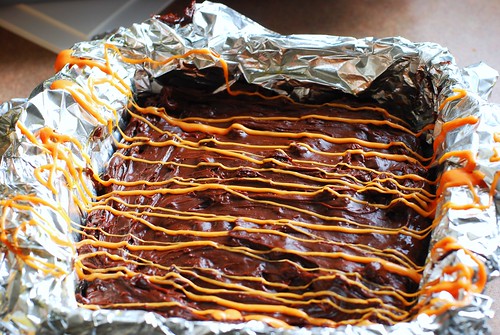
Hmm . . . now this is the texture we’d expect, but it’s a little . . . unrefined-looking. Fortunately, while the main feature was doing its melting thang, I was also melting some vanilla chips with a little bit of the condensed milk, with more condensed milk than the fudge so that it’ll be more cooperative. And since Halloween’s upcoming, let’s make it a theme.

Meanwhile, in another pot . . .

Oh man, that reminds me of a joke. Why did Snoop Dogg carry an umbrella?

Fo’ drizzle.

Oooo!

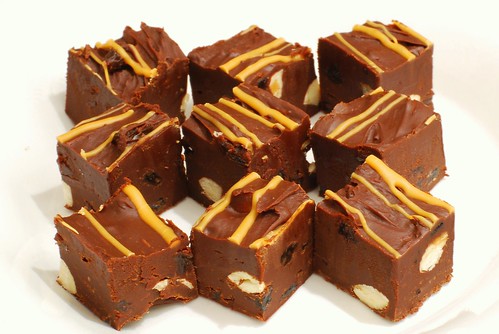
Let that chill, harden, and cut with a nice sharp warm knife.

And now, fudge!

Cadbury’s Fruit & Nut Fudge
built on the premise of Nikki’s Five Minute Fudge

1 – 14oz can of sweetened condensed milk
3 cups milk chocolate chips (since the Fruit & Nut bar is a very milky chocolate)
1.5 tsp vanilla
Dash salt
1/2 c almonds, chopped in half
1/2 c raisins

Fo’ drizzle (optional):
1/4 c white chocolate chips
1/4 c more sweetened condensed milk

Foiled line an 8×8 pan, and spray lightly with cooking spray.

Melt your milk, your chips and vanilla in a pot on stove top. Remove from heat, stir in nuts and raisins, then pour into foil-lined pan.

If you’re drizzling, let the pan cool on your counter for a few moments while you mix the white chocolate chips with your extra condensed milk. Let cool just a minute, then pour into a plastic bag, cut a hole in the bottom, and drizzle from foil to foil.

Chill 2 to 3 hours. Put your longest non-serated cuttin’ knife in a glass of warm water, wipe dry, then slice. Re-heat your knife via the water whenever the going gets less smooth.