how to make chicken cordon bleu
Hey guys, real quick: Omnomicon now has a Facebook page and is also twittering about on Twitter. I’m not quite sure why, but I thought being better socially-networked might be to the benefit of the site. Okay, back to our regularly scheduled recipes.
The first time I had Chicken Cordon Bleu, I was somewhere around 10 years old and my Memere had taken me out for my birthday. I probably ordered mozzarella sticks as an appetizer, because that was my thing, when extremely Quebecois-accented Memere recommended Chicken Bleu, I think mostly as an educational ploy to teach me more French. “O, da Chicken Cordon Bleu! Do you know what dat means? Blue Ribbon Chicken! Huh?! Huh?! Ha!”
Chicken Cordon Bleu doesn’t seem to have a whole lot in the way of history, but according to the nominal amount of research I did on the subject, what we call Chicken Bleu is wholly American and apparently started getting mentioned in newspapers as an airline food around 1960.
Whatever, it’s really frickin good.
Chicken Bleu is simple, cheap, easy and amazingly satisfying without sitting in your stomach like a lump of lead for the following several hours. After a year of being extremely food-conscious, I was surprised to find that I still absolutely love this dish. I wouldn’t call it subtly-flavoured, but it does taste far more sophisticated than the concept would sound.
The formula is simple: swiss, ham, chicken, treat it kind of like a turducken. Most recipes call for breast, but I thought the boneless skinless thigh meat would be a bit more flavourful and tender. You are, as always, free to use your discretion on the matter.
I just used the cheap deli ham and Swiss because um, it works just fine and there’s no reason to spend a lot of money on fancy ham, if such a thing even exists. That said, I do prefer better deli supplies when I’m eating it cold.
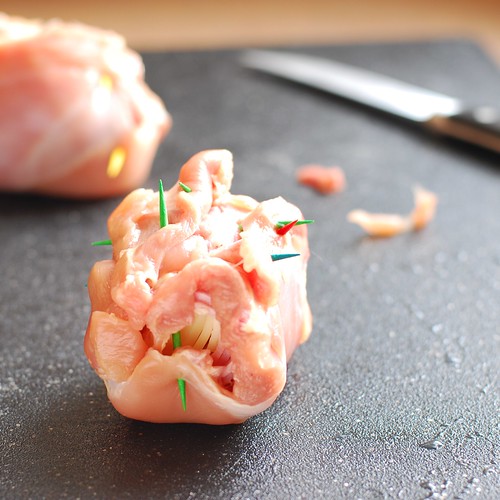
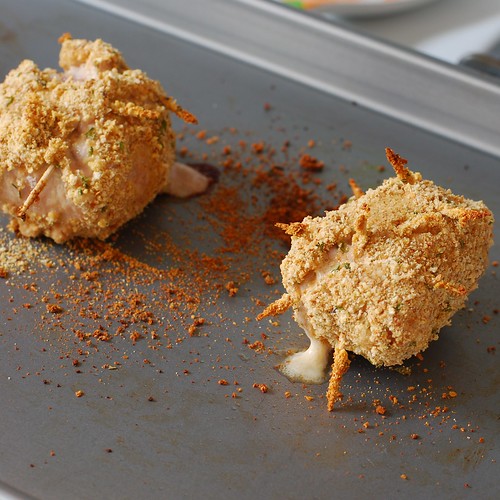
I used toothpicks like safety pins to keep this thing together and “mend” any holes I made in the meat while I was pounding it out. But I have to point out that you really don’t want to use the coloured ones you see here because they will stain your meat, which in addition to being kind of a culinary faux pas is just grossly unappetizing.
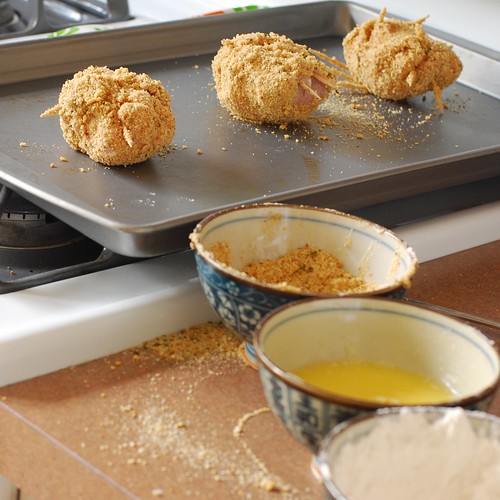
Next up: flour, egg wash, breadcrumbs.
Twenty-five minutes is the *perfect* amount of time to bake this—the chicken is cooked but tender and the cheese is melty without being scorching. Also, because of the toothpicks, these come out looking like you fried alive something vicious.
Was Memere right or what? Yum!
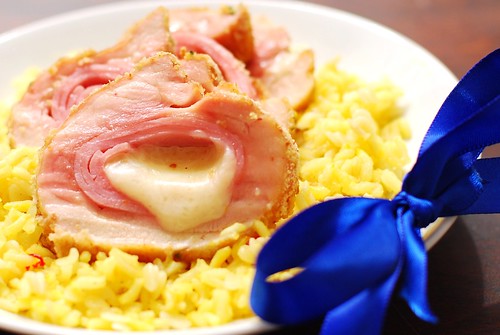
Chicken Cordon Bleu
4 servings
4 boneless skinless chicken thighs or 1/2 breasts (chicken breasts are HUGE these days!)
4 slices deli ham (or prosciutto or capicola)
4 slices deli Swiss cheese (or provolone or mozzarella)
1 egg
1/4 c water
1/2 c all purpose flour
1/2 c seasoned bread crumbs
Several plain toothpicks
If your chicken breast is a little thick, you’ll want to butterfly it and tenderize with a mallet. You can try to do the same if you’re going the chicken thigh route, but it’s not likely to help you very much, so you might as well save yourself the frustration.
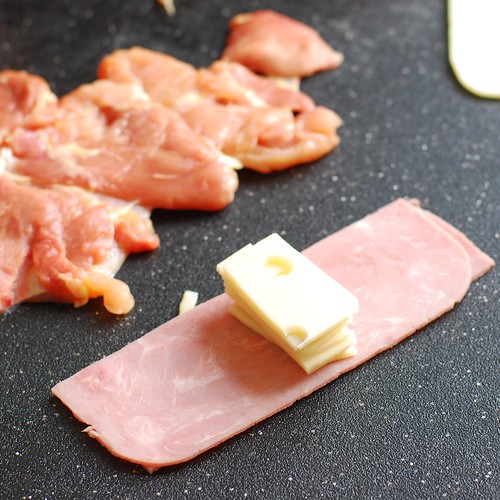
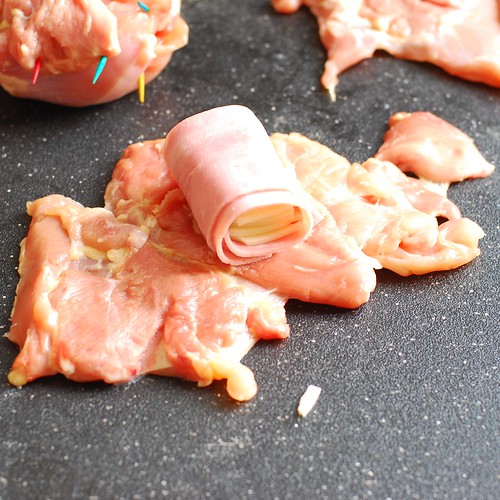
Cut the Swiss cheese into eight rectangles and stack. Slice the ham in half lengthwise, stack both pieces, then roll around the stack of cheese. Now create a little “meat purse” out of your chicken around the ham and cheese, and tack it up with toothpicks. Remember, no colours here unless you want polka dot chickens! The chicken will be cooked leaky-side up so that the cheese has less of an opportunity of gushing out of your creation all over the pan.
Set up three bowls for breading the chicken. The first holds flour for dusting the chicken balls; the second will have a beaten egg and 1/4 c water whisked together for an egg wash. The last will have some seasoned bread crumbs. Dip the chickens in the flour, the egg wash, then the bread crumbs. Place, toothpick side up, on lightly greased cookie sheet.
Bake 25 minutes exactly in a 350o oven. Serve with rice pilaf.
Nutrition Summary: 260 calories, 0g fiber, 13.5g fat; 5.5 Weight Watchers Points
BONUS RECIPE
I thought this might be a good opportunity to try out making rice pilaf from scratch. I really like the stuff from the box, and it’s what most restaurants serve for rice pilaf too. Theirs tastes so much “better,” though, because they use twice the butter called for on the box, and while that sounds like complete conspiracy theory conjecture, I did learn it at the restaurant where I waitressed that one time, and have noticed it everywhere I’ve eaten pilaf since.
Turns out that making your own pilaf is pretty easy (it’s mostly just getting the ratio of rice to orzo correct), but way more time consuming and you can just add whatever seasonings you would put in your own version to the box stuff. I’ve included the recipe as a bonus for those interested.
Rice Pilaf
2.5 c water
1 c long grain rice (brown or white, your choice)
1 tbsp chicken base (from what I can tell this is pretty much the only flavouring in boxed pilaf)
1 tbsp butter
saffron (pictured, or whatever other spices you want in your pilaf)
1/4 c orzo
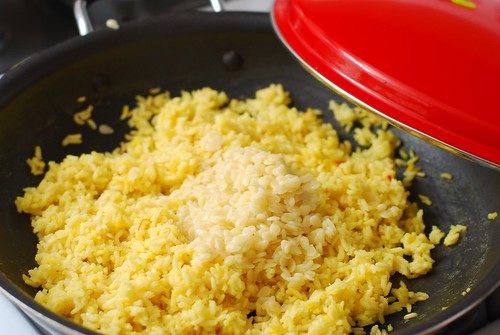
Bring the water to a boil in a deep pan. Doing it this way instead of in a pot makes your pilaf less likely to turn out mushy. Once boiling, add chicken base, butter and seasonings, and stir until fully dissolved. Add the rice, give a stir, then put a lid on the pan. Check the rice for doneness at 20 minutes, 30 minutes and 35 minutes, but it should take about 40-45 minutes overall.
Once you’ve got the rice going, make the 1/4 c orzo according to the box instructions.
Once the rice is tender and fluffy and done, stir in the orzo. Enjoy!
Nutrition Summary: 225 calories, 1g fiber, 8g fat; 4.5 Weight Watchers Points


