online poker

Omnomicon

say it with me now, “om nom nom”

Subscribe to Omnomicon

Everyone knows those people who rants and raves about their Italian/German/Czechoslovakian/Whatever grandmother, her incredible cooking, and the totally amazing recipes that have been handed down for generations. Sadly, I have little to counter with. While the French French are celebrated the world over for their epicurean heritage, the French Canadian are not. Case and point: French Canadians eat frog legs, though on second thought, the French French eat snails, but they have the sense to do it with a lot more panache. My family hails (on both sides, originally) from farms outside of Three Rivers, that I cannot imagine were particularly profitable, seeing as my ancestors cascaded down to work long-ass hours for practically nothing in textile mills in New Hampshire and Massachusetts. Our culinary traditions reflect this reality, and we eat pauper food.

I have two Memeres. The differences between the two are easy to list: Memere Dubois grew up on a Quebecois farm, the daughter of mill workers; Memere LeBlanc grew up in Maynard MA, the daughter of a butcher. Memere LeBlanc has replaced her complete Pfaltzgraff set three times; Memere Dubois uses her oven to store boxes of Little Debbie. While they both can, by memory, trace roots back to Quebec, you can see how perhaps maybe their perspective on food might vary. Ever so slightly.

Okay, a lot.

But they, and everyone else in my family for that matter, can agree that Pork Pie is excellent, must be served at Christmas, and is properly consumed only with ketchup.

While Memere Dubois is a lot closer to the heritage, Memere LeBlanc is clearly the cook, which made it difficult to determine what recipe to use. Memere Dubois always buys frozen pies from some little old lady in Pinardville, and these have potato in them, which makes sense seeing as it’s a nice cheap filler. But Memere LeBlanc’s preferred recipe, naturally, called for two pounds of unadulterated pork. I decided to go with this version because it is based on an actual family recipe (the potato-pie version was definitely NOT the one Memere LeBlanc knew from memory), and pork is only $2.99 a lb, so really, it is modern-day pauper food, and thereby even more appropriate.

This is the recipe as written, though by the time this was handed to me, I already had the same pie in the oven. Boggle your mind on THAT, (or don’t…Memere gave me the recipe over the phone).

Today's recipe.

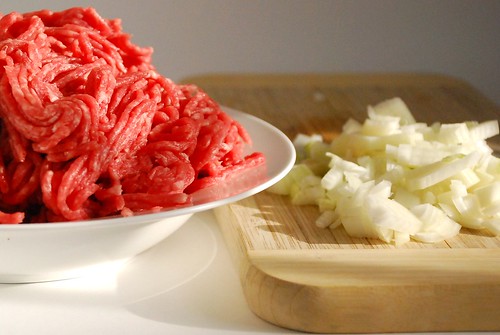
That size is a mite too small to read, but if you had crazy vision, you could see that it calls for pork butts ground twice, which is frankly unsurprising from someone who grew up around lots of meat. The tool I’d procured to follow this exacting direction really didn’t work out, so I had to settle with regular old supermarket ground pork. And the trick, she was done. Along with an onion, that pork is pretty much the only significant ingredient.

That's uh...most of the ingredient list, actually.

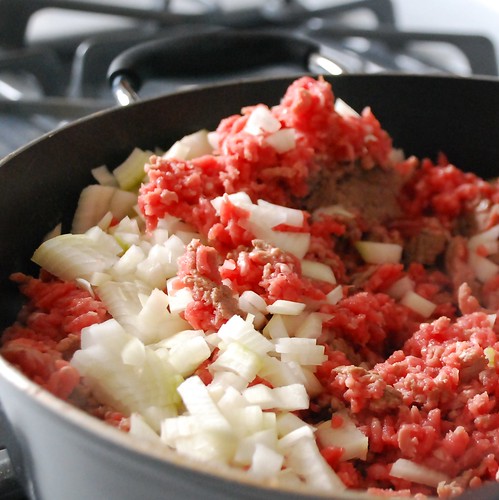
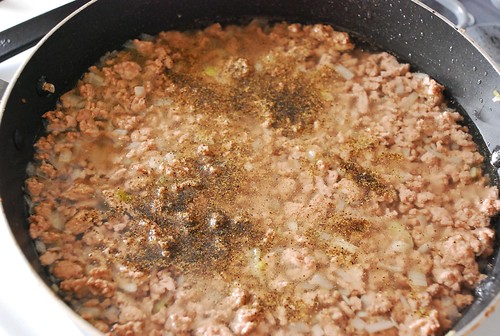
Saute ’em up.

MEAT MOUNTAIN.

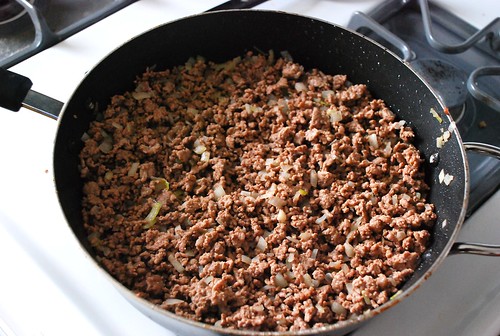
End up with this.

A skillet, a beautiful thing.

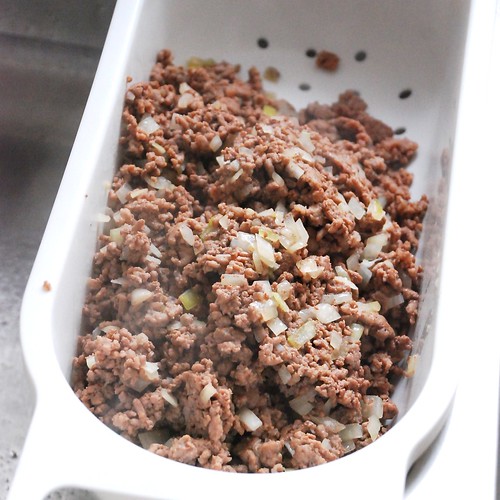
Drain off the grease. Since I won’t be saving the fat for the War Production Board effort, the easiest method I’ve found is using a sieve—it is MUCH more convenient than spooning the stuff out one teaspoon at a time. I have this convenient sieve that sits in my sink.

That misty stuff is steam.

Hhokay, so. Here we hev our meat now covered by ze water.

Wading.

And then you simmer that business for an hour, mixing it up frequently to try to break up all the meat wads. If you change your mind and want to make goetta instead (which is German but somehow Memere Dubois grew up on the stuff), you can boil for an additional hour. No word on when you add the oatmeal, however.

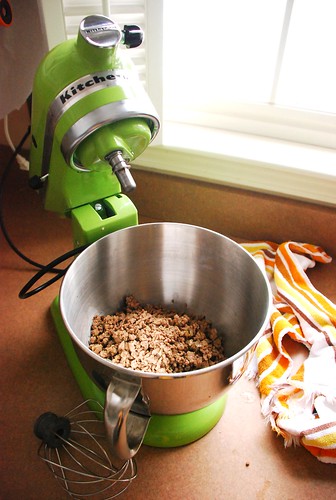
Another strain and now we’re going to use your treasured stand mixer. This will accomplish three things:

  1. It will break up the meat into uniform little granules.
  2. It will mix up the spices and milk with the pork.
  3. It will cool the mix much more quickly than letting it sit out.

Best use of my stand mixer yet.It's not frosting.

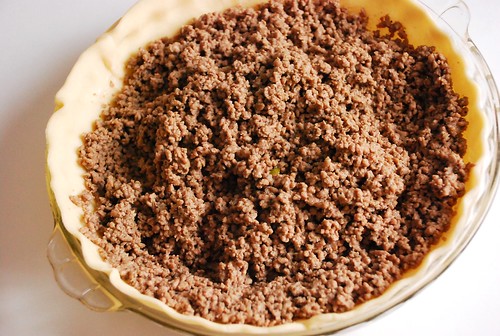
Finally, after like, an hour and a half, you’re ready to start assembling a pie! Go you! I’ve discovered that refrigerated pre-made pie crust comes out tasting just as good as homemade and also doesn’t make me want to shoot myself in the face, so I’m pretty much never making a pie crust by hand ever again. Just sayin is all.

Finally, we're getting to the pie part.

For some reason, pork pies are always topped the same way: a crust with about a 1″ hole in the middle to allow venting. Knowing that I wasn’t going to be able to pull it off freehand, I found a trick for cutting the hole.
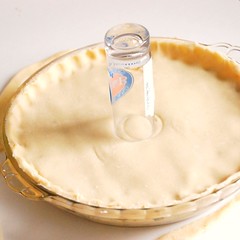
A hole trick.Done and done, my friend.
(you’ll notice I can’t even position a glass in the middle of the pie on my first try, which is exactly the reason why freehanding it was such a terrible idea)

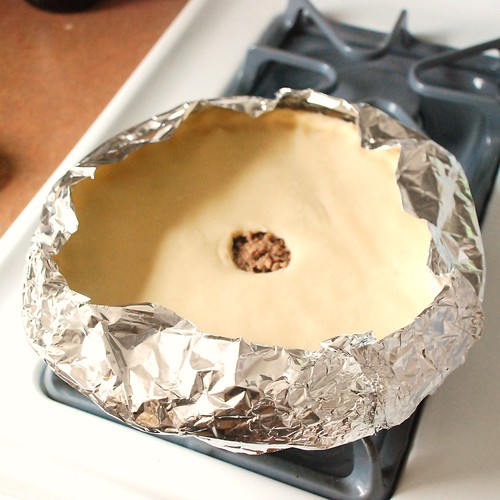
Then I attempted to protect the edges of the crust with aluminum foil.

Yeah, it got too toasty anyway.

It got a little toastier than I would have liked anyway. But at least the edges weren’t burnt, those are the best part!

Pork Pie!

And of course, as any Charbonneau, Levesque or Savoie will shout at you, you have to at least try it with ketchup. Even if you don’t think you’ll like it, that’s the right way to eat it.

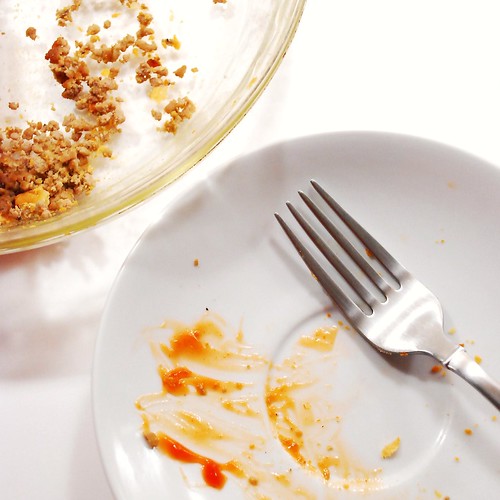
With ketchup. The right way.

French Canadian Pork Pie
Coming to you straight from Memere LeBlanc’s memory

2 lbs pork butts, ground twice (plain old ground pork seems to work as well)
1 small onion, finely diced
1 tsp salt
1 tsp ground black pepper
2-3.5 c water
1/2 tsp sage powder
1/4 c milk
pinch nutmeg
pinch allspice
another 1/2 tsp ground black pepper
pie crust for a covered pie (refrigerated, frozen or your own—you decide!)

Brown pork and onions in a large skillet, breaking up meat as much as possible as it cooks. Drain grease, return to pan, and add just enough water to cover the top of the pork (this has varied for me from 2 c to 3.5 c). Simmer, uncovered, 1 hour, making sure to stir regularly (keep on breaking up the meat with your spatula). Do not let the meat dry out, though it does not need to be covered in water the whole time.

Preheat oven to 400o. Drain meat and onions again, toss into a bowl and beat with remaining ingredients (don’t forget the extra 1/2 tsp pepper!) until almost cooled. This will take the 5-10 minutes you’ll need to prepare your double pie crust, so if you happen to have a stand mixer, it’ll come in handy.

Bake for almost an hour, or until the top looks done. Let cool 5-10 minutes before serving with a side of ketchup.

The end!

Done et up.

nutrition summary: 180 calories, 11g fat, 0g fiber; ~7 weight watchers points

ENLIGHTENING FEEDBACK


mizike agrees with me, which is enough to be edited in, BUT he also gave me the name of this pie.

Nothing says christmas in Quebec like Tourtiere. Serve it with a side of poutine and a bowl of split pea soup for the maximum french-canadianness possible in one meal.

The Wiki on Tourtière is enlightening and dead-on, we just always called it pork pie. My family never did the poutine thing, but split pea soup is ALWAYS on the stove just after Mom and Dad have made a ham. I salute you, mizike, fellow Franco!


Also, I totally earned some cool points from Adam, and just wanted to point out that I am always accepting cool points. Not that I need them or anything. I may even give them to charity.

May-18-2009

rrr: meatloaf winner!

Posted by aleta under recipe round-robin

I am very excited to announce the winner of Omnomicon’s second Recipe Round Robin: it’s Dixie, who can now officially call herself an award-winning Recipierre! Turns out Dixie is defending her PhD thesis tomorrow, and holy crap, I can’t even imagine the pressure. But the good news is that with grad school is over, she’ll have plenty of time to pore over her prize, this 1000 page tome that I read before bed every night (true story): The America’s Test Kitchen Family Cookbook, Heavy-Duty Revised Edition

But a big ole thanks to all the Recipierres who put themselves out there with their precious family favourites (and new takes) and the Tastebuddies who eagerly made not one, but TWO meatloaves over as many weeks and shared their experiences. I’ve said it before, and I’ve no doubt it’ll be said again, but: y’all rock.

Meatloaf time!

And making my job immensely easier is Dixie’s inclusion of a really neat and awesome backstory:

I grew up eating dry, boring meatloaf that my mom (who hated cooking) made, and I believed I didn’t like meatloaf. It wasn’t until I met my grandparents in college (that’s right, until halfway through college Iwouldn’t have known them from Adam and Eve) that I experienced
meatloaf worth eating. For a while it was the only thing I could cook other than omelets, so whenever it was my turn to cook for friends or bring something to a potluck it was this meatloaf.

One of my friends is ridiculously picky and still says she doesn’t like meatloaf. Unless it’s mine.

Meatloaf time!

The truth is that I don’t care much for meatloaf either, so these were promising words! I think a lot of the success of this recipe has to do with creating a channel on the sides of the baking pan to drain the grease. Dixie’s was not the only recipe demonstrating this technique, and indeed, even America’s Test Kitchen agreed that draining grease was important. Without doing so, the meatloaf will get soggy at the bottom and that gross grey ground beef sludge will abound. Disgustingly.
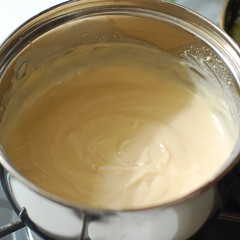
Meatloaf time!

I’m a complete jerk because I just realized, like, while typing this out, that I completely forgot the breadcrumbs! Crappish! So imagine a loaf with a bit more body. I have to say, though, I was very impressed with this meatloaf. I really don’t eat meatloaf because it’s usually totally not worth the calories, but this one, somehow . . . it’s different. I saved the leftovers and didn’t feed them to my coworkers. That’s mighty praise.
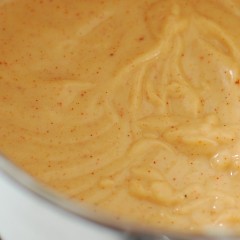
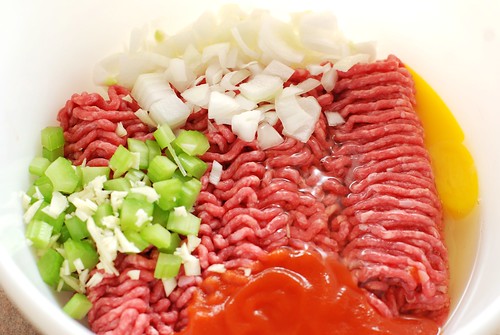
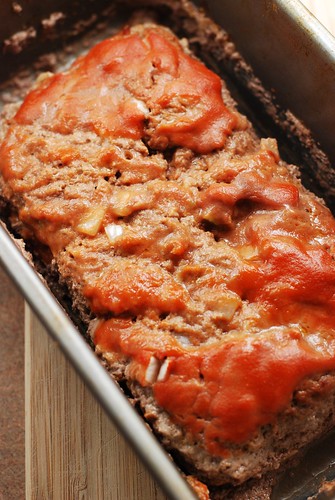
The channels to success (on the side there). Meatloaf time!

The pic on the right looks like it has an abstract face in it. If you see that too. If not, um, I must be awfully lonely tonight.

I drained like, a cup of stuff out of the meatloaf at the 45 minute mark, and it was exhilarating! Really, I suddenly felt SO much better about eating a slice of meat Wonderbread knowing that so much fat had been removed. The nice thing is that you can get the cheaper, fattier ground beef, which will baste itself as it cooks, leading to a nice tender loaf with the calorie-dense fat removed. It’s a perfect system as far as I can tell. The loaf does shrink up quite a bit; I used a 90/10 leanness, and a leaner loaf will be bigger and a fattier loaf will shrink up even more. In the future, I think I’d have used a 93/7, but any meat you want to use will do.

Meatloaf time!

I did halve Dixie’s original recipe, as hers bakes 2 lbs of beef in a 9×13 pan and I am the only one home this week. I also probably eat less than 2 lbs of beef in an entire month, so eating that much in the next week just wasn’t going to happen.

Meatloaf time!

Dixie serves her meatloaf with “garlic mashed potatoes and mushy peas,” and normally I’d go to great lengths to recreate this as it sounds so classic, but alas, peas are probably the one food I just hate hate hate and will not eat. I’m not even remotely picky about food, but peas tortured my entire childhood and I’m just not ready to move on yet. So I steamed up some green beans with almond slivers and enjoyed it that way instead.

Meatloaf time!

And my my, what a delightful loaf of meat! Thank you, Dixie, for sharing a family gem. Take it away!

Oh oh, and hey, everyone, the next Recipe Round-Robin will be announced in about a week. We’re looking for a sweet treat this time around, so feel free to use the comments on this post to not only wax poetic on Dixie’s tantalizing recipe, but also to cast your vote for what we should do next time!


My Grandfather’s Meatloaf

the loaf:
2 lb ground beef
1 stick of celery
1 onion
2 cloves of garlic
2 eggs
2 cups breadcrumbs
1 16 oz can of tomato sauce

the sauce:
2 tbsp dijon mustard
1 tbsp soy sauce (packets left over from Chinese takeout work great:
use 2 packets)
3 tbsp sugar

Preheat the oven to 325F.

Chop the celery, onion, and garlic. The finer you chop, the more heterogeneous your meatloaf will be. You may beat the eggs before adding them to the mix, but I don’t. Combine the beef, celery, onion, garlic, eggs, breadcrumbs, and *half* the can of tomato sauce. I use my hands to squish everything together.
When fully mixed, place in a shallow bread tray (my grandfather used,and I still use a 13 x 9 casserole dish, having never personally witnessed a “shallow bread tray,” but I pass the term along in case you foodies have one or know where to find one). Create a channel along the sides to drain the grease.

Mix the mustard, soy sauce, sugar, and the rest of the tomato sauce in a small saucepan and heat gently. Pour half of the heated mixture over the loaf. Bake the loaf covered for 45 minutes. Take the loaf out, drain the grease. Add the rest of the sauce to the loaf and bake uncovered for 30 more minutes. Drain the
grease again. Allow the loaf to stand for 10 minutes before serving.

Meatloaf time!


nutrition summary: I have absolutely no idea. Since a lot of fat is drained out during the cooking, and having no way to quantify how much of that was actual fat and what was other juices, I really am unable to calculate calories for this dish. Given the grease draining, I’d assign this a health score of “not that bad for you.” Suggestions are always welcome.

Apr-29-2009

daily nom #4

Posted by aleta under daily noms

Sometimes far-fetched (hopefully clever) ideas will grab me at some point between my iced coffee and lunch, then grow like a bacterial colony in my petri-dish mind til I burst with a spattering of about a thousand words into notepad. This is, for example, how the Recipe Round-Robin was born. It’s not the most methodical strategy, but it hasn’t failed me yet.

I bring this up as a reminder to submit your killer meatloaf recipe or comment to be a Tastebud (Tastebuddy? Is that any better? Are these names just awkwardly degrading?) by tomorrow at 5pm. Several excellent-sounding recipes already languish in my inbox, awaiting delicious employment. Details.

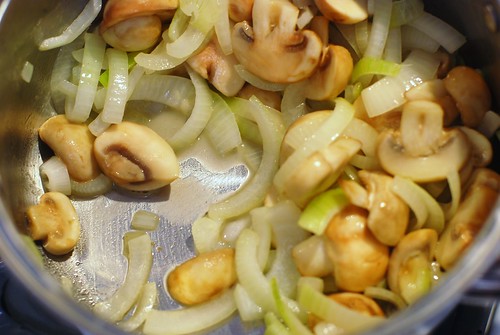
Daily Nom: it is my qualified opinion* that mushrooms are the most rewarding vegetable to sautee, probably because there are stages. Pictured: “when the mushrooms release their liquids.”

"Releasing liquids."


*matter of fact: my opinion is in no way qualified.

fish chowder: a milky dish made with fish!

This weekend exemplified the yang and yin of Spring around here. Saturday was a gorgeous, sunny, “drive with the window open and wear flip-flops” kinda day; on Sunday a fog rolled on the pond all day, heavy and thick even at mid-day. Both days were beautiful in their own way, and even though I know we’ll get snow one last time, I sighed with delighted relief every one of those 48 hours.

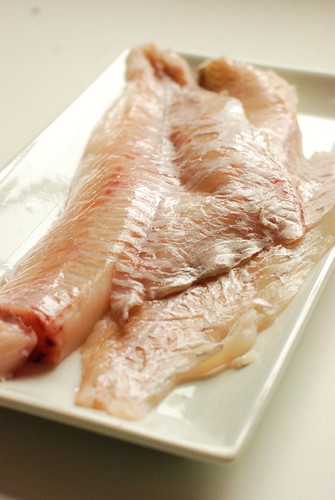
And how convenient is it that Sunday was the perfect day for fish chowder? I used Haddock because it’s cheap, standard, and what 18th-century fisherman’s wife would put in her chowder, but any white fish (or combination of fancy fishes) would work. Salmon would work marvelously, yum!

Haddock.

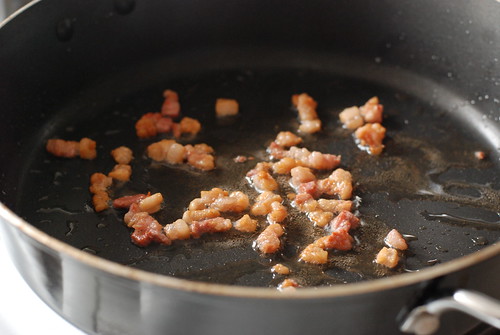
I used salt pork, but please, don’t worry about the gross unhealthiness of this because there’s not much to begin with and it’s spread among 8 servings. Really. It’s mostly for flavour. Bacon would work just as well.

Salt pork.

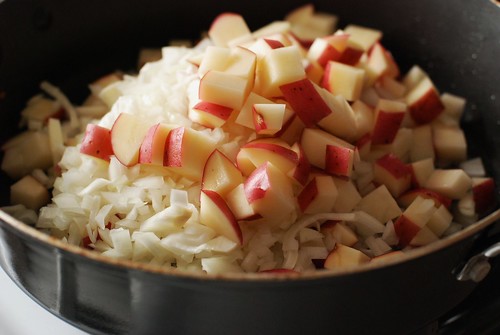
The bulk of fish chowder is vegetables, assuming you count potatoes, which I only sometimes do. Also, the only other vegetable is onion.

Fish chowder.

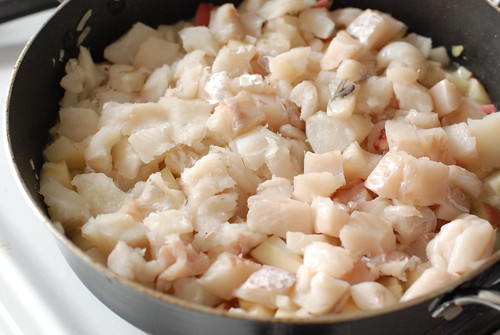
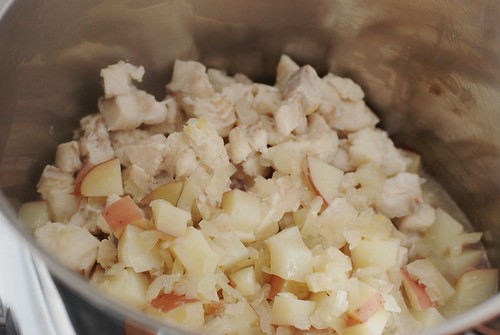
What’s going on here (and you can’t really see, sorry bout that) is that we made a fish broth with some of the fish, poured that into the pan with the veggies, then steamed the fish chunks atop the potatoes and onions, which are submerged in fish broth. It’s a neat way to steam fish and cook potato at the same time.

Steaming the fish!

Eventually we need to move the chunky stuff to a pot, though if your skillet can handle the milk on top of this stuff, you can save yourself a pot by keep your chowder in there too.

Edible, but not done.

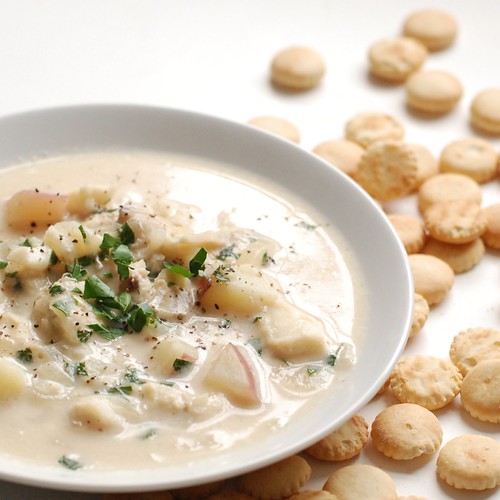
Fish is so low cal that it’s kind of a shame to serve it in a creamy soup, which defeats the purpose, right? But instead of loading up on cream, which is admittedly delicious in a chowder, I used a combination of low fat condensed and regular milk. The result is something creamier than using milk without adding any fat (which accounts for the bulk of calories in cream). I’m assuming it’s because there are more milk solids into the same amount of liquid, but my knowledge of food chemistry is slim, so I’m basing this on logic alone.

But in the end who cares? It’s a hearty and comforting way to watch the fog rolling around on the water.

Fish chowder.


New England Fish Chowder
adapted from a recipe by Margaret Woodworth D’Arcy of The National Society of The Colonial Dames of America in the State of New Hampshire . . . I’m not even kidding, I found this in the Society’s 1968 Cook Book

1.5 oz salt pork, diced
1 lb potatoes (about 2 medium), chopped into 1/2″ cubes
1 yellow onion, finely diced
1.5 lb haddock, about 2 fish or 4 fillets, cut into 1″ chunks
2 c water
1.5 c milk
12 oz evaporated milk
2 tsp salt
1 tsp pepper
2 tbsp butter
3 tbsp finely diced parsley, optional but quite effective

Place 1/2 lb fish (about 1 fillet) in a pot with 2 c cold water. Bring to boil and boil 10 minutes.

Once that gets going, fry up the salt pork over medium heat to extract all the fatness. Once the bits are crispy and brown, remove them and replace with diced potato and onion. Cook 5 minutes over medium-high, stirring frequently. By now the fish broth is done, so add it (and the fish if you like) to the potato and onion, then spread the cubed fish atop the veggies. Allow to steam (i.e. don’t stir) for 10 minutes, continuing on medium-high.

At this point, if you think your pan can’t comfortably handle an additional 3 cups of liquid, transfer the fish & veggies to a bigger pot. Add milk, condensed milk, salt & pepper. Bring to *almost* a boil (don’t let it bubble up big!) then reduce to medium-low, cover, and simmer about an hour.

Immediately before serving, stir in the butter, then ladle into bowls and garnish with parsley and additional pepper. The official word is that chowder is better the next day. I, however, suspect that old wives tale was created by a Mom Conspiracy way of getting us to look forward to leftovers.


nutrition summary (using 1% milk, fat free evaporated milk): 245 calories, 7g fat, 1g fiber; 5 weight watchers points

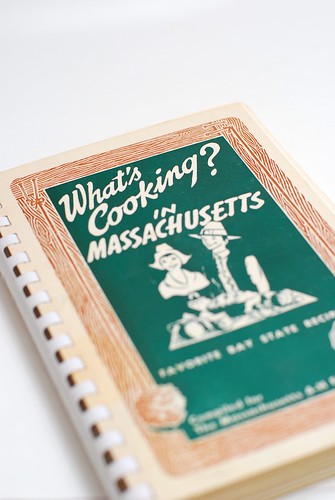
I decided that our household was long overdue for a good old fashioned surf and turf. Well I guess *kind of*. Our meal was old fashioned in that there was shrimp and there was steak, but I came upon a neat idea in this old 4-H fundraiser cookbook I found in a second hand store.

Heya good lookin.

The problem with vintage recipes is that they’re always bland and more often than not, they’re unapologetically gross as well. The shrimp bake recipe, upon inspection, is not a gross one (create a roux, add some milk, sprinkle some sparse spices in there, pair shrimp with macaroni), but it was . . . lacking. So I did a little magic in terms of additions and here’s what I came up with.

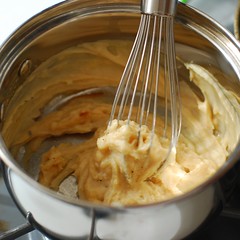
First, we make a roux. While the word is definitely a fancy-pants French one, it’s actually quite simple: melt some butter, pop in a bit o’ flour, whisk until nice and golden and yummy-smelling. For something so very simple, butter and flour smells awfully nice simmering on your stove.

Melty buttery.Roux step two! Flour.
Golden flour.
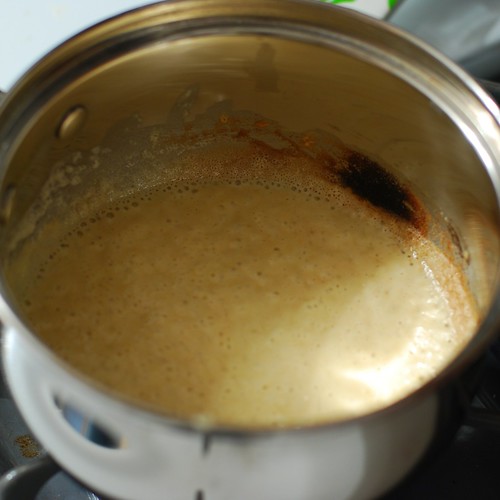
Don’t mind that scald mark, it was there to begin with. Ugh. My stupid dirty pans strike again!

The original recipe called for milk alone, but since I had buttermilk leftover from making butter, I substituted buttermilk for half of the milk. This added a zingy tang to the flavour, that coupled with a little bit of mustard powder, quite well imitates the cheese flavour in macaroni and cheese, without actually incorporating any cheese. I don’t know that the butter and flour method is exactly healthier, it’s just an interesting coincidence, probably heightened by the fact that basically macaroni + creaminess is always associated in my mind with mac n cheese (or “mackin’ cheese,” if you’re pimp enough).

Buttermilking it up.And now some milk.

And now, one by one, we add the flavourful parts. I won’t make you scroll for the next five minutes; here’s the consolidated view. I trust you all, as adults, to understand how to add one ingredient at a time here. [Editor’s aside: Apologies to the kiddos, here’s an explanation: add these ingredients one at a time. Thereyago!]

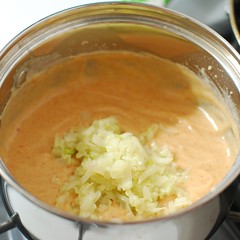
The spicy little detailsThis is what those onions were for.
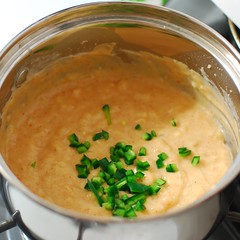
Jalapeno!Corn!
And what is a macaroni casserole without macaroni?Shrimp time!

They are, in order: spices (paprika, mustard, salt), onions & garlic (sauteed lightly in butter first), jalapenos (1/2, diced finely, no seeds), corn (from a can, hey I like it that way best), macaroni (cooked), shrimp (explanation below).

Spice fearers, have no fear! There is very little jalapeno here relative to all else, and this dish is definitely not spicy, it just has this mild and comforting warmth to it. Spice lovers may wish to kick it up the proverbial notch by including the entirety of a jalapeno.

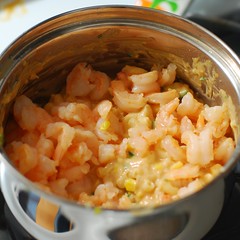
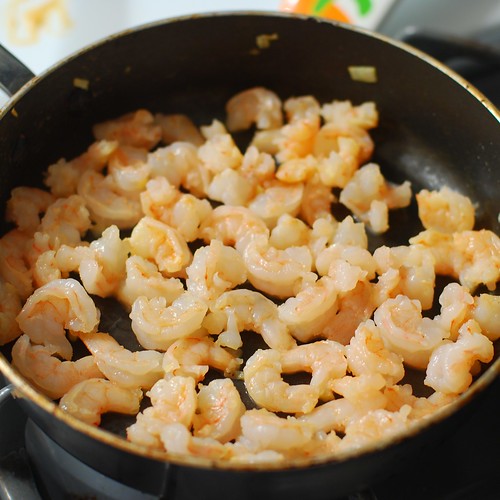
Now if you are fluent in italics, you saw the part about the onion and garlic being sauteed, no? Well obviously I did that first. And then in the same pan, while the macaroni was patiently taking in its first few minutes in the mix, I just added my raw, thawed, shelled, drained shrimp to whatever fat was left in the pan and lightly sauteed them. I’m talking like, *a* minutes here. I toyed with the idea of putting the shrimp in raw, since I knew fully cooked shrimp would get very tough after 35 minutes in the oven, but compromised on this consistency.

Lightly sauteing the shrimps.

Following my lead should result in the same delectable results I enjoyed.

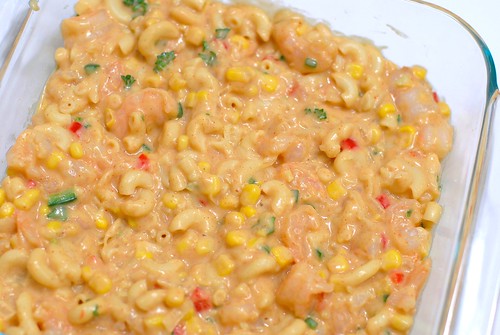
Now it’s casserolin’ time! Use a glass or ceramic baking dish with about 64 square inches. In this case, I used an 8×8.

Shrimp and macaroni "Surf Bake"

At some point of the mixing of things, I included a tablespoon of jarred pimientos. It gives the dish a little bit of a Southwestern-looking flair, but didn’t add much taste, and it’s a little deceitful since this isn’t at all Southwestern, so I’ll be leaving them out in the future. The few sprigs of fresh parsley, however, did fresh things to my casserole (it’s okay, the casserole liked it).

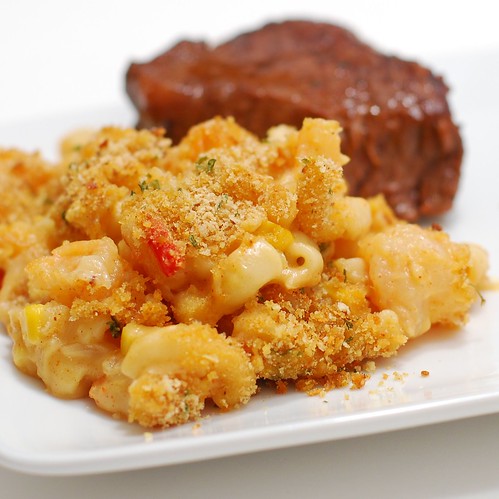
Add some breadcrumbs, a little baking time, and voila! Surf and turf. This dish is really really REALLY good, but its unphotogenicness will probably scare some of you away, and Tastespotting probably won’t accept my submission. And I’m okay with that. Because if one, even one of you makes and enjoys this incredible dish, my foodie missionary work is done, and I shall surely dream of angels.

Shrimp and macaroni "Surf Bake"

Shrimp and Macaroni “Surf Bake”
serves 4 as a side

1 c cooked macaroni, just underdone (2 oz pre-cook)
1/2 finely diced onion
4 cloves minced or pressed garlic (less to taste)
4 tbsp flour (1/2 stick total, divided: 1 tbsp for sauteeing onions, 3 tbsp for roux)
3 tbsp butter
1/2 c buttermilk (substituting milk will be a-ok)
1/2 c milk
1/2 tsp paprika
1/2 tsp dry, powdered mustard
1/2 tsp salt
2 tbsp finely chopped parsley
1/2 finely diced jalapeno (seeded, whole jalapeno for the brave)
1/2 c corn (canned, frozen, fresh, you pick! I used canned)
8 oz small shrimp, thawed, raw, shelled, drained
2 tbsp breadcrumbs

First thing’s first: cook your macaroni a minute or two shy of the al dente recommendation on the package. While that’s on, sautee the onion and garlic in 1 tbsp butter. Dice the 1/2 jalapeno, finely chop the parsley, shell the shrimp and cut each in half.

Preheat oven to 375o.

Melt 3 tbsp butter in a medium saucepan over medium/high heat. Add flour, and whisk, continuously, until the mixture is a nice warm tan. If, at any point, this begins to smell like it’s burning, immediately turn down the heat, and you should be fine.

Take the roux off the burner. Add the buttermilk and milk (again, you can just use 1 cup of milk if you forgot the buttermilk) and whisk vigorously until smooth and unlumpy. Add paprika, mustard, salt, parsley, diced jalapeno, corn and mix thoroughly (the burner’s still off right here).

In the same pan you used to saute the onions and garlic, saute the shrimps for just a minute or two, until they have a little bit of colour, but before they’re fully cooked. Add to concoction.

Spread in an 8×8 casserole dish (glass or ceramic) and sprinkle the breadcrumbs atop it all. Bake for about 35 minutes. Serve with turf.

nutrition information for 1/4 batch: 325 calories, 3g fiber, 13g fat; 7 WW points

Hello!

Let’s make a shrimp ceviche today. It’s light and delicious and awesome for a dinner party . . . you can make it the day ahead and serve as an impressive appetizer. I’ll be honest, this was inspired pretty directly by Mezcal Cantina, a prime example of the fine dining that surprises the Worcester visitor who isn’t scared away by gang warfare.

Okay, I exaggerate, but that’s the unfortunate perception.

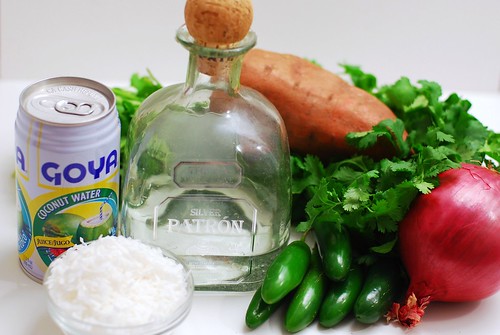
This recipe has all the good, normal, safe ceviche stuff: cilantro, lime juice, shrimp, hot peppers (in this case, serrano), and red onion. And then there are some extra ingredients that make it extra special: sweet potato, coconut juice (also called coconut water, and definitely NOT coconut milk, which is much thicker), toasted coconut as a garnish, and the big un: TEQUILA! Let’s get all crazy on this ingredient list.

Here we go!

And the one ingredient I couldn’t fit in the same shot as the Patron.

DSC_0081

The tequila isn’t alcohol-y, the peppers give just a hint of spice, and the sweet potatoes are so uninterruptive to the flavour as long as they’re cooked enough.

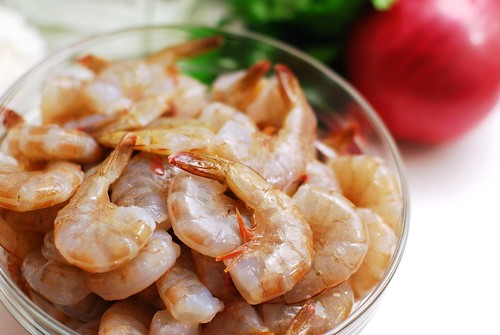
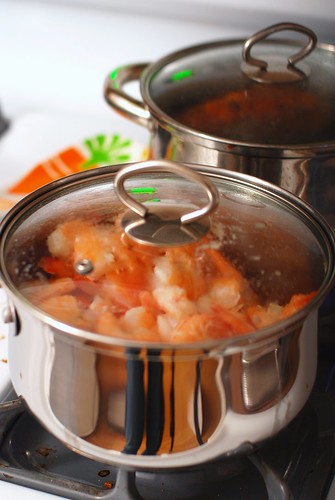
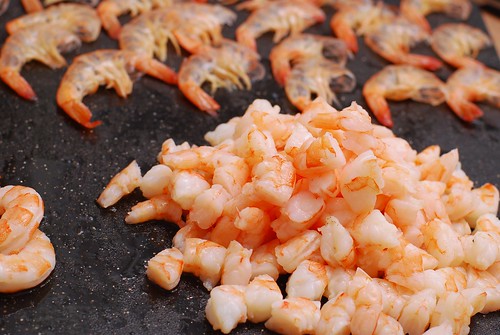
In a true ceviche the raw shrimp is “cooked” by the lime juice. From what I understand, most shrimp is flash-frozen before it’s even off the boat, so this is probably a safe method. Even still, I feel a little weird about it, even though I know the texture is divine. So as a compromise, I lightly steamed them in their shells.

DSC_0096

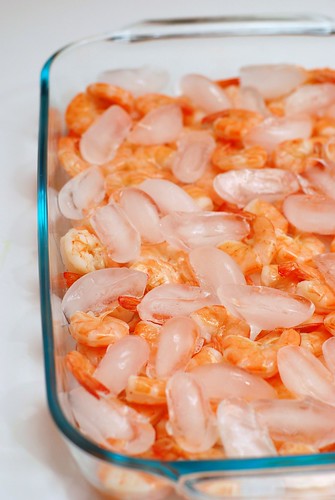
Immediately chill to cease the cooking process.

DSC_0106

Now chop the shrimps in thirds. And anally arrange their shells in the background there.

DSC_0112

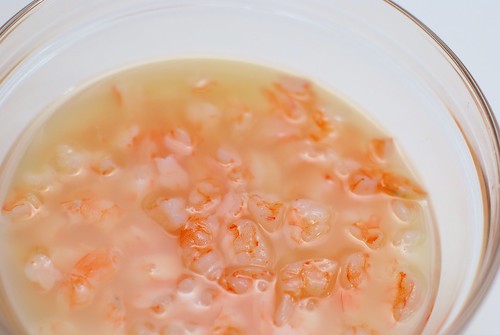
Steep in lime juice in your fridge for about an hour.

DSC_0173

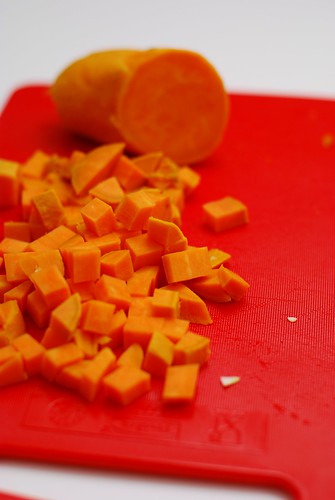
Boil the sweet potato (I guess it’s also called a yam?) for 25 minutes, then chop into 1/4 inch cubes.

DSC_0156

Strain the coconut chunks out of the coconut juice. I see no reason not to leave it in, but the juice really does the job as far as flavour.

DSC_0130

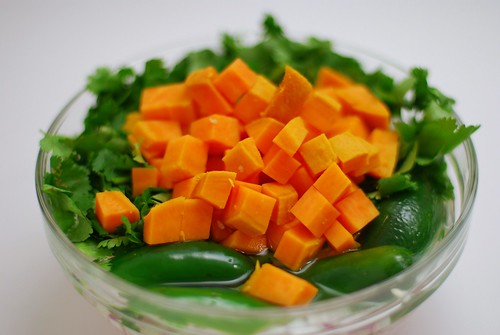
And cilantro and serrano peppers and sweet potato and the coconut juice and of course, a shot of tequila.

DSC_0165

Chill that business for an hour as well. In the meantime, toast some coconut.

DSC_0175

And oh man, just look at that.

DSC_0150

It’s as delicately delicious as it looks. Promise.

Coconut Sweet Potato TEQUILA Shrimp Ceviche
inspired by Mezcal Cantina, Worcester, MA

1 lb thawed raw shrimp, tails on
about 10 oz lime juice
1/2 sweet potato
1 small red onion, chopped finely and rinsed
2/3 c chopped cilantro, plus more for garnish if desired
2 Serrano chiles
1 can coconut water (also called coconut juice, and again: do not use coconut milk)
1 shot tequila of your choice . . . and Patron is CHOICE!
1/4 c coconut, toasted

First, boil a pot of water, drop in a scrubbed sweet potato and let boil for 25 minutes. When it’s done, let it sit in a strainer for a little while to cool off.

A note on the shrimp: if you don’t care the difference, feel free to use thawed, pre-cooked shrimp. But I would assume you’re only doing that because you’ve never cooked raw shrimp yourself and therefore don’t know that it is about a thousand times better. Here’s how to do that:

Bring a medium pot of water to a boil. Drop the shrimp, leave it in there for about two minutes, then skew the lid and drain the pot, leaving the shrimp inside. Let steam in that manner for 8-10 minutes, depending on how nervous raw shrimp makes you. Pour shrimp into a shallow dish and litter the dish with ice cubes to stop the steaming. Once cool, shell and chop into thirds. Put the shrimp in a bowl and cover with lime juice. Chill in the fridge for 1 hour.

Next!

Finely chop the red onion, then rinse in a strainer; this seems to keep the flavour milder. Roughly chop 2/3 c cilantro. Cube half of the sweet potato into 1/4″ cubes, discarding any cubes that still have a crunch to them. Slice the serrano chiles in half, but don’t chop them up . . . they’re just lending flavour to the juice, we’re not putting these in our mouth.

Strain the coconut water into a bowl, add the tequila, stir, and then add the onions, cilantro, sweet potato and chiles. Stir to mix, then fridge it for an hour.

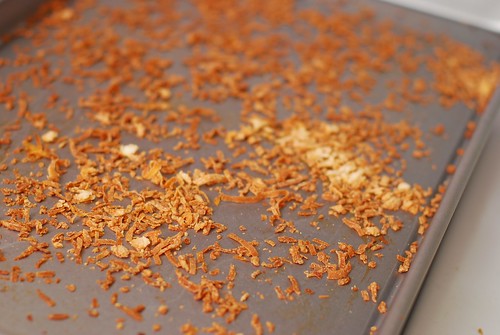
While you’re waiting the practically unbearable hour for all that stuff to mingle, clean your kitchen and toast the coconut. Sprinkle the flakes on a cookie sheet and place in a 300o oven for 5-10 minutes. They’ll look pretty browned, but you really just want to make sure they don’t outright burn. See the picture, this coconut was perfect.

Strain the shrimp, reserving about 1/4 c lime juice. Throw the shrimp and the reserved juice in with the onion/cilantro mixture.

If you’re really looking to impress, serve in a margarita glass. If you’re like me, who drinks iced margaritas out of pint glasses, serve in one of your three martini glasses.

Either way, sprinkle with the toasted coconut, garnish with with some extra cilantro, and serve.